Chapter 9
176
Envizio Pro™ and Envizio Pro II® Installation and Operation Manual
7.
Repeat step 2 through step 6 for any additional features.
8.
When finished recording features for the AccuBoom map, select the Menu icon and then touch the Accept
button to save the currently displayed AccuBoom map and close the AccuBoom tools menu.
Note:
Zone features created while recording a field boundary will not appear until the Save and Close
icon is selected from the AccuBoom Tools Menu.
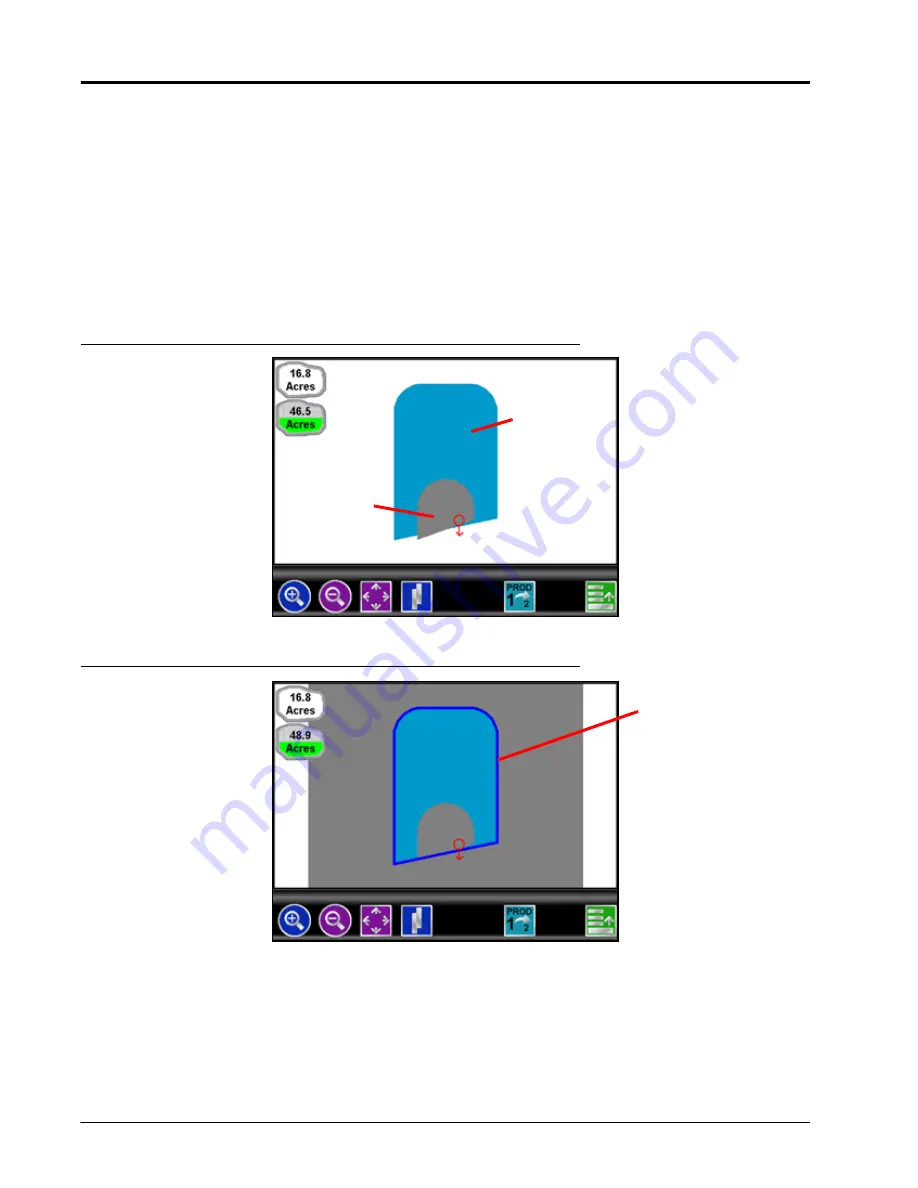
AccuBoom™ Zone Map Examples
The following screens are examples of AccuBoom maps displayed on the field computer.
FIGURE 1.
Field Review Mode While Recording a Boundary
FIGURE 2.
Field Review Mode with Completed AccuBoom™ Field Boundary and No-Spray Zone
Spray Zone
No-Spray Zone
Field Boundary
Содержание Envizio Pro
Страница 3: ......
Страница 13: ...Table of Contents x Envizio Pro and Envizio Pro II Installation and Operation Manual ...
Страница 32: ...3 P N 016 0171 493 Rev I 17 Installation FIGURE 1 Envizio Pro Kit Contents Drawing Number 054 2040 004 ...
Страница 51: ...Chapter 4 36 Envizio Pro and Envizio Pro II Installation and Operation Manual ...
Страница 65: ...Chapter 5 50 Envizio Pro and Envizio Pro II Installation and Operation Manual ...
Страница 193: ...Chapter 9 178 Envizio Pro and Envizio Pro II Installation and Operation Manual ...
Страница 197: ...Chapter 10 182 Envizio Pro and Envizio Pro II Installation and Operation Manual ...
Страница 229: ...Appendix D 214 Envizio Pro and Envizio Pro II Installation and Operation Manual ...
Страница 285: ...Index 270 Envizio Pro and Envizio Pro II Installation and Operation Manual ...


