4
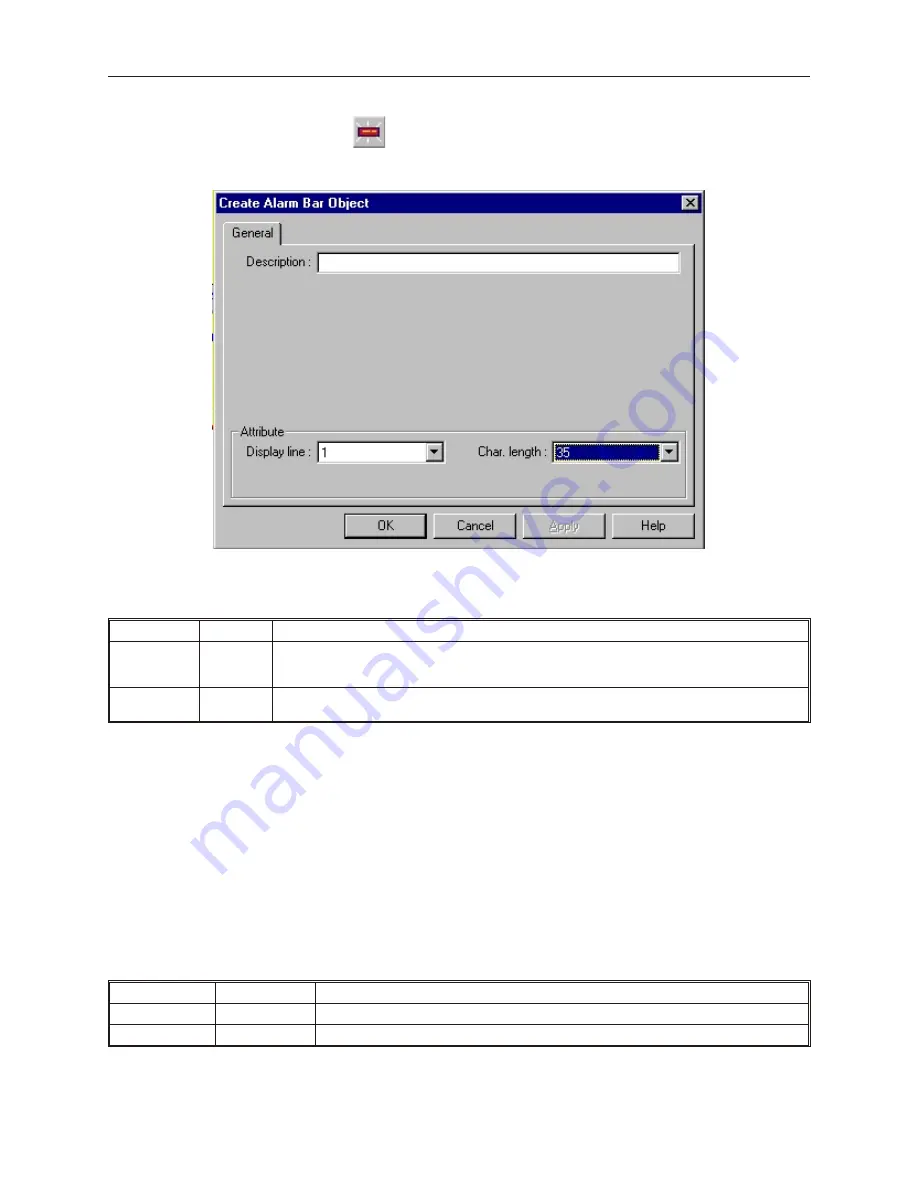
To create an Alarm Bar Object
1.
From the
Parts
menu, click
Alarm Bar
. Or click the
Alarm Bar
icon in the Part2 toolbar.
The Create Alarm Bar Object dialog box appears.
2.
Use the
Description:
box to enter a title for the Alarm Bar part. A description is not
necessary but does help you identify the purpose of the part.
3.
In the
Attribute
frame, select what type of options the Alarm Bar uses:
Function
Range
Description
Display line:
1 to 14
Selects the size of the alarm bar. Although you can select a size of 1 to 14, the Alarm Bar only
displays a single line. Therefore, select 1 for alarms that use the Size 16 font, and select 2 for
alarms that use the Size 24 font.
Char length:
1 to 39
Selects how long the alarm bar is. If Size 24 font is used for the alarm text string, then two
characters are required for each character in the text string.
4.
Click
OK
to close the Create Alarm Bar Object dialog box. The main screen of EasyBuilder
appears with the cursor tied to a rectangular outline of the part you just created at the upper
left corner of the screen. Move the part to the desired location on the window.
5.
Once the part is placed onto the window, you can adjust the attributes of the Alarm Bar by
double-clicking on the part.
The Alarm Bar Object scrolls through each character of an alarm string at a predefined rate. You can change the
rate at which the characters scroll by doing the following.
4
To change the scrolling rate
1.
From the
Edit
menu, click
System Parameters
. The Set System Parameters dialog box
appears.
2.
Click the
General
tab. The General form is displayed.
3.
In the
Alarm bar
frame, select what type of scroll options the Alarm Bar uses:
Function
Range
Description
Pixels per scroll:
8, 16, 24, 32
Selects the number of pixels that shift with each scroll.
Scroll speed:
0.1 to 25.5
Selects the time interval between shifts in the scrolling in seconds.
1010-1001a, Rev 02
Cap turing Alarms and Events
229
Содержание Silver HMI504T
Страница 1: ...1010 1001A Rev 02...
Страница 20: ...1010 1001a Rev 02 16 Silver Series Installation Operation Manual OIT to PC Serial Port Pin Assignments...
Страница 32: ...1010 1001a Rev 02 28 Silver Series Installation Operation Manual...
Страница 128: ...1010 1001a Rev 01 124 Silver Series Installation Operation Manual...
Страница 156: ...1010 1001a Rev 02 152 Silver Series Installation Operation Manual...
Страница 166: ...1010 1001a Rev 02 162 Silver Series Installation Operation Manual...
Страница 216: ...1010 1001a Rev 01 212 Silver Series Installation Operation Manual...
Страница 251: ...1010 1001a Rev 02 Macros 247 Set Bit Objects Attributes Dialog Project Example of Add 2...
Страница 264: ...End Macro_Command 1010 1001a Rev 02 260 Silver Series Installation Operation Manual...
Страница 268: ...1010 1001a Rev 01 264 Silver Series Installation Operation Manual...


