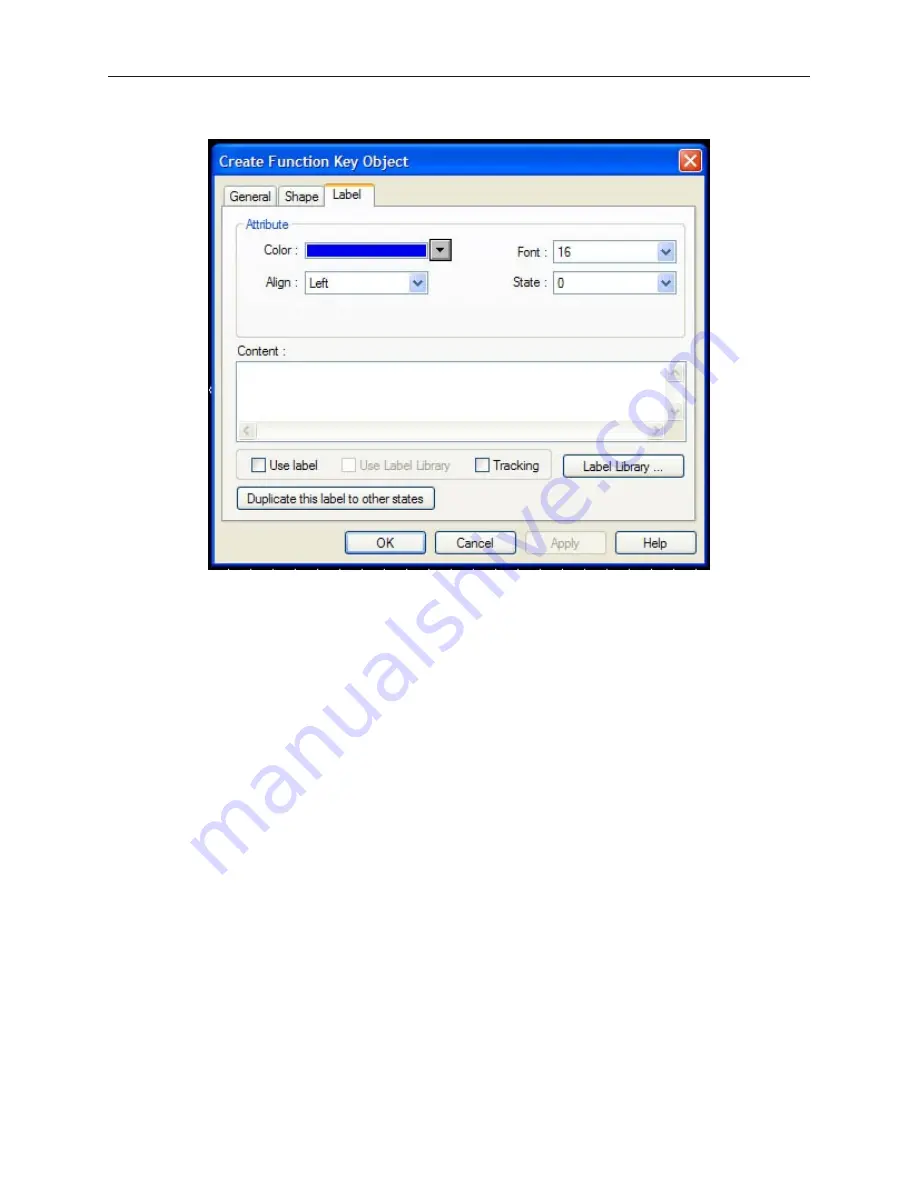
8.
Click the
Label
tab to display the Label form.
9.
Click the
Use Label
checkbox to use a label.
10. You can have a different label for each state of the Bit Lamp. In the
State:
box, enter the
state that you wish to edit, then enter the label for that state in the
Content:
box. Do the same
for the other state.
11. Enter the color that you want for the label in the
Color:
box. You can select a different color
for each label state.
12. Enter how you want the label to be positioned in the
Align:
box. You can select a different
position for each label state.
13. Finally, enter the size of the label in the
Font:
box. You can select a different font for each
label state.
14. Click the
Tracking
checkbox if you want the labels for all states to follow or ‘track’ with the
movement of one label when it is moved after the Function Key object is placed onto the
window. Click
Duplicate this label to other states
if you want to use the same text on all
states.
15. Click
OK
. The Create Function Key Object form closes and the main screen of EasyBuilder
appears with the cursor tied to a rectangular outline of the part you just created at the upper
left corner of the screen. Move the part to the desired location on the window.
16. Once the part is placed onto the window, you can adjust the location of the label inside the
part by clicking once on the label. This will highlight the entire object. Now click on the
label again. Now only the label is highlighted, allowing you to move it without moving the
part. Note: if you double-click (click twice rapidly) then you will not highlight the label but
rather enter the Function Key Object’s Attribute dialog box.
To create a custom keypad, you create several of these Function Key Objects and group them together on a window
to form the keypad. Following the procedure outlined in Chapter 6, you can then save the keypad to a group library
for later use in other projects. Several predefined keypads are included with EasyBuilder. To use these keypads,
use the
Call Group Library
function and access the
keypad
library.
1010-1001a, Rev 02
Using and Cre ating Key pads
203
Содержание Silver HMI504T
Страница 1: ...1010 1001A Rev 02...
Страница 20: ...1010 1001a Rev 02 16 Silver Series Installation Operation Manual OIT to PC Serial Port Pin Assignments...
Страница 32: ...1010 1001a Rev 02 28 Silver Series Installation Operation Manual...
Страница 128: ...1010 1001a Rev 01 124 Silver Series Installation Operation Manual...
Страница 156: ...1010 1001a Rev 02 152 Silver Series Installation Operation Manual...
Страница 166: ...1010 1001a Rev 02 162 Silver Series Installation Operation Manual...
Страница 216: ...1010 1001a Rev 01 212 Silver Series Installation Operation Manual...
Страница 251: ...1010 1001a Rev 02 Macros 247 Set Bit Objects Attributes Dialog Project Example of Add 2...
Страница 264: ...End Macro_Command 1010 1001a Rev 02 260 Silver Series Installation Operation Manual...
Страница 268: ...1010 1001a Rev 01 264 Silver Series Installation Operation Manual...


