


194
Screen Configuration
Section 5-5
7.
Select the option to enable auto-saving of CSV files (described below).
8.
Click the
OK
Button.
The Segment Program 2 Screen will be registered and the screen name
that was input will be displayed on the Screen Management Tree.
Note
If a setting is changed while the
Continue previous segment trend when
restarted
Option is selected, the following dialog box will be displayed.
To make the change, click the
OK
Button. To cancel the change, click the
Cancel
Button.
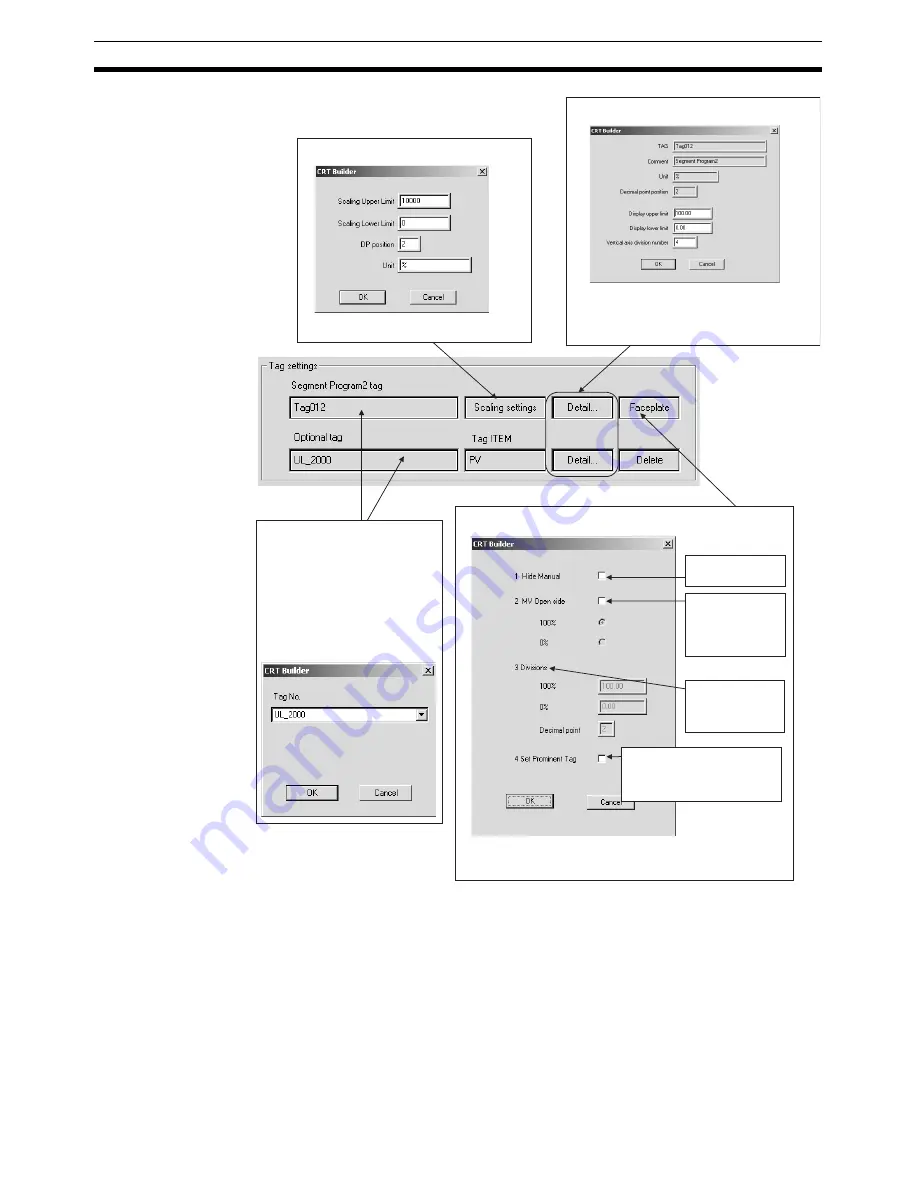
Click the box to display the dialog box shown below.
Make the scaling settings for the Segment Program
2 tag. Make changes as required.
•
Click the box to display the dialog box shown
below.
•
These settings are normally made automatically.
•
It is possible, however, that certain data (such as a
PID constant) may not match the display on the chart.
In cases such as that, the upper and lower limit
settings must be changed.
•
Click a box to display the dialog box
shown below.
•
Select the Segment 2 Program tag to be
monitored on the Segment 2 Program
Screen.
(There is no need to select a tag ITEM
for the Segment 2 Program tag.)
•
Select an optional tag if required.
Select the tag ITEM for the analog ITEM
that is to be registered. In this example,
a function block tag ITEM (PV) with the
tag name "UL_2000" is selected.
•
The
Faceplate
Button is enabled when the tag name is selected.
•
Click the box to display the dialog box shown below.
When this option is se-
lected, the Manual
Pointer is not displayed.
Select this option, and
then select the direc-
tion the MV will open.
If a direction is not
specified, no direction
will not be displayed.
Displays the settings
made using the CX-
Process Tool. These
settings cannot be
changed.
Select this option to set the Prominent
Tag.
A mark will be added to the upper
right of the faceplate on the Segment
Program 2 Edit Screen.
•
Make the settings and then click the
OK
Button.
•
The Manual Pointer and MV direction settings will be reflected in the MV
adjustment area in the lower part of the instrument diagram.
Summary of Contents for CX-Process Monitor Plus 2
Page 1: ...CX Process Monitor Plus Ver 2 Cat No W428 E1 02 SYSMAC WS02 LCMC1 EV2 OPERATION MANUAL...
Page 2: ...WS02 LCMC1 EV2 CX Process Monitor Plus Ver 2 Operation Manual Revised January 2007...
Page 3: ...iv...
Page 5: ...vi...
Page 9: ...x...
Page 15: ...xvi Application Precautions 4...
Page 41: ...26 Basic Operating Procedure Section 1 2...
Page 243: ...228 Checking Configurations Section 5 7...
Page 267: ...252 Reading Writing Function Block ITEMs Appendix A...
Page 269: ...254 Differences between Trend Screens and Batch Trend Screens Appendix B...


