


Detailed Directions
369
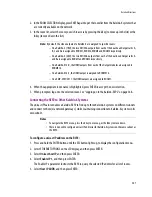
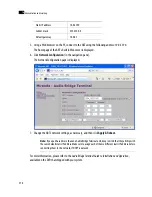
To configure the IP address and other network settings of the ABT:
1. Connect a PC to a switch.
2. Referring to “Changing the Client PC’s IP Address” on page 363, configure the PC with the following
network settings:
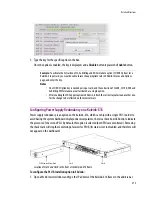
3. Apply power to the Audio Bridge Terminal and make sure it is connected to the same switch as the PC.
If the switch is Power over Ethernet (PoE) enabled, simply connect it to the unit using an Ethernet
cable. If not, PoE mid-span (“inserter”) equipment must be placed between the switch and the Audio
Bridge Terminal.
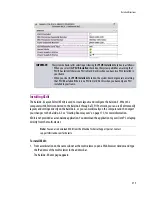
4. Press the RESET button (located on the right-hand side of the ABT rear panel beside the ETHERNET/
POWER RJ-45 connector) for at least 1 second. The Audio Bridge Terminal will reboot with the
following static network configuration:
Note:
The ABT is powered through the RJ-45 Ethernet connector. There is no power ON/OFF button, so
the device is ON whenever a powered Ethernet cable is connected.
DHCP
Off
Static IP address
10.0.0.1
Subnet mask
255.255.0.0
Default gateway
10.0.0.1
DHCP
OFF
Summary of Contents for Kaleido-X
Page 1: ...Kaleido X User s Manual Part Number M770 2800 111 1 June 2011 ...
Page 8: ...viii toc ...
Page 33: ...Loading a Layout 25 Kaleido X16 ...
Page 34: ...26 Getting Started 2 Kaleido X 4RU ...
Page 152: ...144 Creating Logical Sources 7 ...
Page 178: ...170 Setting Up Rooms 8 ...
Page 244: ...236 Creating Layouts 9 ...
Page 253: ...Detailed Directions 245 3 Under Properties General type a Friendly name for the Action ...
Page 256: ...248 Creating Actions 10 ...
Page 272: ...264 Managing Kaleido RCP2 Users 11 ...
Page 348: ...340 Tally Interface Devices 13 ...
Page 350: ......
Page 352: ...344 Using the Serial to TCP IP Dispatcher 15 ...
Page 406: ...398 Index ...