


104
Calibrating the Kaleido-X
5
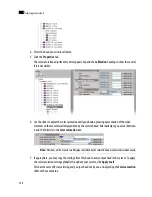
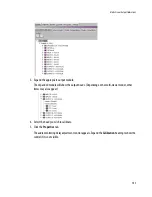
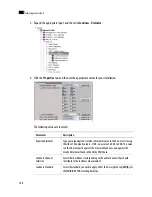
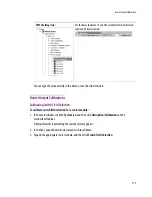
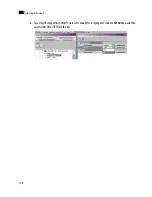
6. Select the appropriate unit (milliseconds or AES samples), and then use the slider to adjust the audio
monitoring delay until the audio and video are well synchronized on the monitor wall display driven
by the selected head. Alternatively, type a value (between
0
and
100
ms, or between
4
and
4800
AES
samples) directly in the
Audio monitoring delay
box.
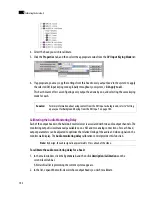
7. If appropriate, you may copy the settings from this head to
every output head
in the system. To apply
the audio monitoring delay calibration globally throughout your system, click
Apply to all
.
This has the same effect as selecting every output head one by one, and adjusting the audio
monitoring delay settings to the same values.
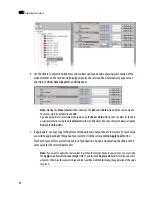
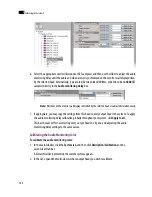
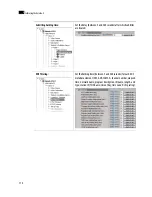
Calibrating the Audio Monitoring Color
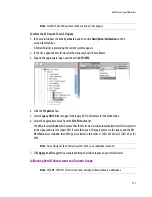
To calibrate the audio monitoring color:
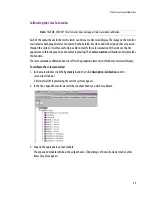
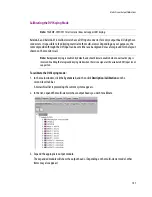
1. In the main window, click the
System
tab, and then click
Description/Calibrations
on the
second-level tab bar.
A hierarchical list representing the current system appears.
2. In the list, expand the multi-viewer whose output heads you wish to calibrate.
Note:
All videos on the monitor wall display controlled by the selected head are adjusted simultaneously.
Summary of Contents for Kaleido-X
Page 1: ...Kaleido X User s Manual Part Number M770 2800 111 1 June 2011 ...
Page 8: ...viii toc ...
Page 33: ...Loading a Layout 25 Kaleido X16 ...
Page 34: ...26 Getting Started 2 Kaleido X 4RU ...
Page 152: ...144 Creating Logical Sources 7 ...
Page 178: ...170 Setting Up Rooms 8 ...
Page 244: ...236 Creating Layouts 9 ...
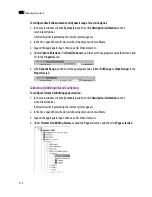
Page 253: ...Detailed Directions 245 3 Under Properties General type a Friendly name for the Action ...
Page 256: ...248 Creating Actions 10 ...
Page 272: ...264 Managing Kaleido RCP2 Users 11 ...
Page 348: ...340 Tally Interface Devices 13 ...
Page 350: ......
Page 352: ...344 Using the Serial to TCP IP Dispatcher 15 ...
Page 406: ...398 Index ...