


Setting RCP User Preferences
257
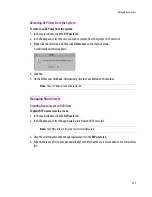
Assigning Room Layouts to an RCP User’s Presets
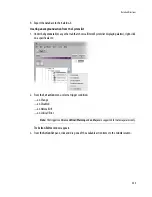
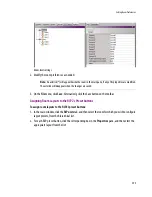
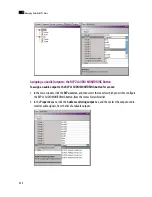
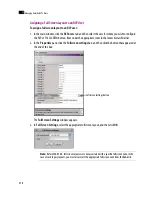
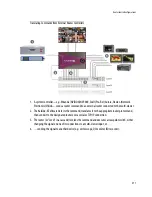
To assign a room layout to an RCP user’s preset button:
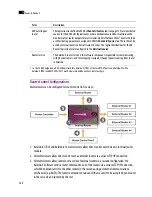
1. In the main window, click the
RCP users
tab, and then select the user for whom you wish to configure
the RCP2’s preset buttons, from under the appropriate room in the hierarchical list.
2. For each RCP preset button, click the corresponding box in the
Properties
pane, and then select the
appropriate layout from the list:
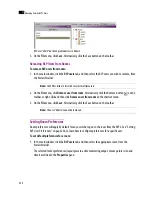
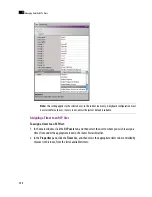
Notes
• The “Admin” user name cannot be modified.
• An asterisk (*) will appear beside the RCP user in the main window if any of the user properties
are modified. The asterisk will disappear when the changes are saved.
• The message “Cannot find reference” indicates that a full screen layout, full screen zone, or
layout associated with a Room or RCP user has been deleted.
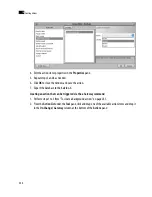
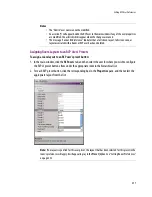
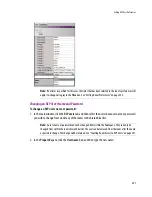
Note:
If no layout is specified for this user preset, the layout that has been selected for this preset in the
room’s preferences will apply. It will appear in gray in the
Preset [n]
box. See “Setting Room Preferences”
on page 252.
Summary of Contents for Kaleido-X
Page 1: ...Kaleido X User s Manual Part Number M770 2800 111 1 June 2011 ...
Page 8: ...viii toc ...
Page 33: ...Loading a Layout 25 Kaleido X16 ...
Page 34: ...26 Getting Started 2 Kaleido X 4RU ...
Page 152: ...144 Creating Logical Sources 7 ...
Page 178: ...170 Setting Up Rooms 8 ...
Page 244: ...236 Creating Layouts 9 ...
Page 253: ...Detailed Directions 245 3 Under Properties General type a Friendly name for the Action ...
Page 256: ...248 Creating Actions 10 ...
Page 272: ...264 Managing Kaleido RCP2 Users 11 ...
Page 348: ...340 Tally Interface Devices 13 ...
Page 350: ......
Page 352: ...344 Using the Serial to TCP IP Dispatcher 15 ...
Page 406: ...398 Index ...