


Configuring an External Router
289
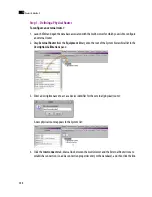
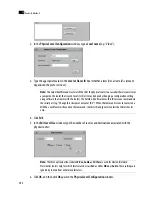
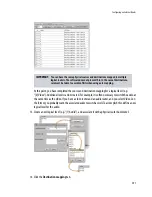
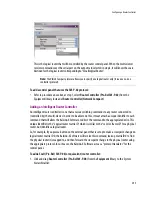
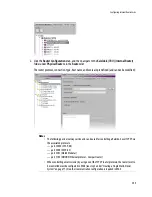
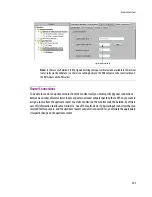
9. Choose a physical output for each logical destination.
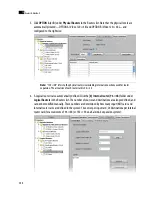
10. Click
Auto map
to automatically enter physical outputs, in sequential order, starting from the first one
in the list:
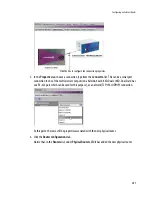
– If you have already specified a physical output, the sequence starts from that one, then autofills
from there.
– If the one you specified is in a row part way down the table, auto-mapping fills in the rows below,
then continues the sequence starting at the top of the table.
This feature is particularly useful when mapping a large number of destinations.
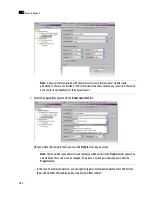
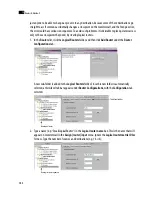
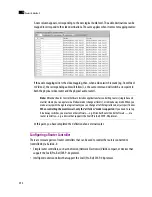
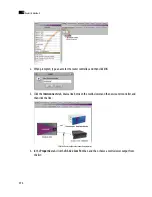
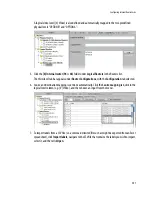
11. To import labels from a CSV file (i.e. a comma-delimited file such as might be exported from an Excel
spreadsheet), click
Import labels
, navigate to the CSV file that contains the labels you wish to import,
select it, and then click
Open
.
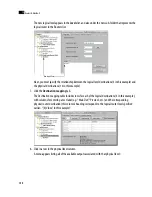
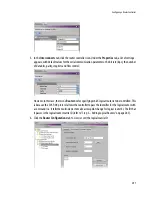
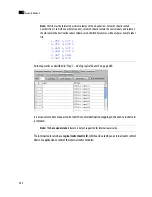
Note:
If you make a mistake, click
Clear mapping
, and then click
Yes
in the confirmation message that
appears to delete the table entries in the physical output column. This does not affect the
Labels
column.
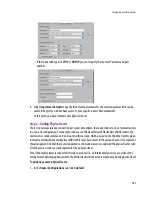
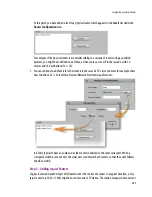
Auto map button
Physical outputs are automatically populated
Summary of Contents for Kaleido-X
Page 1: ...Kaleido X User s Manual Part Number M770 2800 111 1 June 2011 ...
Page 8: ...viii toc ...
Page 33: ...Loading a Layout 25 Kaleido X16 ...
Page 34: ...26 Getting Started 2 Kaleido X 4RU ...
Page 152: ...144 Creating Logical Sources 7 ...
Page 178: ...170 Setting Up Rooms 8 ...
Page 244: ...236 Creating Layouts 9 ...
Page 253: ...Detailed Directions 245 3 Under Properties General type a Friendly name for the Action ...
Page 256: ...248 Creating Actions 10 ...
Page 272: ...264 Managing Kaleido RCP2 Users 11 ...
Page 348: ...340 Tally Interface Devices 13 ...
Page 350: ......
Page 352: ...344 Using the Serial to TCP IP Dispatcher 15 ...
Page 406: ...398 Index ...