


Chapter 17 Troubleshooting
17-77
When the server PC is Printlink5-IN
1. Select [SETUP] - [MAINTENANCE] in Printlink5-IN main window.
“Enter Password” dialog box is displayed.
2. Enter “5678” in the [Password] entry field, and click the [OK] button.
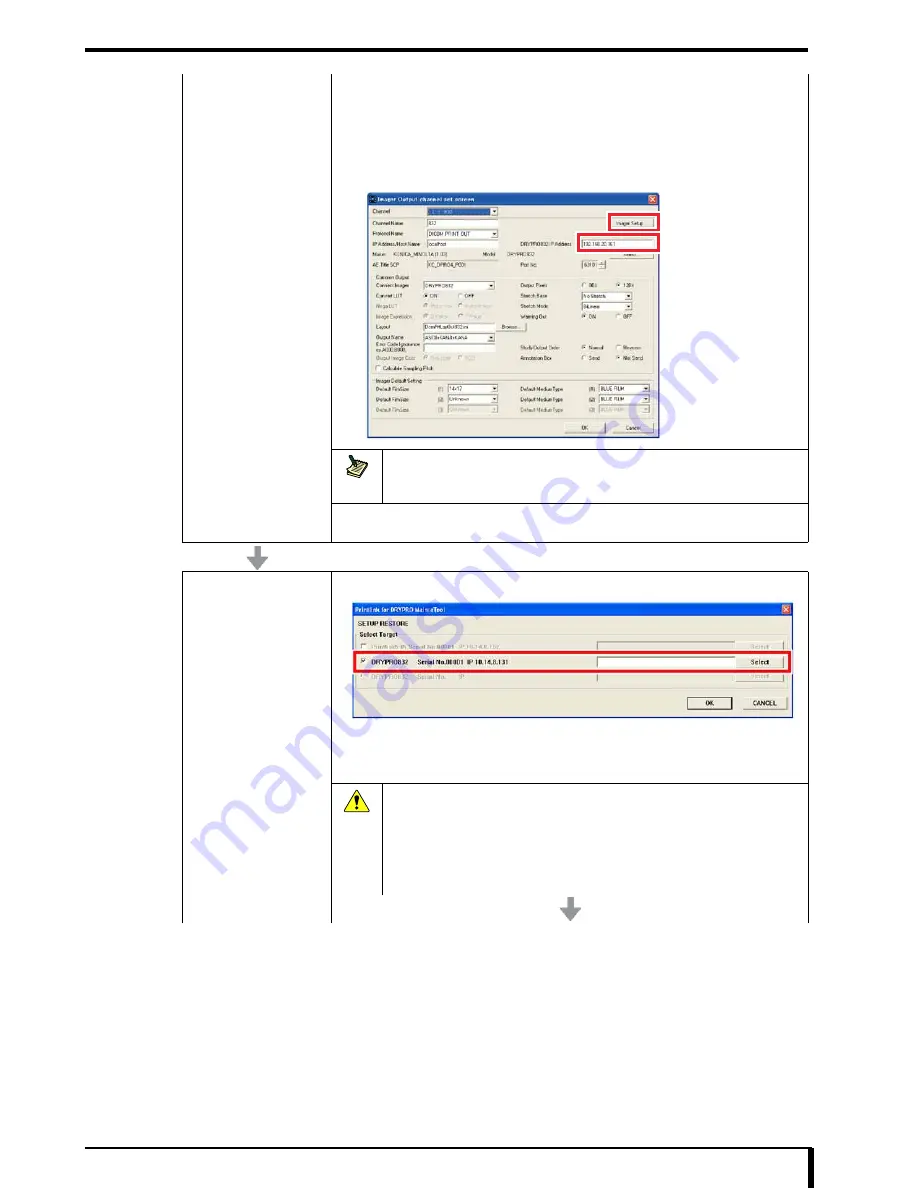
3. Open the “Imager Output channel set” window, enter “192.168.20.161” into the
“DRYPRO 832 IP Address” entry field, and click [Imager Setup] button.
Note
Upgrade of the DRYPRO 832 may start after the [Imager Setup] button is
clicked.Once the upgrade has started, the “disconnected” status may continue for more
than 2 minutes.
4. Refer to
“4.2.6 Change to Local Facility Network Settings”
in the installation
manual
, and set the network.
Restore the setup
Refer to
“16.6 Restoring Settings (Page 16-26)”
to restore the setup.
Server PC will restart automatically when the restore completes without any problem.
Connection error message is displayed when the server PC is CS-2 or CS-3. Click the [Yes]
button.
Caution
•
Perform the restore for the DRYPRO 832. Do not restore
Printlink5.
•
If any error occurs during the restore, restart the server PC and
redo the restore.
•
DRYPRO 832 may restart.In that case, start the restore after the
main unit has started up.
Summary of Contents for Drypro 832
Page 2: ......
Page 12: ......
Page 22: ......
Page 28: ......
Page 74: ......
Page 118: ......
Page 228: ......
Page 242: ......
Page 388: ......
Page 498: ......
Page 521: ...18 23 18 5 Block Diagram ...
Page 527: ...18 29 18 7 Printing Operation Load Timing Chart Standard 1 ch ...
Page 529: ......


