


Chapter 17 Troubleshooting
17-76
Setting up Network
Setup the network.
However, the network setup procedure differs depending on the server PC (Printlink5-IN or CS-2
and CS-3).
When the server PC is CS-2 or CS-3
1. Startup the CS-2 or CS-3.
After starting up WindowsXP, a dialog box is displayed.
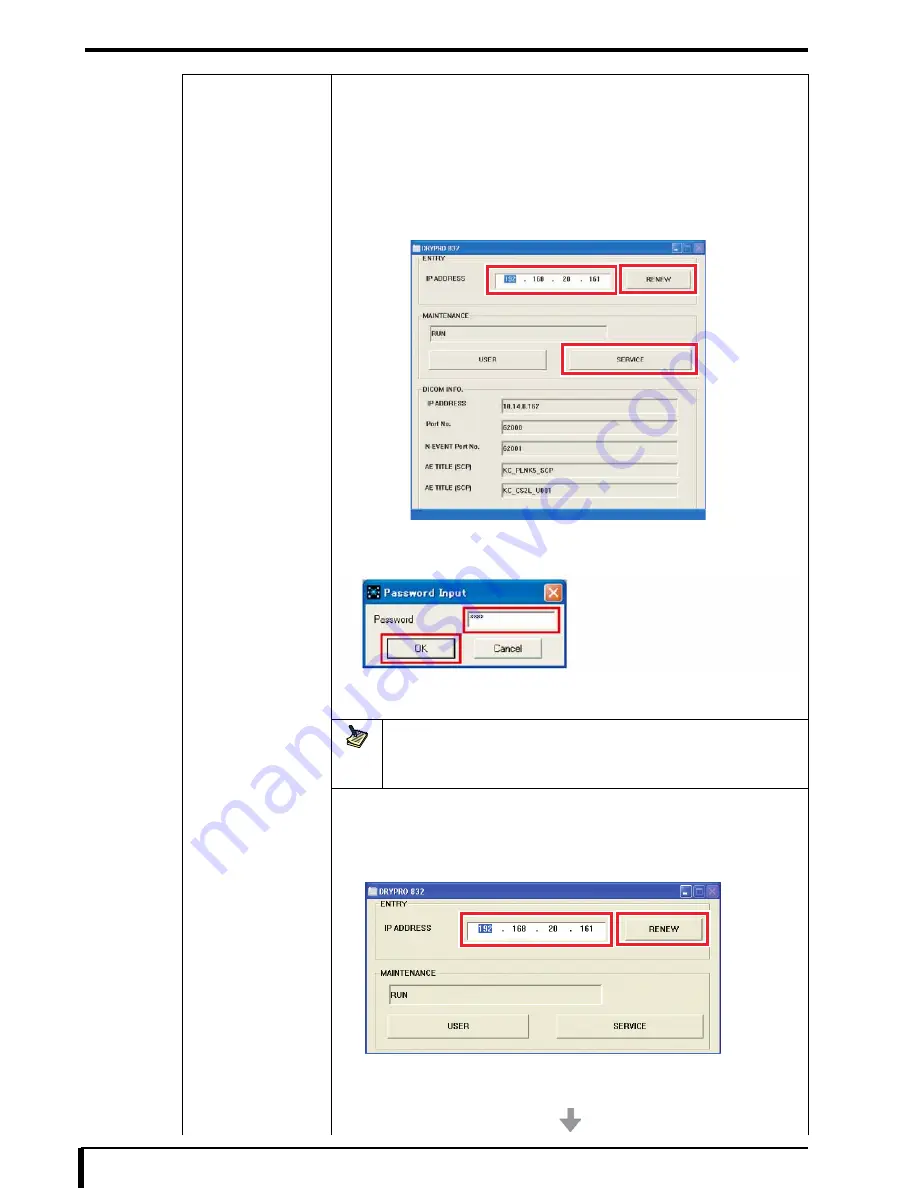
2. Check that the factory IP address (192.168.20.161) is entered in the [IP
ADDRESS] entry field, and click the [RENEW] button.
3. Click the [SERVICE] button.
“Enter Password” dialog box is displayed.
4. Enter “5678” in the [Password] entry field, and click the [OK] button.
The main window of the DRYPRO 832 Utility Tool is displayed.
License registration is required for the oversea version.
Note
Upgrade of the DRYPRO 832 may start when the DRYPRO 832 Utility Tool is
displayed.
Once the upgrade has started, the “disconnected” status may continue for more than 2
minutes.
5. Refer to
step 1
to
10
in
“4.2.6 Changing the Facility Network Settings”
in the
installation manual
, and change the facility network settings.
6. Click the [BACK] button on the main window of the DRYPRO 832 Utility Tool.
7. Enter the new IPaddress that you set for the imager into the “IP ADDRESS” entry
field in the dialog box below, and click the [RENEW] button.
8. Check that a connection has been established with the imager.
9. Close all of the windows, and restart the server PC.
Summary of Contents for Drypro 832
Page 2: ......
Page 12: ......
Page 22: ......
Page 28: ......
Page 74: ......
Page 118: ......
Page 228: ......
Page 242: ......
Page 388: ......
Page 498: ......
Page 521: ...18 23 18 5 Block Diagram ...
Page 527: ...18 29 18 7 Printing Operation Load Timing Chart Standard 1 ch ...
Page 529: ......


