156
REFERENCE GUIDE
2. Press the
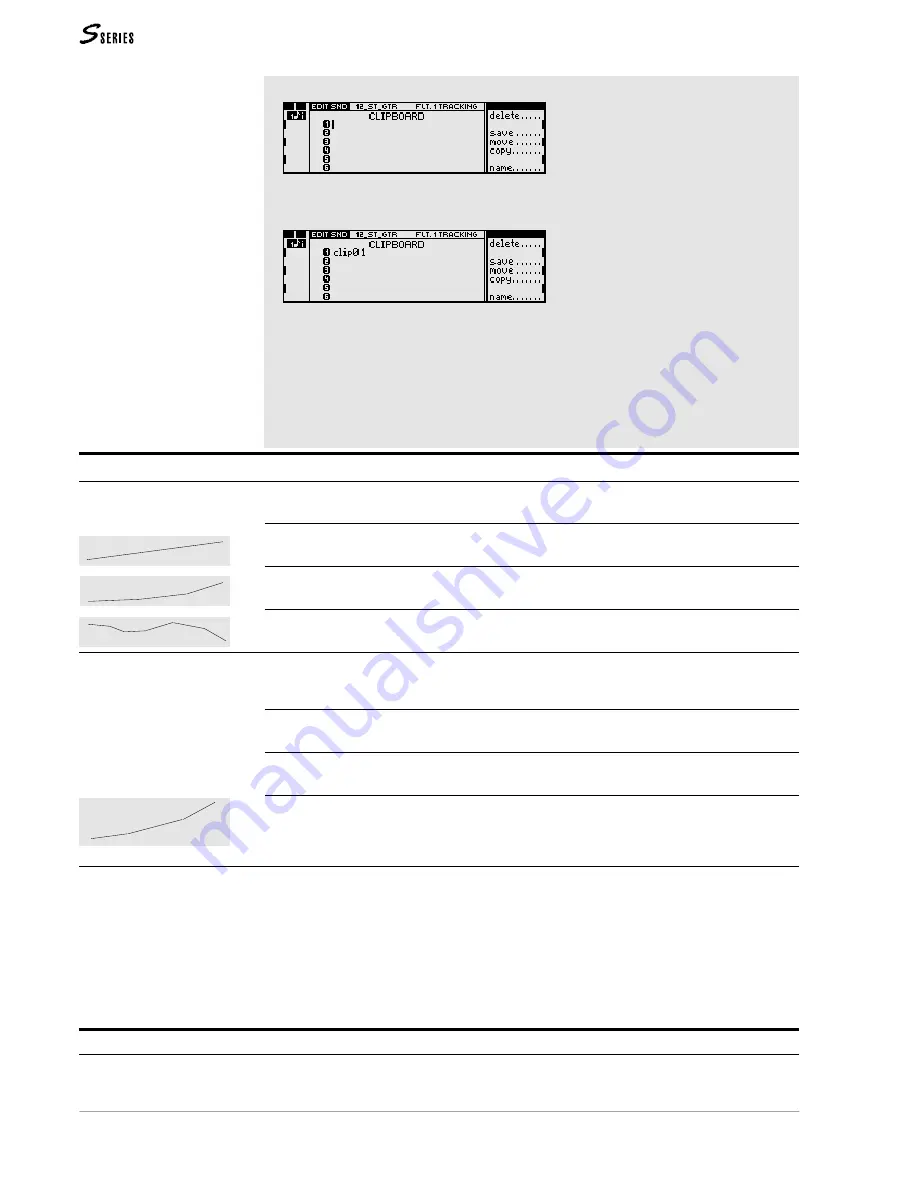
CLIPBOARD
button to open the Clipboard:
3. Select one of the six Clipboard locations and copy the “Filter 1” page by selecting the
“Save” command. The “Filter 1” page is copied as a “clip” in the Clipboard:
4. Return to the edit by pressing
EXIT
or the
SOUND
button in the Edit section and pass on to
the “Filter 2” page.
5. Press
CLIPBOARD
to open the Clipboard, select the clip you have just saved and select the
“Move” command.
6. The “Filter 1” page is copied into the “Filter 2” page and the clip is removed from the
Clipboard.
Additional information on use of the Clipboard are given in the chapter on Clipboard.
Page 3 Filter 1 Tracking
Options
These three options permit you to divide the Tracking “curve” into different segments; in
order to permit a more or less refined programming of the Tracking across the keyboard.
1 segm
1 segment.The Tracking is essential and provides a constant variation of the
Cutoff frequency across the keyboard. The “Key” parameter cannot be modified.
3 segm
3 segments. The Tracking consists of 3 segments which create a curve with
different variations across the keyboard.
6 segm
6 segments. The Tracking curve is greatly divided, allowing a complex program-
ming of the Cutoff Frequency across the keyboard.
Parameters
The three parameters displayed across the bottom part of the Tracking curve can be
accessed by tapping repeatedly on
ENTER
. The selected parameter can be modified with the
DIAL
(the “Key” and “Level” parameters also with the
NUMERIC
KEYPAD
).
point
One of the extreme ends of a segment. Rotation of the
DIAL
selects one of the points
of the Tracking curve (1, 2, or 1, 2, 3, 4, or 1, 2, 3, 4, 5, 6, 7).
key
Determines the keyboard position for the point in edit. The extreme points (A#0, C8)
cannot be modified.
level
The Cutoff Frequency offset with respect to the value programmed on the first page.
Normal use of this parameter requires that the Tracking curve be an ascending whole or
broken line.
Value range: -63 … 0…+63.
Detailed procedure Follow the steps set out below to access and edit the Track-
ing parameters:
1. Tap
ENTER
to select one of the parameters “Point”, “Key” (if possible), or
“Level”.
2. Rotate the
DIAL
to select a P
OINT
, to change the K
EY
note or modify the L
EVEL
.
3. Press
ENTER
to pass on to the next parameter. After “Level” you will return to
“Point”.
Page 4: Filter 2 Tracking
Identical to the Tracking described above, but applied to Filter 2. Use the Clipboard if you
want to copy the “Filter 1 Tracking” page to the “Filter 2 Tracking” page to obtain a 4-pole
filter.
Summary of Contents for S2 Turbo
Page 1: ......
Page 3: ...MUSICPROCESSORS OWNER S MANUAL ...
Page 17: ...INTRODUCTION 1 1 INTRODUCTION INTRODUCTION ...
Page 21: ...5 LAYOUTS 2 LAYOUTS S2 S3 Front panel S2 S3 Rear panel S2R Front panel S2R Rear panel ...
Page 42: ...26 OVERVIEW ...
Page 120: ...104 PRACTICAL GUIDE ...
Page 140: ...124 SAMPLE TRANSLATOR ...
Page 256: ...II APPENDIX ...
Page 257: ...MIDI iii MIDI IMPLEMENTATION CHART MIDI CONTROLLERS SYSTEM EXCLUSIVE ...
Page 267: ...Waveforms Sounds Performances xiii WAVEFORMS SOUNDS AND PERFORMANCES ...
Page 278: ...XXIV APPENDIX ...
Page 279: ...ROM Drumkits and Percussion Samples xxv DRUMKITS AND PERCUSSION SAMPLES ...
Page 291: ...TECHNICAL SPECIFICATIONS xxxvii TECHNICAL SPECIFICATIONS ...
Page 302: ...J TROUBLESHOOTING ...


