


1.
Unpack the replacement hard drive, and prepare it for installation.
2.
Check the documentation for the drive to verify that it is configured for your computer.
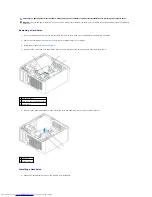
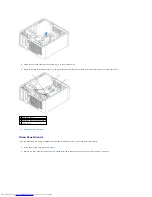
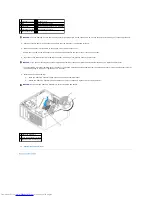
3.
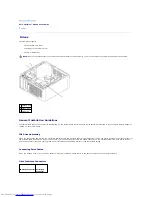
Gently slide the hard drive into the hard-drive bracket until it clicks into place.
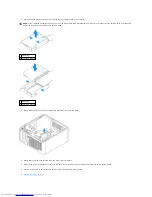
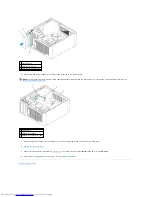
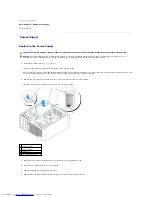
4.
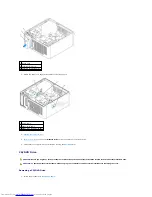
Gently slide the hard drive into the drive bay until it clicks into place.
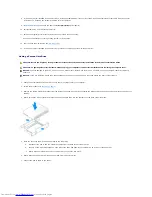
5.
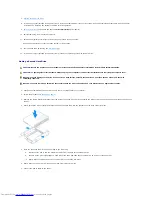
Connect the power and hard-drive cables to the drive. Connect the hard-drive cable to the connector on the system board.
6.
Check all connectors to be certain that they are properly cabled and firmly seated.
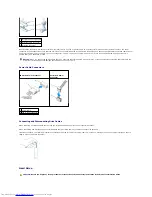
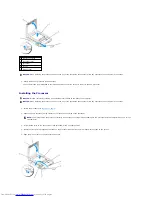
NOTE:
If your replacement hard drive does not have the plastic hard-drive bracket attached, remove the bracket from the existing drive by unsnapping
it from the drive. Snap the bracket onto the new drive.
1 hard drive
2 hard-drive bracket
1 hard drive
2 hard-drive bracket
Summary of Contents for OptiPlex GX520
Page 22: ...4 Press Alt b to restart the computer and implement your changes Back to Contents Page ...
Page 29: ......
Page 97: ...Back to Contents Page ...
Page 108: ......
Page 145: ......
Page 149: ...10 Replace the computer cover Back to Contents Page 3 captive screw housing 2 ...
Page 157: ...Back to Contents Page ...
Page 166: ...Back to Contents Page ...
Page 181: ...10 Replace the computer cover Back to Contents Page 3 captive screw in housing 2 ...
Page 222: ...Back to Contents Page Dell OptiPlex GX520 User s Guide Back to Contents Page ...