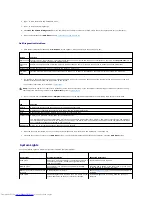
No sound from headphones
Video and Monitor Problems
Fill out the
Diagnostics Checklist
as you complete these checks.
If the screen is blank
Enable digital mode —
Your speakers do not work if the CD drive is operating in analog mode.
1.
Click the
Start
button, click
Control
Panel
, and then click
Sounds, Speech, and Audio Devices
.
2.
Click
Sounds and Audio Devices
.
3.
Click the
Hardware
tab.
4.
Double-click the name of your CD drive.
5.
Click the
Properties
tab
6.
Check the
Enable digital CD audio for this CD-ROM device
box.
Eliminate possible interference —
Turn off nearby fans, fluorescent lights, or halogen lamps to check for interference.
Run the speaker diagnostics
Reinstall the audio driver
Check the device option setting —
Enter system setup
and ensure that the
Audio Controller
option is set to
On
. Exit system setup and
restart your computer.
Enter system setup
Run the Dell Diagnostics
Check for software and hardware conflicts
Check the headphone cable connection —
Ensure that the headphone cable is securely inserted into the headphone connector.
Disable digital mode —
Your headphones do not work if the CD drive is operating in digital mode.
1.
Click the
Start
button, click
Control Panel
, and then click
Sounds, Speech, and Audio Devices
.
2.
Click
Sounds and Audio Devices
.
3.
Click the
Hardware
tab.
4.
Double-click the name of your CD drive.
5.
Click the
Properties
tab.
6.
Uncheck the
Enable digital CD audio for this CD-ROM device
box.
Adjust the Windows volume control —
Click or double-click the speaker icon in the lower-right corner of your screen. Ensure that the
volume is turned up and that the sound is not muted.
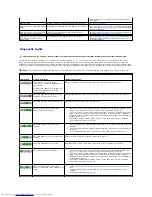
CAUTION:
Before you begin any of the procedures in this section, follow the safety instructions located in the
Product Information Guide
.
NOTE:
See the monitor documentation for troubleshooting procedures.
Check the monitor cable connection —
l
If you purchased a graphics card, ensure that the monitor is connected to the card.
l
Ensure that your monitor is properly connected (see the
Quick Reference Guide
that came with your computer).
l
If you are using a video extension cable and removing the cable solves the problem, the cable is defective.
l
Swap the computer and monitor power cables to determine if the power cable is defective.
l
Check the connector for bent or broken pins. (It is normal for monitor cable connectors to have missing pins.)
Summary of Contents for OptiPlex GX520
Page 22: ...4 Press Alt b to restart the computer and implement your changes Back to Contents Page ...
Page 29: ......
Page 97: ...Back to Contents Page ...
Page 108: ......
Page 145: ......
Page 149: ...10 Replace the computer cover Back to Contents Page 3 captive screw housing 2 ...
Page 157: ...Back to Contents Page ...
Page 166: ...Back to Contents Page ...
Page 181: ...10 Replace the computer cover Back to Contents Page 3 captive screw in housing 2 ...
Page 222: ...Back to Contents Page Dell OptiPlex GX520 User s Guide Back to Contents Page ...


