


Back to Contents Page
Replacing the Computer Cover
Dell™ OptiPlex™ GX520 User's Guide
1.
Ensure that all cables are connected, and fold cables out of the way.
Gently pull the power cables toward you so that they do not get caught underneath the drives.
2.
Ensure that no tools or extra parts are left inside the computer.
3.
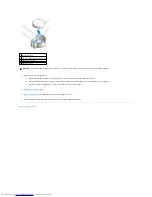
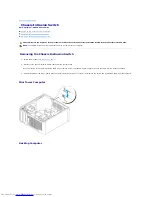
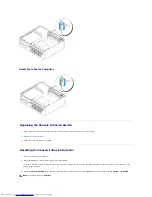
To replace the cover:
a.
Align the bottom of the cover with the hinge tabs located along the bottom edge of the computer.
b.
Using the hinge tabs as leverage, rotate the cover downward to close it.
c.
Snap the cover into place by pulling back on the cover release latch and then releasing the latch when the cover is properly seated.
d.
Ensure that the cover is seated correctly before moving the computer.
4.
Attach the computer stand (if applicable). For instructions, see the documentation that came with the stand.
5.
Connect your computer and devices to electrical outlets, and turn them on.
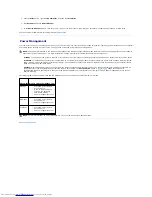
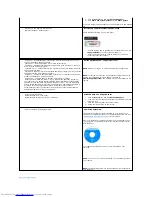
After you remove and replace the cover, the chassis intrusion detector, if installed and enabled, causes the following message to appear on the screen
at the next computer start-up:
ALERT! Cover was previously removed.
6.
Reset the chassis intrusion detector in
system setup
by changing
Chassis Intrusio
n to
On
or
On-Silent
.
Back to Contents Page
CAUTION:
Before you begin any of the procedures in this section, follow the safety instructions in the
Product Information Guide
.
NOTICE:
To connect a network cable, first plug the cable into the network wall jack and then plug it into the computer.
NOTE:
If an administrator password has been assigned by someone else, contact your network administrator for information on resetting the chassis
intrusion detector.
Summary of Contents for OptiPlex GX520
Page 22: ...4 Press Alt b to restart the computer and implement your changes Back to Contents Page ...
Page 29: ......
Page 97: ...Back to Contents Page ...
Page 108: ......
Page 145: ......
Page 149: ...10 Replace the computer cover Back to Contents Page 3 captive screw housing 2 ...
Page 157: ...Back to Contents Page ...
Page 166: ...Back to Contents Page ...
Page 181: ...10 Replace the computer cover Back to Contents Page 3 captive screw in housing 2 ...
Page 222: ...Back to Contents Page Dell OptiPlex GX520 User s Guide Back to Contents Page ...