


12.
If you removed an network adapter card:
a.
Enter system setup
, select
Network Controller
, and change the setting to
On
.
b.
Connect the network cable to the integrated network connector on the back panel of the computer.
Serial Port Adapters
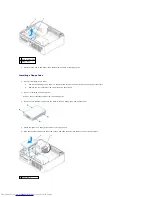
Installing a Serial Port Adapter
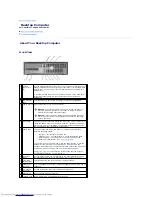
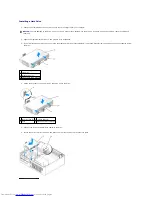
1.
Follow the procedures in "
Before You Begin
."
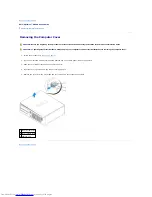
2.
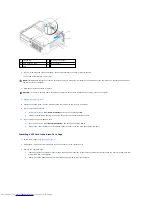
Gently push the release tab on the adapter retention latch.
3.
Remove the filler bracket (if applicable).
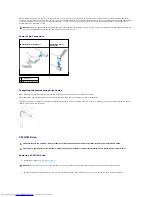
4.
Place the serial-port adapter bracket in the connector and press down firmly. Ensure that the adapter is fully seated in the slot.
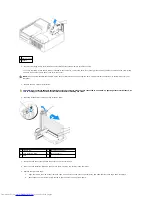
5.
Gently press the adapter retention latch to secure the adapter bracket.
6.
Connect the adapter cable to the serial-port adapter connector (SER2) on the
system board
.
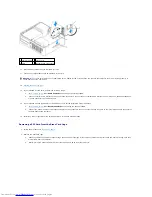
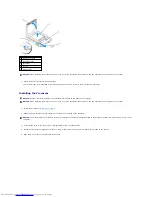
7.
Connect any cables that should be attached to the serial port adapter.
8.
Replace the computer cover
.
CAUTION:
Before you begin any of the procedures in this section, follow the safety instructions in the
Product Information Guide
.
NOTICE:
To prevent static damage to components inside your computer, discharge static electricity from your body before you touch any of your
computer's electronic components. You can do so by touching an unpainted metal surface on the computer chassis.
NOTE:
The serial port adapter for your computer also includes two PS/2 connectors.
NOTE:
See the documentation that came with the adapter for information on configuring the adapter, making internal connections, or customizing it for
your computer.
NOTICE:
Do not route card cables over or behind the cards. Cables routed over the cards can prevent the computer cover from closing properly or
cause damage to the equipment.
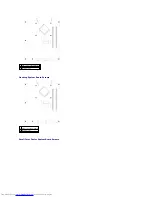
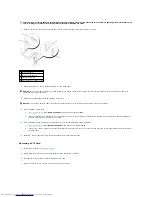
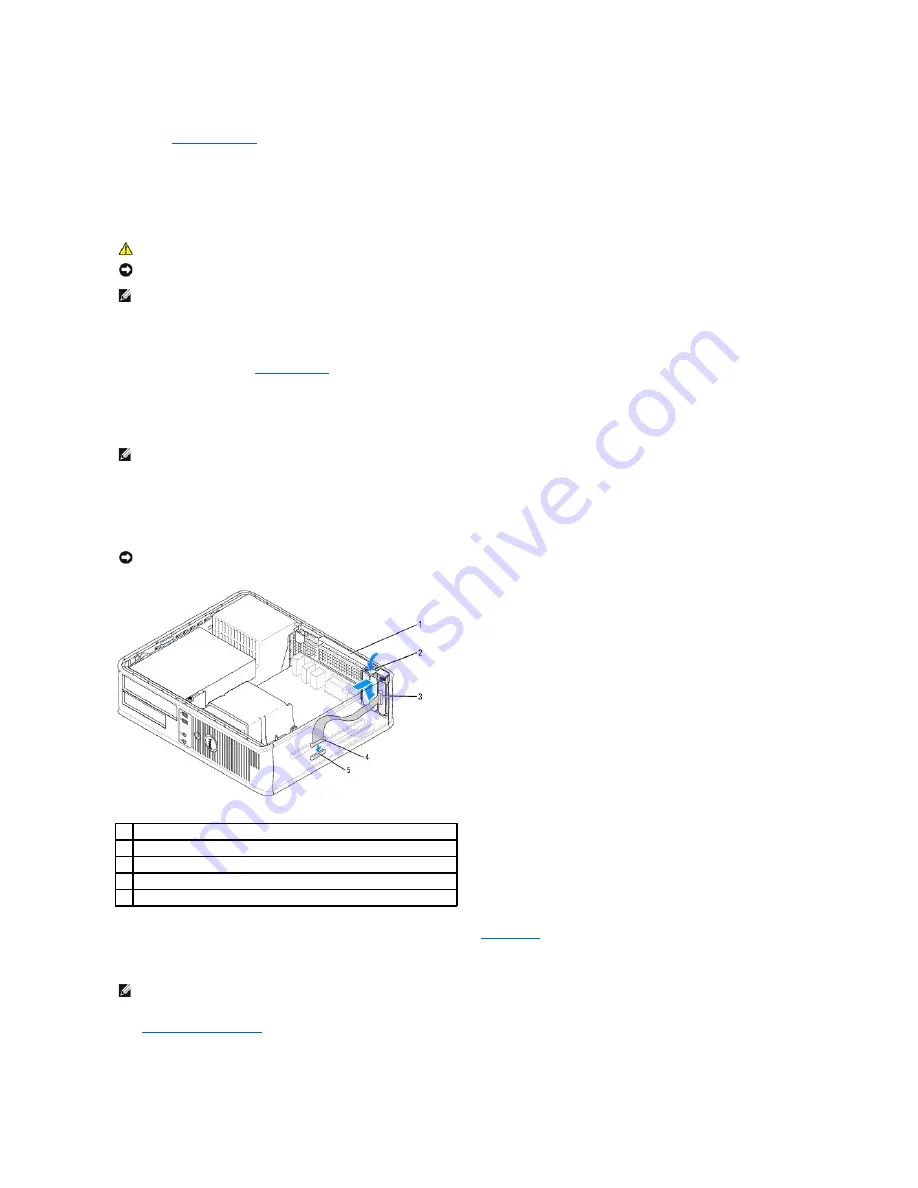
1
adapter retention latch
2
release tab
3
serial-port adapter bracket
4
serial-port adapter connector
5
serial-port adapter system board connector (SER2)
NOTE:
See the documentation for the serial-port adapter for information about the cable connections.
Summary of Contents for OptiPlex GX520
Page 22: ...4 Press Alt b to restart the computer and implement your changes Back to Contents Page ...
Page 29: ......
Page 97: ...Back to Contents Page ...
Page 108: ......
Page 145: ......
Page 149: ...10 Replace the computer cover Back to Contents Page 3 captive screw housing 2 ...
Page 157: ...Back to Contents Page ...
Page 166: ...Back to Contents Page ...
Page 181: ...10 Replace the computer cover Back to Contents Page 3 captive screw in housing 2 ...
Page 222: ...Back to Contents Page Dell OptiPlex GX520 User s Guide Back to Contents Page ...