


9
9
9-103
9-103
Installation > Combination of HDD Options How to check this Installation procedure > Making a Backup of the Data (reference only)
Installation > Combination of HDD Options How to check this Installation procedure > Making a Backup of the Data (reference only)
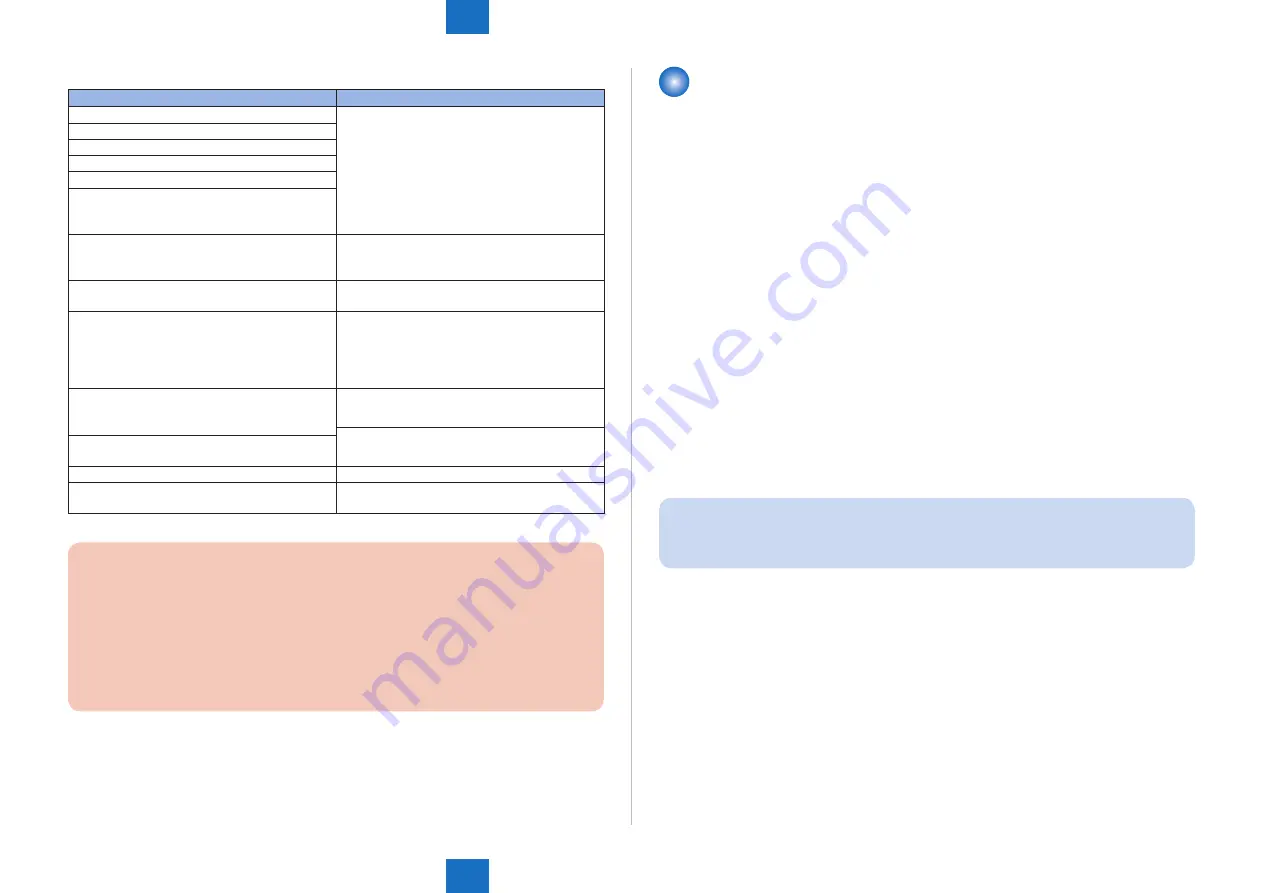
List of Data that can be backed up
Data that can be backed up
Reference
Address Book
For information on exporting data, see the
"e-Manual > Remote UI".
Settings/Registration settings
Device Settings
Printer Settings
Paper Information
Image forms stored in the Superimpose Image
(Excluding the products without Box/Advanced
Box function)
Favorite Settings for Web browser
See the e-Manual > Web Access.
(You can select this if web browser (Option) is
installed.)
License files for MEAP applications
For information on downloading license files, see
the "e-Manual > MEAP".
Data saved by MEAP applications
Data saved by MEAP applications may be
able to be backed up, depending on the MEAP
application.
See the documentation included with the MEAP
application.
Data stored in Mail Boxes or the Advanced Box
(Excluding the products without Box/Advanced
Box function)
See the e-Manual > Remote UI "Setting the
Backup Location for Stored Data ".
See the e-Manual > MEAP.
SSO-H (Single Sign-On H) user authentication
information
Quick Menu Information
See the e-Manual > Quick Menu.
User Information of the Advanced Box (Excluding
the products without Box/Advanced Box function)
See the e-Manual > Security.
CAUTION: Work to Perform After Installing the Kit
• When you start using this product, passwords set for Mail Boxes, Confidential Fax
Inboxes, and the Memory RX Inbox are erased. Set these passwords again.
• If you have logged on to the machine using a login service, such as SSO-H (Single
Sign-On H) before using this product, you must select the login service again
using SMS (Service Management Service) after restarting the machine. For more
information on using SMS, see the e-Manual > MEAP.
T-9-9
Making a Backup of the Data (reference only)
The data items that have been backed up may be restored when the HDD Data Encryption &
Mirroring Kit-C Series has been installed.
These data items are property of the user, and the restoration work must be performed by the
system administrator.
The method of restoration is described in the Users Guide. See Table T-1-2/T-1-4 (Data to be
backed up) in Points to Note About Installation of the Installation Procedure.
1. Procedure to make a backup of Address Book
1) Access the URL given below, and then access Remote UI.
http://[IP address of the device]/
If the system administrator ID and password are set, a dialog box to enter the user name
and password appears. Enter the system administrator ID in User Name and the password
in Password, and then click [Administrator Login].
2) Select [Settings/Registration] > [Management Settings] > [Data Management] > [Import/
Export].
3) Click [Address List].
4) Click [Export].
5) Select the save format for Address list, and click [Start Export].
6) Following the instructions on the window, specify the location to save the file. Be sure to
set a distinctive name to an export file so that you can recognize it when importing it.
NOTE:
Exporting the device settings will export all contents of the address list. In other words,
there is no need for a backup unless it needs to be done individually.
2. Device Settings Export Procedure
1) Access the URL given below, and then access Remote UI.
http://[IP address of the device]/
If the system administrator ID and password are set, a dialog box to enter the user name
and password appears. Enter the system administrator ID in User Name and the password
in Password, and then click [Administrator Login].
2) Select [Settings/Registration] > [Management Settings] > [Data Management] > [Import/
Export].
3) Click [Device Settings (Forwarding Settings, Address List, Favorite Settings)].
4) Click [Export], and then click [Start Export].
5) Following the instructions on the window, specify the location to save the file.


