background image

am.book : ch17    13  Tue May  6 13:24:47 1997

17-13

Chapter 17    Viewing, Creating, and Executing Scripts

Annex Manager User Guide

Part 3    Customize Mode

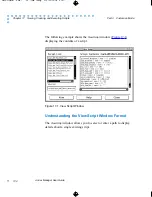
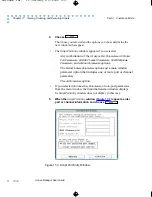
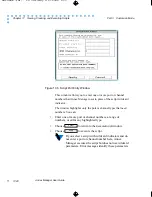
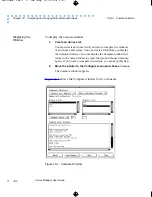
This window allows you to specify one or more port or channel
numbers that Annex Manager uses to create a script. The Script
Port Entry window includes:

All port or channel types and a port or channel number field for
each type. Annex Manager highlights one or more port or
channel types based on the Annex and options you selected.
You can enter one or more port or channel numbers or a range
of numbers for any highlighted type. For example, if the
configuration has no printer ports, the

Printer Port(s)

 field does

not accept port numbers.

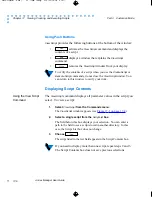
Buttons that allow you to define wildcard characters. If you
entered a single port or channel number in all fields above, you
can create a script with wildcard indicators:

Use the specified port number

 uses only the port or channel

numbers you entered as part of the new script. This button
is the default.

Create wildcard port entries

 enters an asterisk (*) as the script

port or channel number and allows you to use the script for
any port number you enter in the

Execute Script

 command.

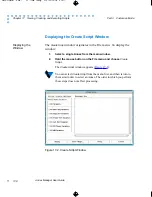
You can choose

 to return to the

Create Script

 window.

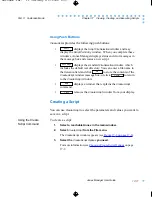
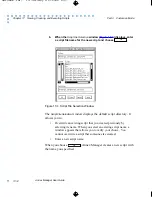
When you choose

, the file selection window displays.

Cancel

Apply

Summary of Contents for Manager

Page 1: ...am book title i Tue May 6 13 24 47 1997 Annex Manager Release 3 0 Part Number 166 025 304 Rev A April 1997 User Guide Annex Manager ...

Page 2: ...the United States Government regarding its use reproduction and disclosure are as set forth in the Commercial Computer Software Restricted Rights clause at FAR 52 227 19 Trademarks of Bay Networks Inc Annex Remote Annex Annex Manager Remote Annex 2000 Remote Annex 4000 Remote Annex 6100 Remote Annex 6300 Remote Annex 5390 Async Remote Annex 5391 CT1 Remote Annex 5393 PRI Bay Networks Model 5399 Re...

Page 3: ...anager 1 8 Linking Annex Manager with SunNet Manager 1 9 Using SunNet Manager Discovery to Find Annexes 1 11 Running Annex Manager 1 12 Chapter 2 Window Basics Window Elements 2 2 Mouse and Keyboard Techniques 2 4 Using the Mouse 2 4 Using Keyboard Commands 2 5 Controlling the Window Display 2 7 Changing the Size of a Window 2 7 Using Annex Manager Icons 2 8 Moving Windows and Icons 2 9 Using Scro...

Page 4: ...rmat 4 4 Using the Specification Area 4 4 Verifying Annex Status 4 11 Using the Configuration Area 4 12 Saving and Opening Annex Lists 4 15 Saving an Annex List 4 15 Opening an Annex List 4 16 Editing List Files 4 18 Displaying SNMP Information 4 18 Displaying the SNMP Information Window 4 19 Understanding the SNMP Information Window Format 4 20 Viewing and Updating SNMP Information 4 22 Part 2 Se...

Page 5: ...sing the Call Defaults Window 9 1 Understanding the Call Defaults Window 9 2 Chapter 10 Setting SNMP Traps Using the SNMP Settings Window 10 1 Understanding the SNMP Settings Window 10 2 Chapter 11 Assigning Remote Addresses Using the Remote Address Window 11 1 Understanding the Remote Address Window 11 2 Chapter 12 Editing Modem Definitions Understanding the Edit Modem Window 12 2 Using Push Butt...

Page 6: ...ttings 14 10 Part 3 Customize Mode Chapter 15 Using and Creating Parameter Groups Working with Parameter Groups 15 1 Creating Parameter Groups 15 3 Displaying the User Defined Parameter Groups Window 15 3 Understanding the User Defined Parameter Groups Window Format 15 4 Creating or Modifying a User Defined Group 15 7 Chapter 16 Viewing and Changing Parameters Viewing Parameter Values 16 2 Display...

Page 7: ...he Compare Window Format 18 3 Selecting Annexes and Scripts for Comparison 18 5 Using Compare Window Buttons 18 9 Comparing Parameters Values 18 9 Copying Parameter Values 18 11 Displaying the Copy Window 18 11 Understanding the Copy Window Format 18 12 Copying Parameter Values 18 16 Identifying Errors 18 19 Compare Command Errors 18 19 Copy Command Errors 18 20 Part 4 Control and Status Commands ...

Page 8: ...U Status Information 20 20 Displaying the Annex PRI Internal CSU Status Window 20 20 Understanding the Annex PRI Internal CSU Status Window 20 21 Viewing PRI Internal CSU Status Information 20 27 Displaying T1 Internal CSU Status Information 20 28 Displaying the Annex T1 Internal CSU Status Window 20 28 Understanding the Annex T1 Internal CSU Status Window 20 29 Viewing T1 Internal CSU Status Info...

Page 9: ...tting up the Annex for SNMP 21 4 Defining the Community String 21 4 Defining Parameters 21 4 Standard MIB Support 21 5 MIB Object Hierarchy 21 6 Describing and Naming Objects 21 6 Trap Hosts and Traps 21 7 Annex Restrictions on Standard MIBs 21 8 Chapter 22 Annex Parameters Chapter 23 Troubleshooting Index ...

Page 10: ...am book amTOC doc x Tue May 6 13 24 47 1997 Annex Manager User Guide Contents x ...

Page 11: ...4 Creating Annex List Window 4 6 Figure 4 5 Main Window with Annex List 4 6 Figure 4 6 Annex List 4 7 Figure 4 7 Annex Info Window 4 10 Figure 4 8 Main Window Configuration Area 4 12 Figure 4 9 Save Annex List Selection Window 4 15 Figure 4 10 Open Annex List Selection Window 4 17 Figure 4 11 SNMP Information Window 4 19 Figure 5 1 Setup Mode Main Window 5 4 Figure 5 2 General Window 5 5 Figure 5 ...

Page 12: ...Script 17 20 Figure 17 7 Execute Script Confirmation Window 17 21 Figure 17 8 Execute Script Reset Parameters Window 17 21 Figure 18 1 Compare Window 18 2 Figure 18 2 Compare Window for two Annexes 18 5 Figure 18 3 Compare Window for Annex and Script 18 6 Figure 18 4 Compare Window for Two Scripts 18 7 Figure 18 5 Copy Window 18 12 Figure 18 6 Copy Command Confirmation Window 18 18 Figure 18 7 Cop...

Page 13: ...F doc xix Tue May 6 13 24 47 1997 xix Annex Manager User Guide Figures Figure 20 12 Discover Annexes Network Process Window 20 52 Figure 20 13 Creating Annex List Window 20 53 Figure 21 1 Network Configuration 21 2 ...

Page 14: ...am book amLOF doc xx Tue May 6 13 24 47 1997 Annex Manager User Guide Figures xx ...

Page 15: ...utput Box Information 18 8 Table 21 1 Supported Standard MIBs 21 8 Table 21 2 RFC 1213 MIB II Objects 21 9 Table 21 3 RFC 1398 Ethernet MIB Objects 21 10 Table 21 4 RFC 1316 Character MIB Objects 21 10 Table 21 5 RFC 1317 RS 232 MIB Objects 21 12 Table 21 6 RFC 1389 RIPv2 MIB Objects 21 14 Table 21 7 RFC 1243 AppleTalk 21 15 Table 21 8 RFC 1406 DS1 MIB Objects 21 16 ...

Page 16: ...am book amLOT doc xxii Tue May 6 13 24 47 1997 Annex Manager User Guide Tables xxii ...

Page 17: ...configure Annex remote access communication servers It assumes that you are familiar with network protocols and that you know the parameter values you need to configure Annexes About the Documentation This book provides the documentation for Annex Manager It explains all Annex Manager commands and gives you step by step directions for using each command In addition it describes each parameter elig...

Page 18: ...sion Chapter 3 Working with Annex Manager Windows describes the Annex Manager command secondary warning and help windows Chapter 4 Using the Main Window explains all features in the main window It includes directions for creating and using Annex lists Part 2 Setup Mode Chapter 5 Setup Mode Basics describes the windows and special features of the Setup mode Chapter 6 Selecting General Settings disc...

Page 19: ...g Modem Definitions explains how to edit a modem definition in your configuration files Chapter 13 Setting Security Values describes how to set frequently used Annex security settings Chapter 14 Using the AppleTalk IP IPX and LAT Windows explains how to set frequently used values for these protocols Part 3 Customize Mode Chapter 15 Using and Creating Parameter Groups describes how to create your o...

Page 20: ...rmation describes the commands that give you status information for Annexes ports channels and interfaces Part 5 Reference Information Chapter 21 Annex Manager and SNMP presents a brief overview of SNMP and its relationship to the Annex and Annex Manager Chapter 22 Annex Parameters describes each parameter eligible for Annex Manager processing It includes each parameter type allowable values Annex...

Page 21: ... The following table lists the Annex Manager User Guide conventions Convention Represents Italics Book titles chapter titles and chapter headings Window font Text from any Annex Manager window and command names Parameter font Parameter names tool names file names and directory names Keycaps Window push buttons Notes provide important information Warnings inform you about conditions that can have a...

Page 22: ...am book pref xxviii Tue May 6 13 24 47 1997 Annex Manager User Guide Preface xxviii ...

Page 23: ...features through a graphical user interface It allows you to Configure Annexes with Setup or Customize mode Setup mode allows users to configure one or more Annexes by setting the most commonly used parameters Customize mode allows users to set individual Annex parameters and provides access to all main menu commands Simplify configuration operations using pre defined parameter groups Create addit...

Page 24: ...pecific port on more than one Annex Define site specific defaults Identify Annexes in the network Save lists of Annex names or addresses Display default values for each configuration parameter Boot and reset Annexes Edit Annex configuration file Reset ports or Annex subsystems automatically after you change parameter settings Supported Annex Hardware and Software Annex Manager supports the followi...

Page 25: ...associated help and data files from the distribution media to the workstation s disk storage Although it is not a requirement you should consider installing Annex Manager on the same workstation you use for the Annex software installation Annex Manager depends on the proprietary MIB defined for the Annex and on the various standard MIBs supported by the Annex As such Annex Manager cannot manage ot...

Page 26: ... vary depending on the type of workstation and the other tasks that run concurrently with Annex Manager Annex Manager works best with a color monitor directly attached to the workstation or a color X window terminal connected to the UNIX host over the network Annex Manager also supports a gray scale X window terminal attached to the workstation Any X window terminal used with Annex Manager must ha...

Page 27: ...pplication Setting Environment Variables Working with SunNet Manager Running Annex Manager Annex Manager Delivery and Platforms You can receive the Annex Manager installation file tarfile on a disk tape orasanelectronically transmittedfile TheapplicationrunsonAIX HP UX Solaris and SunOS platforms You can use the instructions in this section for any Annex Manager medium or platform The directions i...

Page 28: ... installation scripts release notes and a release version file Type mkdir annex setup cd annex 2 Extract the setup directory from the media Type xvf tar device name setup 3 Execute the setup install script Type setup install The script responds with a message as shown in the following example It is required that you run this script as root This command is used to install Annex Software boot images...

Page 29: ...5 Quit 5 After you select a media type the installation script requests further information based on your previous selection The example below shows you the questions that the installation script asks for each media type For Floppy Drives Enter the install source type 1 1 What is the name of the floppy drive that has the tarfile Name For Tape Drives Enter the install source type 1 2 What is the na...

Page 30: ...ll Annex Manager 3 Quit Enter desired action 1 2 For the installation to proceed we must copy software to a directory on a hard disk on the host Please enter the name of the directory to be used 7 Specify a directory in which you want to install Annex Manager Enter the name of the Annex Manager installation directory Directory name usr annex gui_am_R3 0 u1 annex_manager To merge existing Annex Man...

Page 31: ...ou installed Annex Manager previously the installation merges existing data files in the new directory To merge files select c as shown in the example below If you do not want to merge files abort the installation make the necessary changes and restart the installation process from the beginning If this is correct press c to continue Otherwise abort by pressing a make the necessary changes for you...

Page 32: ... Enter Username root root 12 Enter group ids for users allowed to read and write to Annex Manager files The installation program will change the group id of Annex Manager files and directories to group bin Only members of this group can add data files To have the installation script change the group id enter the group id now or press return to accept bin Enter Group id bin annex 13 Confirm the ins...

Page 33: ...ine by itself to end Enter a to print the current access list User name CR to end 15 Select a color scheme for displaying Annex Manager What default color scheme do you want c color m mono c m Finishing installation Installation complete To Run Annex Manager you need to set your environment as follows 1 If you have changed the recommended installation directory set the GUI_AM_DIR environment varia...

Page 34: ...SPLAY environment to point to the host where you want Annex Manager to appear You can put these commands in your cshrc login profile or an equivalent script Working with SunNet Manager Although Annex Manager is a stand alone application it can be loosely linked to SunNet Manager so that a network administrator can click on an icon representing an Annex in the network map and select Annex Manager f...

Page 35: ... Manager in the xylogics schema file located in the usr snm struct directory Adding Annex Manager to the Console Commands Tools Option Menu To add Annex Manager to the Console Commands Tools option menu Add the following information in the instance elementCommand section of the xylogics schema file instance element Command SNM_Console Annex Manager GUI_AM_DIR bin gui_am Please refer the SunNet Man...

Page 36: ...lementCommand section of the xylogics schema file instance elementCommand component annexII Annex Manager GUI_AM_DIR bin gui_am component microannex Annex Manager GUI_AM_DIR bin gui_am component annex3 Annex Manager GUI_AM_DIR bin gui_am 2 Place mouse cursor on the Annex icon and click the MENU button to display the popup menu 3 In the popup menu select Annex Manager under the Tools option Please ...

Page 37: ...s to create You must add components of each Annex model to the discover conf file located in the var adm snm directory for Discovery to create Annex elements For more information please refer the SunNet Manager Reference Manual Currently all Annex models return the same OID for the sysOid object SunNet Manager Discovery cannot distinguish among Annex hardware models To use the Discovery tool Add t...

Page 38: ...nnex subnet mask dt timeout to discover the Annex timeout anx annex_name to display the Annex name w community_string to display the community string nod for no discovery If you did not set a path type cd install directory bin and then type gui_am or type the full path gui_am is a script file that sets environment variables and runs the Annex Manager gui_am_exe executable You should not invoke gui...

Page 39: ...and corresponding keyboard commands Controlling the Window Display provides instructions for changing the size of a window moving a window reducing a window to an icon using scroll bars and using the control menu Using Fields Buttons and Boxes describes each type of Annex Manager field button and box and gives instructions for selecting and entering information After you become familiar with the t...

Page 40: ... bars list boxes and help windows The Annex Manager main window Figure 2 1 serves as an example since it uses most available elements Figure 2 1 Window Elements If you are familiar with windows applications you recognize many elements in the main window WARNING Maximize button Minimize button Title bar Control menu button Menu bar Text field Cursor Push button Option button Scroll Border List box ...

Page 41: ...l bars to view all available text Minimize button converts all open Annex Manager windows to an icon on your desktop Maximize button toggles the size of the main window enlarging it from the standard size to fill the terminal screen or restoring it to its original size Text fields display specific pieces of information You can type new values or change existing values in some text fields List boxe...

Page 42: ...he main window The menu bar stores the pull down menus you can use for Annex Manager commands and for help facilities Some menu selections duplicate Annex Manager buttons other operations appear only in these menus Mouse and Keyboard Techniques Annex Manager allows you to navigate in windows and enter information using a mouse keyboard commands or a combination of both methods This section tells y...

Page 43: ...le 2 2 Keyboard Commands to list commands that can substitute for clicking or dragging the mouse pointer Term If you The mouse Click Press and release the mouse button Selects a window box text field button or list item Double click Press and release the mouse button twice quickly Displays help when cursor is on an Annex parameter or parameter group Drag Hold the mouse button and move the mouse Mo...

Page 44: ...x or button Space bar Selects an item from a list or menu Space bar Displays information about an Annex list item or Moves the pointer through a list or a menu or Selects text in a field Acknowledges file selection windows warning boxes and help messages or Deletes a character to the right or left of the cursor based on your keyboard configuration or Displays a help message for a list item a field...

Page 45: ...fault size You can change the size of a window by using the maximize button which expands the window to fill your desktop or by using the mouse which lets you choose any size for the window Using Borders to Change Window Size To change the size of a window using the mouse 1 Place the mouse pointer in the border of the window To size the entire window place the pointer in the corner of the window i...

Page 46: ...imize button click the button again You can also use the Size option of the Control menu to alter the size of a window For more information see Using the Control Menu later in this chapter Using Annex Manager Icons If you need room on your desktop for other applications you can reduce any open Annex Manager window to an icon When you restore an icon the window opens in the size and location that d...

Page 47: ...er icon to a more convenient location on your desktop Since you may use certain Annex Manager windows more often than others you can position these windows to suit your needs Moving a Window To move a window 1 Place the pointer in the title bar of the window 2 Drag the pointer The border of the window becomes an outline as you move the pointer 3 Release the mouse button when the border reaches the...

Page 48: ...n scroll boxes In the example above scroll boxes are the white area These boxes indicate whether the scroll bar is active scroll boxes change size to reflect the proportion of material that the window displays The example above shows active and inactive scroll bars The vertical scroll bar is active The scroll box fills about one third of the available space indicating that there is more informatio...

Page 49: ...own one line To view one page at a time 1 Move the pointer to the scroll bar above or below the vertical scroll box or to the left or right of the horizontal scroll box 2 Click the mouse button The list displays according to the location of the pointer For example if you place the pointer below the vertical scroll box the display moves down one page To scroll through the display 1 Move the pointer...

Page 50: ...ontrol menu uses standard window features Active options appear in black type and inactive options appear in gray The key sequence for each option appears next to the option If your keyboard does not have a key labeled Alt consult your hardware documentation to find the corresponding key The first letter of each option is underlined When you display the control menu you can select an option by typ...

Page 51: ... and Minimize have the same effect on a window as the buttons in the upper right corner of the window For more information about these buttons refer to Using Annex Manager Icons on page 2 8 Using the Move Option To alter the position of a window on your desktop 1 Select Move and click the mouse button The pointer changes to and the border of the window becomes an outline as you move the pointer 2 ...

Page 52: ...the size of a window by using this option or by following the directions in Changing the Size of a Window on page 2 7 The Lower option moves any Annex Manager window to the back of your desktop When you use this option on overlapping windows the window in the foreground moves revealing the window that was covered Using the Lower Option To change the display 1 Select the window you want to move 2 S...

Page 53: ...s allow you to enter or change values others simply display information Entering Text Field Information The cursor appears in a text field when you can enter or change the value of the field To use a text field 1 Place the pointer in the field and click the mouse button The border of the field is highlighted and the cursor blinks 2 Type new information or edit the value that displays You can use t...

Page 54: ... item and place it in the box Selecting Items in Option Buttons To use an option button 1 Move the pointer inside the button and click or hold the mouse button The menu appears 2 Move the mouse to highlight the item you want and click or release the mouse button Your selection appears in the box Push buttons instruct the system to begin a process or display a new window For example a push button c...

Page 55: ...hen you select a button Radio buttons always appear in a box in sets of two or more You can select only one button in each set Selecting Radio Buttons To use a radio button 1 Move the pointer to the diamond shape 2 Click the mouse button When you select a radio button the center of the diamond is highlighted If you select another button in the set the highlighting of the first button disappears Fi...

Page 56: ...e check buttons 1 Move the pointer to the square shape 2 Click the mouse button When you turn a selection on the center of the square is highlighted When you turn a selection off the center of the square is empty 3 Move the pointer to the next check button you want to select and repeat steps 1 and 2 When you select more than one button the previously selected buttons remain highlighted Figure 2 4 ...

Page 57: ...ox horizontal and vertical scroll bars allow you to view the complete list Message boxes monitor Annex Manager operations These boxes can include status and error messages Output boxes display the results of Annex Manager processing Selecting Items in List Boxes List boxes store information about Annexes parameters and files These boxes which always include an identifying label allow you to select...

Page 58: ...nex Manager highlights the item indicating that it is selected You can search through a list by selecting one item and typing the beginning letters of the item you want to find The list scrolls automatically to the item that matches your entry Selecting More than One Item In many lists you can select more than one item To select items one at a time 1 Move the pointer to the first item you want to ...

Page 59: ...ll items to indicate that they are selected You can skip steps 2 and 3 by selecting the first item in the range moving the pointer to the last item you want to select pressing and clicking the mouse Adding a Range of Items To select a range when you already selected items and or ranges 1 Move the pointer to the first item you want to select hold and hold the mouse button Annex Manager highlights t...

Page 60: ...em you want to deselect hold and hold the mouse button 2 Drag the pointer through all items you want to deselect The highlighting of each item disappears as the pointer moves past 3 Release the mouse button on the last item you want to deselect Annex Manager removes highlighting from the range of items indicating that they are no longer selected Deselecting All Items To deselect all items in a lis...

Page 61: ...operationsyouuseandcaninclude error and status messages You cannot enter information in these boxes Reading Message Boxes Message boxes monitor Annex Manager operations by displaying status and error information Figure 2 6 shows the Set message box Figure 2 6 Set Window Message Box This message box summarizes the Show Values command The Show Values command lists each parameter and notifies you tha...

Page 62: ... the results of Annex Manager commands Like message boxes output boxes can include error and status messages Figure 2 7 shows the Compare output box for two Annexes Figure 2 7 Compare Window Output Box In this example the output box displays the differences in parameter values between Annexes The box lists each parameter and includes the values for each Annex ...

Page 63: ... Window Types discusses the relationship between the Annex Manager main window command window and secondary windows Using Annex Manager Menus describes each entry in the pull down menu Using Secondary Windows explains File Selection Confirmation Reset Parameters and Cancel windows Understanding Warning Windows tells you how and why warnings appear and gives you instructions for acknowledging these...

Page 64: ...eld selections Some windows require secondary windows for processing Annex Manager uses the following windows which are described later in this chapter The File Selection window lets you enter a path and file name or choose an existing file in which to store the scripts and lists you create In addition this window lets you select files for storing help messages and command output The Confirmation ...

Page 65: ... book describes them as part of each command Using Annex Manager Menus TheAnnexManagermainwindowgivesyouaccesstoallAnnexManager commands and options through its pull down menu This menu is located just below the window title bar The following list describes the menu headings as well as the commands and operations it provides The File heading provides tools you can use with Annex Manager commands O...

Page 66: ... Configuration allows you to edit an Annex Configuration file WAN Internal Modems allows you to view and change the status of one or more internal modems Reset changes a specific Annex or port configuration without rebooting Setup provides access to the Annex Manager Setup mode Compare matches parameters and values for two Annexes an Annex and a script or two scripts Copy copies parameter values f...

Page 67: ...set procedure for the Set Copy and Execute Script commands If you choose this option the default turns it on you must respond to the window that appears before Annex Manager changes a configuration If you do not select this option the reset procedure occurs automatically The Status heading provides access to commands that give you current Annex port channel and interface information Annex Status d...

Page 68: ...s when a command requires information that its window does not accommodate For example if you create a new script the File Selection window allows you to specify a path and file name to store the script This section describes the secondary windows common to more than one command It includes Using the File Selection Window Understanding the Confirmation Window Using the Cancel Window Using the Rese...

Page 69: ...ndow that displays when you use the Open Annex List command Figure 3 1 File Selection Window The title of the window reflects the command name For example the Open Annex List command displays the Annex List Selection window illustrated above the Create Script window displays the Script Selection window Eachcommanddisplaysfilesappropriateforitsprocessing Forexample theOpen Annex List commanddisplay...

Page 70: ...ed to the Filter field If you then choose the Files box displays all files in the directory you selected The Filter field considers text that follows the last slash to be a file filter If you select a directory from the Directories box without clearing the Filter field the file selection window places your selection in the existing path preceding the file filter The Files box lists all files in th...

Page 71: ...w that explains how the file selection window works for the command you are using Editing Files You can use an ASCII text editor to change the list or script files you save Annex Manager verifies each file according to its first four lines When you edit these files you must use Annex Manager conventions List files begin with DB_VERSION V1 0 FORMAT Annex Name Community String Timeout Retries Script...

Page 72: ...ou choose an eligible existing file from the file selection window This window gives you information about the changes that occur Figure 3 2 shows a sample Confirmation window for the Copy command Figure 3 2 Confirmation Window You must respond to this window You can click to continue processing the command or to return to the command window Figure 3 3 shows the window that appears if you try to s...

Page 73: ...ow how much processing occurred and allows you to cancel the command Cancelling a command does not restore values or undo processing that occurred before you issued the cancellation Figure 3 4 shows the window for the Discover Annexes command Figure 3 4 Cancel Window The Cancel window uses a dynamic graph to show you the percentage of processing that took place If you find that the operation is ta...

Page 74: ...Option The Confirm Auto Reset entry determines whether or not Annex Manager displays the Reset Parameters window It is the only menu entry that is a check button The check button is selected when you begin using Annex Manager This requires that you respond to the Reset Parameters window Confirm Auto Reset is located in the Options pull down menu of the main window You can deactivate the Reset Para...

Page 75: ...gure 3 6 shows a warning window that appears for a command that requires you to select an Annex Figure 3 6 Warning Window Acknowledging Warning Windows To acknowledge a warning window 1 Move the pointer to 2 Click the mouse button The warning window disappears You can also acknowledge the warning box by moving the pointer into the box and pressing After you acknowledge the warning window you can r...

Page 76: ...u can save this information in a text file Information about all Setup mode fields single fields in Customize mode and all boxes and buttons appears in a small window labelled Window Item Help You cannot save the contents of these windows Short descriptions of Setup mode fields appear automatically at the bottom of every Setup mode window This section explains how you can use help windows It inclu...

Page 77: ...ng is highlighted 2 Press or click The Window Item Help window appears Figure 3 7 shows a help message for the button in the main window Figure 3 7 Window Item Help Acknowledging Help Windows Responding to a Help Window You can acknowledge this kind of help window at any time 1 Move the pointer to 2 Click the mouse button or press The help window closes You cannot save information directly from Wi...

Page 78: ...in a file Displaying Command Information To display information about a command 1 Display any command window or the main window 2 Click The Help window appears Fromthemainwindow usetheHelp entryfromthepull downmenu andselectMainWindow TheHelp entryalsoincludesahelpmessage that describes the main menu bar Displaying Parameter Information To display information about a parameter group or a single pa...

Page 79: ...nager User Guide Part 1 Annex Manager Basics Figure 3 8 shows the Help window for the Set command Figure 3 8 Help Window You can leave this kind of help window on your desktop as you use Annex Manager Each time you select command help or help on parameters Annex Manager adds help text to the window ...

Page 80: ...User Guide They include An overview of each command Information about the format of the command window Descriptions of the fields buttons and boxes that comprise the command window Special notes or warnings about using the command Short descriptions of each parameter eligible for Annex Manager processing You can save help messages that appear in this box but you cannot edit them or delete portions...

Page 81: ...its contents in a file at any time You can include parameter help in Help windows by highlighting a parameter or an input area and pressing or clicking Saving Help Information To save help messages 1 Display the Help window You can display this window by clicking the button of any command or by clicking twice on a parameter name or parameter group 2 Click The Save Output File Selection window appe...

Page 82: ... file that someone else created Enter a new file name 3 Choose Annex Manager stores the contents of the Help window in the file you specified Changing Site Defaults The Site Parameters command allows you to change default parameter values that display in the Show command if you select the Verbose Output button that displays in help messages You can use this command to inform users about your site ...

Page 83: ...value of a a parameter To use this command 1 Select Site Parameters from the Options menu The Site Parameters window appears see Figure 3 10 Figure 3 10 Site Parameters Window Understanding the Site Parameters Window Format The Site Parameters window is divided into two sections the left hand section allows you to choose a parameter from an existing list The right hand section shows you the parame...

Page 84: ...e a list the box below this button displays all parameters included in the list You can select a single parameter from this list Understanding the Default Value Area The right hand side of the Site Parameters window displays the current default values and allows you to enter a new default value for help messages and the Show command Before you select a parameter the small box at the top of the win...

Page 85: ...heck your work removes your site default and replaces it with Annex Manager s default displays a window that explains the Site Parameters command removes the Site Parameters window from your display Changing Default Values Using the Site Parameters Command To change the default values that display 1 Choose a list from the option button All parameters included in the list you choose appear in the l...

Page 86: ... field appears as an option button or a text field depending on the parameter you selected If it displays as an option button you can choose a value from the list If it displays as a text field you can type a value 4 Click Annex Manager changes the default value displayed in the parameter help message and in the Show command to the value you entered This value appears for display purposes only App...

Page 87: ...ening Annex Lists Displaying SNMP Information Using Setup and Customize Modes Annex Manager provides two modes Setup mode allows you configure one or more Annexes quickly It provides a series of windows that allow you to choose basic Annex and port settings The main window appears in Setup mode when Annex Manager appears on your desktop Customize mode allows you to set any Annex parameter You can ...

Page 88: ...Window in Setup Mode In Setup mode you can use the main window to enter one or more Annex names or IP addresses add or remove Annexes from the list and display the Setup mode windows This mode allows you limited access to the Annex Manager pull down menu You cannot chose the View Script Create Script Compare Copy Execute Script Show Set User defined Parameter Groups or Site Parameters commands WAR...

Page 89: ...sics If you choose Customize from the Mode menu Annex Manager expands the main window Figure 4 2 Figure 4 2 Main Window in Customize Mode In Customize mode you have access to all Annex Manager commands This chapter explains how the main window works in Setup and Customize modes WARNING Specification area Configuration area ...

Page 90: ...for the Annexes you selected This area appears only in Customize mode The information required in the specification and configuration areas depends on the command you choose When you complete required information you can use Setup windows and other Annex Manager commands The main window displays at all times when you use Annex Manager In Customize mode you can return to this window at any time to ...

Page 91: ...e Figure 4 3 Figure 4 3 Automatic Discovery Process Window As Figure 4 3 shows this message window indicates that you did not enter a specific Internet Address or Subnet Mask In addition it includes the default broadcast address for your local network and a default timeout value You can use the dn Discover Network ds Discover Subnet mask dt Discover Timeout and nod No Discovery command arguments w...

Page 92: ...List Figure 4 4 Figure 4 4 Creating Annex List Window The Annex List box in the main window Figure 4 5 includes all available Annexes on your local network Figure 4 5 Main Window with Annex List You can save any list using the Save Annex List command or recreate a saved list using the Open Annex List command In addition you can change lists using and Instructions for saving opening and changing li...

Page 93: ... using the other identifier e g the IP address for the same Annex amessageinformsyouthattheAnnexisalreadyincludedinthelist If you enter a device with which Annex Manager cannot communicate via SNMP NOT REACHABLE displays in place of the Annex type If you enter a device name that responds to SNMP but is not an Annex or if you enter the name of an unknown device a warning message informs you that th...

Page 94: ...rea You can save any list using the Save Annex List command in the File menu This menu also provides the Open Annex List command which recreates a saved list Instructions for saving and opening lists appear later in this chapter Selecting Items in Lists Selecting an Annex Many Annex Manager commands require you to select Annexes from the main window list To select one or more Annexes 1 Create an A...

Page 95: ... more devices from the list displays basic information about any Annex you select Adding to a List To add an Annex to a list 1 Enter an Annex name and a community string If you use the default community string public you do not need to complete this field 2 Click or press The device you entered appears in the Annex list box Deleting from a List To delete a device from an existing list 1 Select one...

Page 96: ...t box Annex Manager highlights your selection If you select more than one Annex a warning window informs you that the Annex Info window contains information about the first Annex you selected You can select an Annex and choose Verify Annex State from the Status menu to insure that the Annex Info window displays current information 2 Choose or press The Annex Info window appears Figure 4 7 Figure 4...

Page 97: ...st box 2 Select Verify Annex State from the Status menu If you select an Annex whose status changed from NOT REACHABLE the Annex type replaces the original message If you select a device that is now reachable but is not an Annex Annex Manager removes it from the list If an Annex has the NOT REACHABLE status because you added it using an invalid Community string and you use Verify Annex State again...

Page 98: ...arameter options for processing Some Annex Manager commands use the Annexes you select in the specification area and the parameter options you select here Figure 4 8 shows the initial display of the configuration area Figure 4 8 Main Window Configuration Area To complete this area you need to select a Parameter Option and choose individual items from the parameter list You can then use the Show Se...

Page 99: ...parameter groups you created and saved with the User defined Parameter Groups command The Annex Only List option includes all parameters excluding port parameters The Async Port List option displays asynchronous port parameters The Printer Port List option includes printer port parameters The Enet Port List option displays Ethernet port parameters The DS0 Channels List option displays DS0 channel ...

Page 100: ...ps or Lists To select items 1 Hold the mouse button on the Parameter Options button highlight your choice and release the button The appropriate list displays in the box 2 Click the mouse button on each list item you want If you choose Pre defined Groups or User defined Groups you can select one item For all other options you can select as many items as you need Annex Manager highlights the items ...

Page 101: ...x Manager processing When you save or open a list Annex Manager stores community string timeout and retry information for each Annex Save Annex List and Open Annex List use the file selection window described in Chapter 3 Working with Annex Manager Windows You should be familiar with this window before you save and open Annex lists Saving an Annex List Saving a List The Save Annex List command sto...

Page 102: ...ng list a window appears that allows you to verify your choice You cannot overwrite a list that someone else created Create a new list by entering a new file name or a path and name and choosing When you complete this window Annex Manager saves the list in the file you specified Opening an Annex List Opening a Saved List Open Annex List places any list you saved in the main window specification ar...

Page 103: ...u store lists in another directory you can enter a path and file name in the Selection field Annex Manager attempts to communicate with each device on the list displaying its type or the NOT REACHABLE designation The list appears in the main window specification area replacing the new list For more detailed information about the Annex Manager standard File Selection window see Chapter 3 Working wi...

Page 104: ...ays begin with DB_VERSION V1 0 FORMAT Annex Name Community String Timeout Retries For example you might enter emma public 2 2 You can enter comment lines as long as each line begins with the pound sign Annex Manager processing ignores these lines Displaying SNMP Information The SNMP Information command lets you see and update timeout retries and community string information for one or more Annexes...

Page 105: ...s menu To display the window 1 Create an Annex list and select one or more Annexes For more information see Creating Annex Lists in this chapter If you are changing Annex Manager defaults you do not need to create an Annex list first You can begin with step 2 2 Move the pointer to the Options menu and select SNMP Information The SNMP Information window appears as shown in Figure 4 11 Figure 4 11 S...

Page 106: ...cifies the length of time in seconds that Annex Manager waits for a response You can enter a number of seconds here If you leave this field blank SNMP Information uses the Annex Manager five second default Retries controls the number of times that Annex Manager tries to reach an Annex or other device on the network You can enter a number here If you leave this field blank the command uses the Anne...

Page 107: ...s the Annex Manager SNMP defaults based on the values in the text fields Using Push Buttons SNMP Information uses the following push buttons activates the command and changes Timeout Retries and Community String values displays SNMP default values in the text fields displays current Annex values in the text fields If you selected multiple Annexes that have different values a warning window informs...

Page 108: ...to display current values always displays the Annex Manager default values The values that display when you use depend on the Annexes you selected in the main window If you select a single Annex or multiple Annexes that have the same values text fields display current values If you select multiple Annexes that have different values a warning window informs you that differences exist and values do ...

Page 109: ...all main menu commands For details see Part 3 of this book Customize Mode A series of Setup mode windows allows you to change Annex settings Each window groups related settings and provides access to fields based on your previous selections You can select The General window to change the most commonly used Annex settings If you click a second window allows you to view and change additional Annex s...

Page 110: ... AppleTalk zone The IP window to select Internet address and interface routing settings The IPX window to choose an IPX frame type The LAT window to change LAT servers and group codes Setup mode uses windows that allow you to change Annex settings as well as Help Warning and Confirmation windows This section explains Setup mode windows in the following sections Understanding Setup Windows Displayi...

Page 111: ...to return to the main window A Confirmation window appears if you change settings and click rather than This window informs you that your changes do not take effect if you continue the closing process A Reset Parameters window informs you that Annex Manager needs to reset Annexes or ports for your changes to take effect This window appears only when you select Confirm Auto Reset from the pull down...

Page 112: ...o display Setup windows When you click in the main window and the first Setup mode window appears you can display additional windows Using the Main Window To display the Setup mode windows you must start from the Annex Manager main window see Figure 5 1 For detailed information about the main window see Chapter 4 Using the Main Window Figure 5 1 Setup Mode Main Window Setup ...

Page 113: ...lect one or more Annexes For information about creating Annex lists see Chapter 4 Using the Main Window 2 Click The General window appears see Figure 5 2 Figure 5 2 General Window The Setup field at the top of this window also appears in the Async Ports WAN Modules SNMP Settings Call Defaults Remote Address Security AppleTalk IP IPX and LAT windows You can use it to display another Setup window Se...

Page 114: ...e General window displays first 2 Move the pointer to the Setup field and select any available option Understanding Setup Window Fields When you select an option from the Setup field Annex Manager displays anotherwindowthatallowsyoutochangeAnnexsettings Onceyouenter or select new values and click Annex Manager changes settings on the Annexes you selected Your selections in a Setup mode window may ...

Page 115: ...isplay a value Text fields and option menus appear blank Radio buttons appear with no buttons selected If you select multiple Annexes or ports and you want to view or change values for a single Annex or port you can return to the main window or the Edit Async Ports window to select a single Annex or port Using Push Buttons When you choose a Setup field option the windows that appear use the follow...

Page 116: ...ars This button appears in the General and Edit Async Ports windows returns you the previous window in a series After you click you must click on the first window in the series Annex Manager does not change Annex settings until you click appears in the General continued Edit Async Ports and Edit Modem windows closes a window and displays the previous window in a series If you change values and the...

Page 117: ...select new values in any window and click rather than Annex Manager displays a confirmation window Figure 5 3 informing you that your changes do not take effect if you continue the closing process Figure 5 3 Closing Confirmation Window You can click to continue closing the window or to return to the window where you should click Close Apply OK Cancel Apply ...

Page 118: ...am book ch5 10 Tue May 6 13 24 47 1997 Annex Manager User Guide Chapter 5 Setup Mode Basics 5 10 Part 2 Setup Mode ...

Page 119: ...Annexsettingsinthefirstwindowanddisplayasecondwindowtochange additional settings This chapter describes the General windows in the following sections Using the General Window Using the General continued Window Selecting General Settings Displaying the General Window To display the first General window Figure 6 1 click in the main window Figure 6 1 General Window Setup ...

Page 120: ...er Preferred Host Nameserver Alternate Host Time Host Logging Host and Dump Host fields are 0 0 0 0 In this situation Annex Manager sets those fields to the address in the Host field You can change these addresses using the General continued window Load Sequence specifies available network interfaces and the order in which they are used for a down line load or an up line dump You can list more tha...

Page 121: ...Logging box provides the following fields Log messages at and above determines the priority levels that the Annex logs You can choose emergency to log hardware failures alert to log all Annex reboots critical to log configuration and initialization problems such as configuration file format errors or lack of memory error to log all line initialization errors warning to log minor problems notice to...

Page 122: ...ew York since it is five hours west of GMT or 60 for Paris which is one hour east of GMT Using Push Buttons The General window uses the following push buttons displays the General continued window sets the changes that you made in this window and in windows that have an OK button displays current values for all fields if you have not yet clicked Apply displays a window explaining the General windo...

Page 123: ...97 6 5 Chapter 6 Selecting General Settings Annex Manager User Guide Part 2 Setup Mode Displaying the General continued Window To display this window Figure 6 2 click on the General window Figure 6 2 General continued Window More WARNING ...

Page 124: ...n activates the ACP security server including security for AppleTalk CLI and SLIP PPP connections The button deactivates security If the selected Annex uses these security systems the On button is selected when the window first appears In this case the enable_security parameter is activated If you change the setting to Off Annex Manager deactivates security but does not change the enable_security ...

Page 125: ...pe of name service and host addresses Preferred Service defines the type of name service used with the Nameserver box Preferred Host field You can select none dns or ien_116 Alternate Service defines the type of name service used with the Nameserver box Alternate Host field The Annex uses this service and host when the service specified in the Preferred Service field is not available You can selec...

Page 126: ...nex broadcasts its log messages The Software Options box lists the options you can use on the Annexes you selected The left hand Software Options box activates routing and filtering AppleTalk functions and parameters IPX and the CLI tn3270 command You must contact your supplier to obtain the key value for the features you choose Available options appear in black text those that are unavailable app...

Page 127: ...ministrative password used for access to the superuser CLI commands and for administrative access to an Annex This password overrides the CLI lock and virtual CLI passwords For security reasons Annex Manager displays this value as set or unset These passwords use 1 to 16 characters Using Push Buttons The General continued window uses the following push buttons stores new values closes this window ...

Page 128: ...do not need to use the second window go to step 5 3 Click The General continued window appears 4 Enter or select new values in any field and click The General window reappears 5 Click If the Confirm Auto Reset button in the Options menu of the main window is checked and the settings you changed require Annex Manager to reset Annexes the Reset Parameters window appears Figure 6 3 If the Confirm Aut...

Page 129: ... settings you want to view or change The Edit Async Ports and Edit Async Ports continued windows include the most commonly used port and modem settings The Edit Modem window allows you to display change or delete a modem definition refer to Chapter 12 Editing Modem Definitions This chapter describes these windows in the following sections Selecting Async Ports Using the Edit Async Ports Window Usi...

Page 130: ...7 Setting Asynchronous Port Values 7 2 Part 2 Setup Mode Selecting Async Ports The Async Ports window Figure 7 1 allows you to select individual ports To display this window select Async Ports from the Setup option button Displaying the Window Figure 7 1 Async Ports Window ...

Page 131: ...Ports box It includes the following categories Annex Name displays the name or IP address of each Annex you selected in the main window Port provides the number of each port Mode displays the current setting for the type of access on each port Modem Type includes the name of the modem attached to each port Status provides the current state for each port The information in this box is current as of...

Page 132: ...list displays a window explaining the Async Ports window removes the Async Ports window from your display and returns you to the main window Using the Edit Async Ports Window After you select ports in the Async Ports window you can change modem and interface settings in the Edit Async Ports window Figure 7 2 In addition you can use push buttons to display the Edit Async Ports continued window and ...

Page 133: ...am book ch7 5 Tue May 6 13 24 47 1997 7 5 Chapter 7 Setting Asynchronous Port Values Annex Manager User Guide Part 2 Setup Mode Figure 7 2 Edit Async Ports Window ...

Page 134: ...ed with your selections in the Direction box determines the available selections in the Mode box Modem indicates that the ports you selected use the modem specified in the Modem Name field of the Edit Modem window This button selects the Modem Signals button and sets Flow Control to Hardware No Modem indicates that the ports you select do not use a modem It deselects Modem Signals sets Flow Contro...

Page 135: ...a port to identify an incoming packet s protocol as IPX PPP ARAP or CLI Serial provides access to modems serial line printers and other serial devices attached to this outgoing port PPP specifies that a port can perform as a network interface using PPP ARAP specifies that a port can perform as a network interface using ARAP IPX allows dial in Novell access with the Fastened II client Telnet automa...

Page 136: ...e Annexes you selected currently use modes that differ from the options displayed in the Mode box You can use the Set command in Annex Manager Customize mode to check these values or you can select another option here You cannot select the Other button If you select Autodetect PPP ARAP IPX or SLIP Annex Manager does not allow an Annex to determine modem speed automatically If you select Serial CLI...

Page 137: ...fer If you select None the port does not use hardware or software flow control Hardware the port uses CTS RTS signals Software the port uses xon xoff signals Other displays if the Annexes you selected have flow control set to a value that is not Hardware Software or None If you select another setting here you cannot select Other again The Speed box defines the baud rate of the asynchronous line be...

Page 138: ...e Annex configuration file and displays its name You cannot configure modem information if you select multiple Annexes that do not use the same configuration fileonthesamehost Theconfigurationfiledoesnothave to reside on the same host as does Annex Manager In addition youcannotconfiguremodeminformationifyou select one or more Annexes where the preferred boot host is different from the actual boot ...

Page 139: ...otocol AppleTalk Rlogin Telnet and Dedicated boxes The Settings box displays address and protocol information for the ports you selected Remote Address contains the IP address for the host at the remote end of the point to point SLIP or PPP link Subnet Mask contains the Annex IP subnet mask Subnet Mask defines which portion of the IP address is the network subnet and host The default is based on t...

Page 140: ...nt The connection is denied for a remote SLIP client If you select the dhcp button the Annex contacts a DHCP server to request the PPP dialup addresses If you select the Local button the Annex uses the value from the Annex If remote_address is set to0 0 0 0 the Annex negotiates for the address with the remote PPP client The connection is denied for a remote SLIP client The Interface Protocol box l...

Page 141: ...e same address You can enter numbers ranging from 0 to 65534 255 The Rlogin Telnet box allows you to specify arguments for rlogin and telnet connections Argument contains the commands used when you select Rlogin or Telnet in the Mode box You should include a host name or address here You can enter up to 100 characters The Dedicated box allows you to choose a host and the rlogin or telnet applicati...

Page 142: ...displays a window explaining the Async Ports window removes the Edit Async Ports window from your display and returns you to the main window displays the Edit Async Ports continued window Using the Edit Async Ports continued Window TheAnnexManagerEdit AsyncPorts continued window Figure 7 3 allows you to select port settings for PPP security inactivity timers and the LAT protocol Displaying the Win...

Page 143: ...e and LAT boxes The PPP Security box defines data for authorization on a remote PPP peer This box uses the following fields Remote Username contains the user name by which the Annex identifies itself when the remote PPP peer asks for authentication This name can contain up to 15 characters Remote Password defines the password that the Annex uses when the remote PPP peer requests authentication For...

Page 144: ... Annex terminates all sessions and resets the port You can use the Input is Activity and Output Is Activity buttons to define activity as input to the port or output from the port If you do not use these buttons the timer runs independent of activity You can enter any number of minutes up to 255 minutes Input Is Activity buttons define activity as input If you click the On button the Annex resets ...

Page 145: ...orts windows Selecting Ports Before you can change port settings you need to select specific ports 1 Create an Annex list select one or more Annexes and click The General window appears 2 Select Async Ports from the Setup button The Async Ports window appears 3 Choose one or more ports from the list The next window settings display current values based on your selections here If you choose ports w...

Page 146: ...te for the ports you chose The selections you make here control the availability of the remaining fields For detailed information about the Port Options box see Understanding the Edit Async Ports Window earlier in this chapter 3 Click The Edit Async Ports continued window appears 4 Enter or change information in the PPP Security Time or LAT boxes Available fields depend on your selections in the p...

Page 147: ...e 6 Click The Reset Parameters window Figure 7 4 appears if you selected the Confirm Auto Reset option from the pull down menu and if the settings you changed require Annex Manager to reset Annexes If you did not select Confirm Auto Reset Annex Manager resets Annexes without notifying you Figure 7 4 Reset Parameters Window Apply ...

Page 148: ...am book ch7 20 Tue May 6 13 24 47 1997 Annex Manager User Guide Chapter 7 Setting Asynchronous Port Values 7 20 Part 2 Setup Mode ...

Page 149: ...les window allows you to select the WAN interface whose settings you want to view or change The Edit WAN Module window allows you to set WAN interface parameters The Security window controls security systems for the WAN interface For detailed information about this window see Chapter 13 Setting Security Values This chapter describes the WAN Modules window and the Edit WAN Module window in the foll...

Page 150: ...es window Figure 8 1 allows you to select the WAN interfaceswhosesettingsyouwanttovieworchangeintheEdit Wan Module window To display this window select WAN Modules from the Setup option button Figure 8 1 WAN Modules Window Understanding the WAN Modules Window The WAN Modules window displays a list of the WAN Modules available on the Annex es you selected in the main window It provides ...

Page 151: ...icates the number of WAN Modules available on the selected Annex s WAN Type indicates the type of WAN interface e1 for PRI E1 except Australia e1_aust for PRI E1 Australia t1 for PRI T1 with external CSU t1_intcsu for PRI T1 with internal CSU cas_t1_csu for channelized T1 cas_e1 for channelized E1 Using Push Buttons The WAN Modules window uses the following push buttons displays the Edit WAN Modul...

Page 152: ... Module Values 8 4 Part 2 Setup Mode Using the Edit WAN Module Window The Edit WAN Module window allows you to set the Annex WAN interface parameters To display this window click the Edit WAN push button in the WAN Modules window Displaying the Window Figure 8 2 Edit WAN Module Window ...

Page 153: ...e switch provided by your telephone company You can select SwitchType Applicability Protocol default null string other not listed sng Singapore E1 ISDN PRI ni2 NI 2 National ISDN 2 T1 ISDN PRI dms DMS 100 Northern Telecom DSM 100 T1 ISDN PRI at9 5ESS AT T 5ESS T1 ISDN PRI ets ETSI E1 ISDN PRI au1 Australia AUSTEL E1 PRI PRI ntt Japan NTT PRI ets NCR4 ETSI E1 ISDN without CRC4 PRI ust1 US North Ame...

Page 154: ... list You can use admin CLI commands to check these values Buildout allows adjustment of the cable loss measurement between the last T1 signal regenerator and your location This measurement is supplied by the telephone company at installation You need to adjust your buildout based on this measurement There are four choices 0 dB 7 5 dB 15 dB 22 5 dB FDL Type allows you to configure the FDL standard...

Page 155: ...hoose one of the following Wink Ground Loop or Immediate The Direction box check buttons determine whether a channel transmits and or receives data You can choose Outbound Inbound or both Outbound and Inbound The DNIS Provisioning box allows you to set the number of digits that the Channelized T1 E1 interface is provisioned to provide Typical values are between 4 and 10 The default value is 0 DNIS...

Page 156: ...am book ch8 8 Tue May 6 13 24 47 1997 Annex Manager User Guide Chapter 8 Setting WAN Module Values 8 8 Part 2 Setup Mode ...

Page 157: ...o two windows Call Defaults allows you to view and change Annex settings Edit Modem allows you to view and change internal modem definitions refer to Chapter 12 Editing Modem Definitions Using the Call Defaults Window The Call Defaults window Figure 9 1 allows you to view and change settings for the Annex es you selected in the main window To display this window select Call Defaults from the Setup...

Page 158: ...select Outgoing Incoming or both These buttons determine the Mode options you can use When an option is unavailable it appears in gray You cannot select such options Mode Box The Mode box defines the type of access available This box includes the following radio buttons Autodetect allows an Annex to identify an incoming packet protocol as IPX PPP ARAP or CLI Serial provides outbound access to mode...

Page 159: ...e Mode box You can use the Set command in Annex Manager Customize mode to check these values or you can select another option here You cannot select the Other button Interface Options Box The Interface Options box displays information in the IP Addresses PPP Interface Protocol AppleTalk and Rlogin Telnet boxes The IP Addresses box has settings for the IP addresses used for each connection The Addr...

Page 160: ...ddress is set to 0 0 0 0 the Annex negotiates for the address with the remote PPP client The connection is denied for a remote SLIP client The Subnet Mask field contains the Annex IP subnet mask The Subnet Mask defines which portion of the IP address is the network subnet and host The default is based on the network portion of the Annex IP address Entering an incorrect Subnet Mask can cause routin...

Page 161: ...ments for rlogin and telnet connections Argument contains the commands used when you select Rlogin or Telnet in the Mode box You should include a host name or address here You can enter up to 100 characters Time Box The Time box provides information in the Timer Input is Activity and Output is Activity boxes The Timer box defines activity and controls inactivity timers CLI Inactivity Timer specifi...

Page 162: ...n established call Output Is Activity buttons defines output as activity If you click the On button the Annex resets the inactivity timer when it sends output PPP Security Box The PPP Security box defines data for authentication on a remote PPP peer This box uses the following fields Remote Username contains the user name by which the Annex identifies itself when the remote PPP peer asks for authe...

Page 163: ...led information see Chapter 12 Editing Modem Definitions sets the changes you made in this window and in windows that have an OK button displays current values for all fields if you have not yet clicked Apply displays a window which explains the Call Defaults window removes the Call Defaults window from your screen and returns you to the main window When an option in the Call Defaults window is un...

Page 164: ...am book ch9 8 Tue May 6 13 24 47 1997 Annex Manager User Guide Chapter 9 Setting Call Default Values 9 8 Part 2 Setup Mode ...

Page 165: ...s window Using the SNMP Settings Window The SNMP Settings window Figure 10 1 allows you to enable disable and set threshold values for SNMP traps It also provides a Call History field where you can set the maximum number of calls that the Annex keepsinitsCallHistorytable Todisplaythiswindow selectSNMP Settings from the Setup option button Displaying the Window Figure 10 1 SNMP Settings Window ...

Page 166: ... set the threshold value to 0 the trap is automatically disabled You can select Call Begin to generate a trap when an incoming call is detected or an outbound call is generated by the Annex Call End to generate a trap when a call terminates Unexpected Call disconnect to generate a trap when a call disconnects unexpectedly Forced Call Disconnect to generate a trap when a call is disconnected Modems...

Page 167: ...ximum number of calls that the Annex keeps in the Call History table When this number is reached the Annex starts to overwrite the information If this value is set to 0 no call history is kept For more information about the Call History Table refer to the Model 5399 Remote Access Concentrator Network Administrator s Guide for UNIX Using Push Buttons The SNMP Settings window uses the following push...

Page 168: ...am book ch10 4 Tue May 6 13 24 47 1997 Annex Manager User Guide Chapter 10 Setting SNMP Traps 10 4 Part 2 Setup Mode ...

Page 169: ...nections Setup mode provides access to the Remote Address Window Using the Remote Address Window The Remote Address window Figure 11 1 allows you to assign consecutive remote addresses to an Annex ports or B channels for SLIP or PPP connections Displaying the Window To display the window select Remote Address from the Setup option button Figure 11 1 Remote Address Window WARNING ...

Page 170: ...individual ports or channels using other methods admin na or Customized mode are non consecutive this field and the Last Remote Address field are blank If you change the First Remote Address and click Apply the IP address you entered is assigned to the first port or channel of the Annex you selected in the main window Subsequent ports or channels are then assigned IP addresses numbered consecutive...

Page 171: ... is made to determine the node portion in the assignment of IP addresses However the last octet cannot exceed 255 For example ifa16portAnnexisselectedandthestartingremoteaddress is 132 245 33 254 you will receive an error message reading Last Remote Address Out of Range No addresses are assigned Using Push Buttons sets the changes you made in this window and in windows that have an OK button displ...

Page 172: ...am book ch11 4 Tue May 6 13 24 47 1997 Annex Manager User Guide Chapter 11 Assigning Remote Addresses 11 4 Part 2 Setup Mode ...

Page 173: ...nexes We recommend that you use the Edit Modem window Figure 12 1 to change modem definitions However you can use Edit Configuration from the Annex Manager Configure menu for the same purpose This chapter includes Understanding the Edit Modem Window Creating and Changing Modem Definitions Understanding the Modem Database Editing the Configuration File Displaying the Window To display the Edit Mode...

Page 174: ...odem Name specifies the type of modem attached to the ports or Annexes you selected For Annexes with asynchronous ports this field automatically displays the name that appears in the Modem Name field of the Edit Async Port window For ISDN Primary Rate Annexes it displays the internal modem name from the Annex configuration file If this field displays an existing modem name Connect Status String Di...

Page 175: ...sts all successful connect messages that the modem can return You can enter up to 80 status codes Dialin Setup Command contains the command the Annex sends to incoming modem ports before the first user connects to a port The command should include all modem steps required to answer a call coming into the Annex For example it should turn on the auto answer feature and disable inbound modem connect ...

Page 176: ...eating and Changing Modem Definitions The Edit Modem window allows you to change existing modem definitions create new ones and remove definitions from the Annex configuration file Changing Definitions for Annexes with Asynchronous Ports To edit or create a new definition for Annexes with asynchronous ports 1 From the Async Ports window click Edit Port to display the Edit Async Ports window and ch...

Page 177: ...confirmation window appears Figure 12 2 You can click to continue or to return to the window Figure 12 2 Modem Definition Confirmation Window If you create a new modem definition or edit one that exists in the Annex configuration file your changes modify the current file If you edit a definition for which defaults exist Annex Manager copies the definition and places it in the Annex configuration f...

Page 178: ...w 4 Click A confirmation window appears Figure 12 3 You can click to continue or to return to the window Figure 12 3 Modem Definition Confirmation Window If you edit a modem definition that exists in the Annex configuration file your changes modify the current file If you edit a definition for which defaults exist Annex Manager copies the definition and places it in the Annex configuration file Yo...

Page 179: ...e definitions you created or modified You cannot remove Annex Manager default definitions since they exist in include files 3 In the Modem Name box enter the name of the modem whose definition you want to remove 4 Click A confirmation window appears Figure 12 4 You can click to continue or to return to the window Figure 12 4 Remove Modem Definition Confirmation Window When you click Annex Manager ...

Page 180: ... The Annex Manager modem database consists of modem definitions stored in the Annex configuration file and in include files Annex Manager Setup mode gives you access to The Modems section of the Annex configuration file The Annexes you select must use the same configuration file on the same host and must use the same address for current and default boot hosts The configuration file does not have t...

Page 181: ...values in the configuration file include file definitions retain their original values Creating New Modem Definitions You can create new modem definitions using the Edit Async Port continued window Figure 7 3 on page 7 15 and Edit Modem window Figure 12 1 If you enter a new name in the Modem box of the Edit Async Port window Annex Manager creates a definition with default values in the Annex confi...

Page 182: ...ion file Figure 12 6 The Annexes you select must use the same configuration files If you select Annexes that use different configuration files you cannot edit the files Figure 12 6 Configuration File Window Annex Manager identifies the configuration file by querying the Annex copying the file to a local host and launching an editor with the file You must define the editor you want to use in the ED...

Page 183: ...ation file appears 2 Change add or remove modem definition information 3 Save and close the file When you end an editing session Annex Manager displays a window Figure 12 7 informing you that you changed the configuration file Figure 12 7 Edit Configuration Window You can select to update the file or to leave it unchanged When you complete this window Annex Manager copies the file to its original ...

Page 184: ...am book ch12 12 Tue May 6 13 24 47 1997 Annex Manager User Guide Chapter 12 Editing Modem Definitions 12 12 Part 2 Setup Mode ...

Page 185: ...urity window controls port security systems for the Annexes you selected in the main window This chapter includes Understanding the Security Window Selecting Security Window Settings Displaying the Window To display the Security window Figure 13 1 select Security from the Setup field Figure 13 1 Security Window ...

Page 186: ...es the ACP security server including security for AppleTalk CLI IPX and SLIP PPP connections for the ports or calls you selected Modem Ports and Non modem Ports do not apply for ISDN Primary Rate Annexes WAN Calls does not apply for Annexes with asynchronous ports The PPP Security Protocol box defines the security check that the Annex requires before it starts the network control protocol You can ...

Page 187: ... acp_restrict file The VCLI box provides Security buttons The On and Off buttons for the Security field control user validation on virtual CLI connections to an Annex If you select the On button the Annex uses the same user name and password validation for virtual CLI connections as it does for CLI security If the Annexes you chose currently use this security system the On button for Modem Ports N...

Page 188: ... modem Ports On and Off buttons selected the enable_security parameter was set to enabled If you select either Off button Annex Manager deactivates security but does not change the enable_security setting 3 Click TheResetParameterswindow Figure 13 2 appearsifyouselected the Confirm Auto Reset option from the pull down menu and if the settings you changed require Annex Manager to reset Annexes If y...

Page 189: ...pleTalk IP IPX and LAT protocols This chapter includes Using the AppleTalk Window Using the IP Window Using the IPX Window Using the LAT Window Using the AppleTalk Window The Annex Manager AppleTalk window Figure 14 1 allows you to define a zone for the Annexes you selected in the main window Displaying the Window To display the AppleTalk window select AppleTalk from the Setup field Figure 14 1 Ap...

Page 190: ...cters You must use spaces to separate words e g general engineering lab To escape embedded spaces use the backslash Using Push Buttons The AppleTalk window uses the and pushbuttons Fordetailedinformationaboutthesebuttons seeChapter 5 Setup Mode Basics Changing AppleTalk Window Settings Changing Settings You can enter new values for the Default Zone field of the AppleTalk window 1 Display the Apple...

Page 191: ...s Annex Manager User Guide Part 2 Setup Mode Using the IP Window The IP window Figure 14 2 allows you to specify addresses and IP information for the Annexes you selected in the main window Displaying the Window To display the IP window select IP from the Setup field Figure 14 2 IP Window WARNING ...

Page 192: ...s in decimal notation You can use this field only when you select a single Annex in the main window Subnet Mask contains the IP subnet mask The initial display of the field is based on the network portion of the Annex IP address Entering an incorrect Subnet Mask can cause routing problems The Interface Routing box allows you to specify RIP versions Accept RIP version controls the RIP versions that...

Page 193: ... can enter new values for the IP window address and change selections for its RIP fields 1 Display the IP window 2 Enter new values or change existing ones 3 Click TheResetParameterswindow Figure 14 3 appearsifyouselected the Confirm Auto Reset option from the pull down menu and if the settings you changed require Annex Manager to reset Annexes If you did not select Confirm Auto Reset Annex Manage...

Page 194: ...pleTalk IP IPX and LAT Windows 14 6 Part 2 Setup Mode Using the IPX Window The IPX window allows you to specify the type of IPX frame used by the Annexes you selected Displaying the Window To display the IPX window Figure 14 4 select IPX from the Setup field Figure 14 4 IPX Window WARNING ...

Page 195: ... IPX packets on the Ethernet interface You can select 802 2 802 3 SNAP or Ethernet II Using Push Buttons The IPX window uses the and push buttons For detailed information about these buttons see Chapter 5 Setup Mode Basics Selecting IPX Window Settings Changing Settings You can change the Frame Type of the IPX window 1 Display the IPX window 2 Select a new value 3 Click Annex Manager sets the Fram...

Page 196: ...LAT Windows 14 8 Part 2 Setup Mode Using the LAT Window The LAT window allows you to view and change server names and group codes for the Annexes you selected that use the LAT protocol Displaying the Window To display the LAT window Figure 14 5 select LAT from the Setup field Figure 14 5 LAT Window WARNING ...

Page 197: ...e group codes that can access local services offered by an Annex To access these services the Annex must have at least one enabled group code that matches the service s group codes You can enter all none a series of numbers separated by commas e g 1 5 7 or a range of numbers separated by dashes e g 1 5 200 255 You can use any number between 0 and 255 Virtual CLI Group Codes specifies remote group ...

Page 198: ...ormation about these buttons see Chapter 5 Setup Mode Basics Entering LAT Window Settings Entering Settings You can change the fields of the LAT window 1 Display the LAT window 2 Enter new values for the LAT server and or group codes For detailed information about the LAT window see Understanding the LAT Window earlier in this chapter 3 Click Annex Manager sets the new values you entered Apply Res...

Page 199: ...is chapter explains each group delivered with the system and gives you directions for creating new groups It includes Working with Parameter Groups Creating Parameter Groups Working with Parameter Groups When you select Pre defined Groups from the Parameter Options button in the main window you can choose one of the following groups AppleTalk Basic_Annex Basic_Async_Port Call_Defaults Channel Cmd_...

Page 200: ... PRI_Line Printer_Port Routing SLIP Security Sync_Call_Defaults SysLog T1_DS0 T1_DS1 TMux TN3270 Time_of_Day VCI_Interface Virtual_CLI To see all parameters included in a particular group select it from the list and click the mouse twice For information about a particular parameter select the parameter and click the mouse twice or refer to Chapter 22 Annex Parameters ...

Page 201: ...Groups option This section includes Displaying the User Defined Parameter Groups Window Understanding the User Defined Parameter Groups Window Format Creating or Modifying a User Defined Group Displaying the User Defined Parameter Groups Window Displaying the Window The User Defined Parameter Groups command does not depend on information you enter in the main window To display the window 1 Move th...

Page 202: ...s 15 4 Part 3 Customize Mode Figure 15 1 User Defined Parameter Groups Window Understanding the User Defined Parameter Groups Window Format The User Defined Parameter Groups window consists of a parameter group list a parameter list a work area box and push buttons This section explains each area in the window ...

Page 203: ...oosing individual parameters you can use the Parameters box and the Work Area box You do not have to use the Parameter Groups box Using the Parameters Box The Parameters box includes an option button and the list box The option button controls the parameter list that displays below it You can select one of the following options The Annex Only List option includes all parameters excluding port para...

Page 204: ...lick onany parameter in theParameters orWork Area box to display a help message about the parameter Using the Work Area Box The Work Area box displays the parameters in an existing group and stores the parameters you select in the Parameter Groups and Parameters boxes You can select one or more parameters from the Work Area box and choose to remove the selected parameters from the list and change ...

Page 205: ...se this button the Name Entry window displays displays a window explaining the User defined Parameter Groups command removes the User defined Parameter Groups window from your display Creating or Modifying a User Defined Group You can create your own groups or modify existing ones with the User defined Parameter Groups command Creating a Group To create a new group 1 Move the pointer to the Option...

Page 206: ...ter Groups window Modifying a Group To modify an existing group 1 Move the pointer to the Options menu and select User defined Parameter Groups The User defined Parameter Groups window displays see Figure 15 1 on page 15 4 2 Select an existing group from the Parameter Groups box and click or double click on the group name The group parameters appear in the Work Area box 3 Select the parameters you...

Page 207: ...ze Mode 4 Choose All parameters in the Work Area box become part of the modified group If you change a group in the Work Area box and click without pressing a Confirmation window appears You can then click to continue or to return to the Work Area box You can modify only those groups that you created Modify Close Modify OK Cancel ...

Page 208: ...am book ch15 10 Tue May 6 13 24 47 1997 Annex Manager User Guide Chapter 15 Using and Creating Parameter Groups 15 10 Part 3 Customize Mode ...

Page 209: ...Parameter Values Changing Parameter Values Identifying Errors Before You Use Show and Set Commands The Show and Set commands are based on information you enter in the main window Before you use Show or Set you need to 1 Create an Annex list and select one or more Annexes from the list Show and Set display information only for connected Annexes that you select 2 Choose a Parameter Option The approp...

Page 210: ...dow Format Viewing Parameter Values Displaying the Show Window Displaying the Window The Show command originates in the main window or in the Configure menu To use this command 1 Create an Annex list For details about creating lists refer to Chapter 4 Using the Main Window 2 Select the Annexes and parameter groups or individual parameters you want to include 3 Choose or move the pointer to the Con...

Page 211: ... Manager User Guide Part 3 Customize Mode The example below is the Show window for the Basic_Annex group Figure 16 1 Show Window In this example the Show window displays information for each Annex you selected This window includes all parameters that you selected and a value for each parameter ...

Page 212: ...ameter names and current values Entering Port and Channel Information The parameters you choose in the main window determine whether you need to enter port or channel information for Show If you select parameters that require this information you can select a port or channel type and enter port or channel numbers in fields located below the Output box Entering Port Channel Types and Port Channel N...

Page 213: ...ection for each Annex you selected In Figure 16 1 a line of asterisks separates information about two Annexes All parameters included in a group or all parameters you selected Parameters in groups display in the order in which they appear in the group If you choose a parameter that requires port or channel information and you enter more than one port or channel number the output box displays a sep...

Page 214: ...and removes the Show window from your display Viewing Parameter Values Displaying Values To check parameter values with the Show command 1 Select the level of detail you need using the Verbose Output button When you select Verbose Output the output box includes parameter names MIB definitions default values and current values If you do not select it the output box includes only parameter names and...

Page 215: ... the window and gives instructions for changing parameter values It includes Displaying the Set Window Understanding the Set Window Format Changing Parameter Values Displaying the Set Window Displaying the Window The Set command originates in the main window To display the Set window 1 Create an Annex list For details about creating lists refer to Chapter 4 Using the Main Window 2 Select the Annex...

Page 216: ...24 47 1997 Annex Manager User Guide Chapter 16 Viewing and Changing Parameters 16 8 Part 3 Customize Mode The following example is a Set window that shows the Basic_Annex group values for more than one Annex Figure 16 2 Set Window ...

Page 217: ...nnel Types and Port Channel Numbers To select a port channel type and enter port channel numbers 1 Hold the mouse on the option button that displays Async Ports The menu displays Async Port s Printer Port s Enet Port s DS0 Channel s and WAN Module 2 Highlight the port or channel type you want and release the button You must enter a port or channel type that matches your Parameter Options selection...

Page 218: ...You can highlight any parameter name or the corresponding value field and click or to display a message about the parameter Text fields or option buttons follow each parameter name If the Annexes or ports channels you selected have the same value these fields and buttons display that value Once you select the check button you can enter new values or select new options here The Display Differences ...

Page 219: ...n the marked parameters to confirm your changes Messages related to this operation appear in the box Message boxes contain error messages if you enter incorrect values if Annex Manager cannot find values for parameters if the process times out and Annex Manager cannot set values for all marked parameters or if you enter an incorrect format for fields that require an integer or an IP address For mo...

Page 220: ...m the message box and deselects marked parameters It does not change values displayed in the work area displays the standard File Selection window You can enter a file name in the Selection field and click to store the contents of the Set window output box or click to return to the Set window displays a window explaining the Set command removes the Set window from your display You can leave the wi...

Page 221: ...ion button and enter a port or channel number in the field next to the port channel type 3 Choose The Work Area displays values for the parameters you selected The Message Box lists each parameter name You can skip this step if you do not want to see current values If you selected Annexes ports or channels that do not have the sameparametervalue the buttondisplaysintheWork Area of the Set window Y...

Page 222: ...r drag the cursor through a range of check buttons for each parameter you want to change The check button appears filled This marks each parameter that is to change 5 Enter new values or select new options for any marked parameter 6 Choose This step triggers several operations A Confirmation window Figure 16 4 displays allowing you to check your work before values change You can choose to return t...

Page 223: ...ocess or to return to the Set window If you did not select Confirm Auto Reset Annex Manager resets Annexes without notifying you Figure 16 5 Set Command Reset Parameters Window Set changes marked parameters that have valid values For parameters that did not change the message box lists error conditions For more information about errors see Identifying Errors in this chapter The work area displays ...

Page 224: ...pear if you Do not enter complete information Select an unreachable Annex Do not enter port or channel information and then select a parameter group or list that requires this information Select a port or channel type that does not match one or more parameter types For example a warning window displays if you choose Printer port type and the Basic_Async_Port group or if you enter a port or channel...

Page 225: ...eter when you use Set Communication with the Annex times out You choose and the Set operation cannot change one or more marked parameters The message box lists all marked parameters with error messages for those that could not change In addition the Set complete with errors message appears This message indicates that Annex Manager completed Set processing but due to error conditions changed some b...

Page 226: ...am book ch16 18 Tue May 6 13 24 47 1997 Annex Manager User Guide Chapter 16 Viewing and Changing Parameters 16 18 Part 3 Customize Mode ...

Page 227: ...Annex parameter values for backup or to apply a special configuration This chapter describes the Script commands It includes Viewing Script Contents Creating New Scripts Changing Annex Values Using Scripts Annex Manager provides predefined scripts that you can use to reset Annex parameters to their factory default values View Script displays the contents of predefined or site specific scripts Exec...

Page 228: ...he terminal port editing parameters If you use framed protocols PPP IPX etc you may want to leave these parameters at their default settings Dedicated_Port contains port parameters for dedicated port mode Modem contains port modem configuration parameters Modem_Internal contains port modem configuration parameters for the CSMIM MODMIM product and other products with internal modems Nameserver cont...

Page 229: ...ts The View Script command displays the contents of any existing script You can use this command to determine whether you need to create a new script to check the contents of scripts delivered with Annex Manager or to verify the contents of scripts you created This section includes Displaying the View Script Window Understanding the View Script Window Format Displaying Script Contents Displaying t...

Page 230: ...ts 17 4 Part 3 Customize Mode The following example shows the View Script window Figure 17 1 displaying the contents of a script Figure 17 1 View Script Window Understanding the View Script Window Format The View Script window allows you to select or enter a path to display details about a single existing script ...

Page 231: ... enter the path of another directory The Selection field below the Script List box displays the default script directory When you choose a script from the list box this field changes to display your selection If you need to display a script stored in another directory you can enter a path here The Script Contents box displays the script listed in the text field with the name of the script in paren...

Page 232: ...eturn to this window to verify your work Displaying Script Contents Using the View Script Command The View Script command displays all parameter values in the script you select To view a script 1 Select View Script from the Commands menu The View Script window appears see Figure 17 1 on page 17 4 2 Select a single script from the Script List box The field below this box displays your selection You...

Page 233: ...ns youcancreateascriptforanyAnnexparameters except the Internet address inet_addr the administrative password password the port password port_password the access control protocol key acp_key the Local Area Transport key lat_key the option key option_key and the virtual CLI password vcli_password parameters This section includes Displaying the Create Script Window Understanding the Create Script Wi...

Page 234: ...window originates in the File menu To display the window 1 Select a single Annex from the main window 2 Hold the mouse button on the File menu and choose Create Script The Create Script window appears Figure 17 2 You can select Create Script from the menu first and then return to the main window to select an Annex The order in which you perform these steps does not affect processing Figure 17 2 Cr...

Page 235: ...ters you chose in the main window For example if you chose the Basic_Annex group each parameter in the group and the values for the Annex you selected become the new script All Parameters creates a script from all parameters of the Annex you selected including port and channel parameters All Annex Only Parameters creates a script from the Annex parameters excluding port and channel parameters All ...

Page 236: ...t Entry window appears first followed by the Script File Selection window For detailed information about these windows see Creating a Script in this chapter Reading the Message Box The Create Script window message box includes the status and error messages that result from the script creation process After you complete the port entry window and or the file selection window this message box monitor...

Page 237: ...r a file name in the Selection field and click to store the contents of the Create Script window message box or click to return to the Create Script window displays a window that explains the Create Script command removes the Create Script window from your display Creating a Script You can use Create Script to select the parameters and values you want to save in a script Using the Create Script Co...

Page 238: ... All DS0 Channel Parameters All WAN Module Parameters and All Enet Parameters options The Main Windows Parameters option and a main window parameter option that includes one or more port or channel parameters The All Parameters option If you selected All Annex Only Parameters or non port parameters from the main window the Script File Selection window displays he Script Port Entry window does not ...

Page 239: ...numbers for any highlighted type For example if the configuration has no printer ports the Printer Port s field does not accept port numbers Buttons that allow you to define wildcard characters If you entered a single port or channel number in all fields above you can create a script with wildcard indicators Use the specified port number uses only the port or channel numbers you entered as part of...

Page 240: ...ure 17 4 Script File Selection Window The Script File Selection window displays the default script directory It allows you to Overwrite an existing script that you created previously by selecting its name When you select an existing script name a window appears that allows you to verify your choice You cannot overwrite a script that someone else created Enter a new script name When you choose Anne...

Page 241: ...ION V1 0 FORMAT Parameter Name Port Type Port Number Value For example you might enter lock_enable none 0 enabled Script files accept 0 in the Port Channel Number field when you select non port parameters A port or channel number or an asterisk to specify a wildcard port in the Port Channel Number field Asy ptr eth 2 for DS1 ports or none for All Annex Only parameters in the Port Channel Type fiel...

Page 242: ... Execute Script Window Format Executing a Script Displaying the Execute Script Window The Execute Script window originates in the Configure menu You can execute an existing script for one or more Annexes Displaying the Window To display the window 1 Select one or more reachable Annexes from the main window 2 Hold the mouse button on the Configure menu and choose Execute Script The Execute Script w...

Page 243: ...nexes you selected in the main window Using the List Box and Text Field This window uses a list box text field and a message box The Script List box displays all files in the Annex Manager default script directory You can select any script displayed here The text field below the Script List box initially displays the default script directory When you choose a script from the list box this field ch...

Page 244: ...ncorrect format or if processing times out the message box informs you about error conditions For more information see Identifying Errors on page 17 22 Using Push Buttons Execute Script provides the following push buttons activates the execution process When you use this button the message box displays status and error messages and Annex Manager applies the eligible values in your script to the An...

Page 245: ...ript window from your display Executing a Script You can use Execute Script to apply the parameter values of a script to one or more Annexes Using the Execute Script Command To execute a script 1 Select one or more reachable Annexes in the main window 2 Select Execute Script from the Configure menu The Execute Script window appears see Figure 17 5 on page 17 17 3 Select the script name you need Yo...

Page 246: ...cript wildcard indicator The window highlights only the port or channel types that need numbers You can Enter one or more port or channel numbers a range of numbers or all for any highlighted type Choose to return to the Execute Script window Choose to execute the script If you select a script with wildcard indicators and do not enter a port or channel number here Annex Manager executes the script...

Page 247: ...pt Confirmation Window You can choose to execute the script or to return to the Execute Script window The Reset Parameters window Figure 17 8 appears if you selected the Confirm Auto Reset option from the pull down menu and if the parameters changed by the script require Annex Manager to reset Annexes If you did not select Confirm Auto Reset Annex Manager resets Annexes without notifying you Figur...

Page 248: ...rs Execute Script Command Errors Create Script Command Errors Create Script displays warning windows if you Use the Main Window Parameters option for a list with more than one Annex and do not select an Annex and a main window parameter option Select an option that does not match the Annex or parameters you select in the main window For example a warning appears if you select the All Sync Port Par...

Page 249: ...a port or channel number that does not exist in a selected Annex The message box includes error information when Annex Manager cannot read or find values for one or more parameters Communication with the Annexes you selected times out The Create Script operation does not use one or more parameters or finds specified parameters that are not eligible for scripts In this case the Script creation comp...

Page 250: ...ation when Annex Manager cannot find the value of one or more parameters The Execute Script operation does not use one or more parameters or finds specified parameters that are not eligible for scripts In this case the Script execution complete with errors message appears Annex Manager does not execute a script if you enter an incorrect format for an IP address or for an integer ...

Page 251: ...arameter Values Identifying Errors Comparing Parameters and Values The Compare command lets you match parameters and values for two Annexes an Annex and a script or two scripts You can use this command to check existing values before you change an Annex configuration This section includes Displaying the Compare Window Understanding the Compare Window Format Selecting Annexes and Scripts for Compar...

Page 252: ...you want to compare two Annexes or an Annex and a script You can create a list before you display the Compare window or you can display the Compare window first return to the main window to create the list and choose Compare again If you want to compare two scripts you can skip this step 2 Move the pointer to the Configure menu and choose Compare The Compare window appears Figure 18 1 shows the Co...

Page 253: ...u can compare and copy parameters as long as they exist in both Annexes and scripts you select For example you cannot copy parameters from a Primary Rate Annex to an Annex that has asynchronous ports because the parameters sets in each Annex are not the same Choosing Compare Options Compare uses option buttons at the top of the window to control the contents of list boxes and the fields The left h...

Page 254: ...pare all parameters excluding port parameters Async Port Params to compare asynchronous port parameter values Printer Port Params to compare printer port parameter values Enet Port Params to compare Ethernet port parameter values WAN Module Params to compare WAN Module parameter values The message below these buttons summarizes your selections If you chose Annex vs Annex and the Main Window Params...

Page 255: ...t Type Button and Fields Thecomparisonoptionyouselectdeterminesthekindsofboxesandfields that display When you compare Two Annexes each box displays your Annex lists a port type button and a port number field for each Annex list A message appears below the Compare Options reminding you that the comparison is based on your selections in the main window You can select one Annex from each box and a po...

Page 256: ... of the script The port type button and port number field display below the Annex list box You can select a single Annex from the list If the script you select contains wildcard ports you must enter a port type and number The script selection field displays below the Script List box If you select an existing script its directory and file name appear in the field If you want to compare a script sto...

Page 257: ...use a script that is not stored in the default directory you can enter its directory and name in either selection box Figure 18 4 shows the Compare window for two scripts Figure 18 4 Compare Window for Two Scripts Reading the Comparison Output box The Comparison Output box reports the differences in parameter values between the Annexes and scripts you select If parameter values differ or if a para...

Page 258: ...differences found If you repeat the Compare command for another combination of Annexes and scripts new information replaces the original display If values differ and you select The Output Box includes Annex vs Annex Parameter name followed by each Annex name port number if necessary and the parameter value Annex vs Script Parameter name followed by the Annex name and value and the file name and va...

Page 259: ...indow displays a window explaining Compare removes Compare from your display Comparing Parameters Values Using the Compare Command To use the Compare command 1 Select Compare from the Configure menu The Compare window displays see Figure 18 1 on page 18 2 2 Choose the Compare Options button and select the comparison type you need The list boxes and fields change depending on the option you choose ...

Page 260: ...d the same Annex in both list boxes you must select different port numbers here If you selected Annex vs Annex go to step 6 5 Choose an existing script from each Script List box that displays or enter a script stored in another directory in the script selection field If you selected the Annex vs Script option and the script you use has wildcard indicators the comparisons are based on the port numb...

Page 261: ...ernet address inet_addr the administrative password password the port password port_password theaccesscontrolprotocolkey acp_key the Local Area Transport key lat_key the option key option_key and the virtual password vcli_password parameters This section includes Displaying the Copy Window Understanding the Copy Window Format Copying Parameter Values Displaying the Copy Window Displaying the Windo...

Page 262: ... 18 Comparing and Copying Parameters and Values 18 12 Part 3 Customize Mode Figure 18 5 Copy Window Understanding the Copy Window Format The Copy window uses an option button Annex list boxes port information and a message box This section explains each Copy window element ...

Page 263: ...u select Async Port Params copies asynchronous port parameter values from one Annex and port Printer Port Params copies printer port parameter values from one Annex and port Enet Port Params copies Ethernet port parameter values from one Annex and port WAN Module Params copies DS1 line parameter values from one Annex and port The message below these buttons summarizes your selections If you chose ...

Page 264: ...ow to add an Annex as well In this window however you can select more than one Annex If you intend to copy port parameter values from one port to another on the same Annex you need to select the same Annex in both boxes Selecting Port Types The port type button defines the kinds of port parameters that are to be copied All Annexes involved in the copy process must use the same port type This butto...

Page 265: ...cific ports separate port numbers with commas or indicate a range of numbers using dashes For example you might enter 1 3 8 to specify three ports or 1 3 8 to specify ports 1 through 3 and port 8 Reading the Message Box The Copy window message box monitors copy operations It includes A status message indicating that Annex Manager is obtaining parameter values from one Annex For example if you sele...

Page 266: ...ction window which includes the default text directory You can enter a file name in the Selection field and click to store the Output box contents or click to return to the Copy window displays a window that explains the Copy command removes the Copy window from your display Copying Parameter Values Using the Copy Command You can use the Copy command to copy parameter values from one Annex or port...

Page 267: ...spond to the port type in the parameters you selected in the main window If you selected an option other than Main Window Params skip this step and go to step 6 6 Enter a port number in the field next to the port type button if you selected Main Window Params that require port information Async Port Params Printer Port Params WAN Module Params or Enet Port Params If you chose Main Window this port...

Page 268: ...and Confirmation Window Themessageboxdisplaysstatusmessages and ifnecessary itlists error messages For more information about errors see Identifying Errors in this chapter The Reset Parameters window Figure 18 7 appears if you selected the Confirm Auto Reset option from the pull down menu and if the parameters you are copying require Annex Manager to reset Annexes If you did not select Confirm Aut...

Page 269: ...ct an Annex or a script from list boxes that contain more than one Annex or script Use the Annex vs Annex option for a list with more than one Annex and do not select an Annex and parameters Use Annex vs Annex do not enter port information and then select parameters that require this information Use Script vs Script and select the same script in each window Select a port type that does not match o...

Page 270: ...w Params option and do not select parameters Use the Main Window Params option and do not enter port information for parameter groups that require this information Message Box The message box includes error information when Annex Manager cannot read or copy one or more parameters You choose and the Copy operation cannot change one or more parameters The message box includes error messages for thos...

Page 271: ...ng an Annex Configuration Broadcasting Messages Configuring WAN Internal Modems For detailed information about Annex configurations refer to your Annex hardware guide Booting Annexes The Boot command allows you to boot one or more active Annexes You can choose to boot Annexes immediately set a time in the future for the boot to take place and send an explanatory message to all users This section g...

Page 272: ...tes in the Configure menu To display the window 1 Create an Annex list in the main window For more information about Annex lists see Chapter 4 Using the Main Window 2 Select one or more Annexes from the list 3 Hold the mouse button on the Configure menu choose Boot and release the mouse button The Boot window appears as shown in Figure 19 1 This figure shows the Boot window for a single Annex Figu...

Page 273: ...mand addresses source time image and message to users The Annex Manager standard push buttons activate the command This section describes each window element Defining Boot Options You can choose one of the following Boot Option buttons Immediate boots selected Annexes as soon as you activate the command Delayed accepts a Boot Time at which the boot occurs You can enter more than one delayed reques...

Page 274: ...the message includes the boot time For Abort the message indicates cancellation Using Text Fields The Boot window text fields control the Boot command addresses source time image and message to users Pref Load Addr stores the address from which the boot command loads the image Pref Dump Addr accepts the address to which Boot dumps the current image You can use this field only when you select the D...

Page 275: ... The Preferred Load Address Preferred Dump Address and Boot Image fields use the default addresses and image If you select A single Annex Boot displays the default addresses and image Two or more Annexes with the same preferred load and dump address and default image Boot displays these addresses and image Two or more Annexes with different default values for load or dump addresses and images Boot...

Page 276: ...he boot time and amount of time until the boot takes place For example if you schedule a boot for 11 50 a m on Thursday the message would say Annex emma shutdown message from NA by SNMP network manager Annex emma going down in 57 minutes 11 50 Thu Abort to stop a scheduled boot the message indicates that the boot is cancelled For example if you cancel the boot scheduled for 11 50 a m on Thursday t...

Page 277: ...information about each option 4 Enter information in the Boot window text fields Text fields may be required or may not be available depending on the Boot Option you choose If you selected Immediate Diagnostic or Save in Flash you can enter text in the Pref Load Addr Boot Image and Boot Message fields Delayed you must complete the Boot Time field You can enter a time in HH MM format or you can ent...

Page 278: ...enter text in the Boot Message field If you select a single Annex Pref Load Addr Pref Dump Addr and Boot Image display the current addresses and image of the Annex If you select multiple Annexes whose values differ for Pref Load Addr Pref Dump Addr or Boot Image values do not appear If you leave these fields blank Boot uses the current load and dump addresses for each selected Annex and uses the v...

Page 279: ...smission was unsuccessful If you boot an active Annex its status in the main window list changes to NOT REACHABLE In fact although the Annex is not available while boot processing takes place a successful boot does restore the Annex on your network You can use Verify Annex State to restore the display Resetting an Annex Configuration You can use the Reset command to change a specific Annex or port...

Page 280: ... Window The Reset command originates in the Configure menu To display this window 1 Create an Annex list in the main window For more information about Annex lists see Chapter 4 Using the Main Window 2 Select one or more Annexes from the list 3 Hold the mouse button on the Configure menu choose Reset and release the mouse button The Reset window appears Figure 19 3 Figure 19 3 Reset Window ...

Page 281: ... Ports Hard All T1 DS1 Ports Soft All Internal Modems Individual Ports All InternalModems IndividualInternalModems IndividualInternalModems and PRI Line options You can choose one of the following buttons All resets all items listed in the remaining buttons Annex All resets all items included in the LAT Macros Message of the Day Name Server and Security buttons All Async Ports resets the asynchron...

Page 282: ...om a Unix host to a remote node over a port in slave mode LAT resets LAT Local Area Transport parameters When you use this option existing connections keep their current values new parameter values apply only to LAT connections established after you use Reset Macros resets macros after you customize them in the Annex configuration file Message of the Day resets the file for the message that appear...

Page 283: ...al Internal Modems the menu displaysInternal Modem s IfyouchosePRI Line themenudisplays WAN Module 2 Highlight the selection you want and release the button If you chose Individual Internal Modems you do not have to select an option here If you chose PRI Line 2 displays automatically 3 Enter one or more port line or modem numbers in the field To enter specific ports or modems separate numbers with...

Page 284: ...is chapter and to the Remote Annex Administrator s Guide for UNIX Reset terminates active connections to an Annex when you use the All All Async Ports All Printer Ports All Virtual Ports All T1 DS1 Ports Hard All T1 DS1 Ports Soft All Internal Modems Individual Ports and Individual Internal Modems options IfyouselectedtheIndividualPorts ortheIndividualInternal Modems option continue to step 4 For ...

Page 285: ...ex a warning window appears This window lists the Annexes that were reset and if necessary lists Annexes where Reset was unsuccessful Broadcasting Messages The Broadcast command lets you send messages to all ports on one or more Annexes You can use this command to communicate quickly with all terminals connected to the Annexes you select This section includes Displaying the Broadcast Window Unders...

Page 286: ...e an Annex list in the main window For more information about Annex lists see Chapter 4 Using the Main Window 2 Select one or more Annexes from the list 3 Move the pointer to the Configure menu and choose Broadcast The Broadcast window appears Figure 19 5 Figure 19 5 Broadcast Window Understanding the Broadcast Window Format TheBroadcast windowusesradiobuttons amessagebox andpushbuttons to transmi...

Page 287: ...you select Virtual sends your message to all virtual connections on selected Annexes When you choose a destination you can enter message text Writing a Message The Broadcast window Broadcast Message box lets you enter the text of your message Your message can Use 1 to 128 characters Contain any number of lines You can change the Broadcast window size to display a message that exceeds the standard ...

Page 288: ...l terminals connected to an Annex To send a message 1 Create an Annex list and select one or more Annexes For more information about creating lists refer to Chapter 4 Using the Main Window 2 Select Broadcast from the Configure menu The Broadcast window displays see Figure 19 5 on page 19 16 3 Choose the Broadcast Destination you need You can select All Async or Virtual For detailed information ref...

Page 289: ...AN Internal Modems Window Understanding the Set WAN Internal Modems Window Changing Internal Modem Status Displaying the Set WAN Internal Modems Window Displaying the Window The Set WAN Internal Modems command appears in the Configure menu To display the window 1 Create an Annex list in the main window For more information about Annex lists see Chapter 4 Using the Main Window 2 Select one or more ...

Page 290: ... 4 Control and Status Commands Figure 19 6 Set WAN Internal Modems Window Understanding the Set WAN Internal Modems Window You can use the Set WAN Internal Modems window to view the current status of individual internal modems or to change the status of one or more modems This window uses a list box and radio buttons ...

Page 291: ...dicates that the modem is set to this status to make it unavailable Used indicates that the modem is handling a call Failed indicates that the modem is not working Using the Modem Status Button The Modem Status button allows you change the status of an internal modem You can select Available to make a modem available when its current status is Busy or Failed You cannot choose Available for modems ...

Page 292: ...nu The Set WAN Internal Modems window displays 3 Select one or more modems from the Modems List box The system highlights your choices 4 Choose the Modem Status you need If you are setting modems to Available you can skip this step 5 Click Annex Manager changes status for the modems you selected Using Push Buttons The Set WAN Internal Modems window uses the following push buttons activates the WAN...

Page 293: ...laying Asynchronous Port Status Information Displaying Interface Status Information Displaying PRI Channels Status Information Displaying PRI Internal CSU Status Information Displaying T1 Internal CSU Status Information Displaying T1 Modem Calls Status Information Displaying DVS Status Information Identifying Annexes All status windows are snapshots of current values status commands do not provide...

Page 294: ... in the Status menu To display the window 1 Create an Annex list in the main window For more information about Annex lists see Chapter 4 Using the Main Window 2 Select a single Annex from the list 3 Hold the mouse button on the Status menu choose Annex Status and release the mouse button The Annex Status window appears Figure 20 1 The name of the Annex you selected appears in the window title bar ...

Page 295: ...booted in days hours minutes and seconds Rescheds min tot displays the number of processes whose time slice expired in the last minute followed by the number of processes whose time slice expired since the Annex was booted CPU Utilization displays the percentage of CPU resources currently being used Switches min tot lists the number of context switches in the last minute min followed by the number...

Page 296: ... indicates the number of times a process was denied a memory buffer because the buffer was not available Understanding the Memory Box The Memory box gives you statistics about the memory of an Annex Total shows the total memory measured in bytes Free indicates the amount of currently available memory Min Free provides the lowest amount of free memory that is available since the Annex was booted Av...

Page 297: ...mand provides information about one or more asynchronous ports for an Annex This section includes Displaying the Annex Async Port Status Window Understanding the Annex Async Port Status Window Viewing Asynchronous Port Status Information Displaying the Annex Async Port Status Window Displaying the Window The Async Port command originates in the Status menu To display the window 1 Create an Annex l...

Page 298: ...he window for three asynchronous ports Figure 20 2 Annex Async Port Status Window Understanding the Annex Async Port Status Window The Annex Async Port Status window displays information in the Port Totals and Port Information boxes In addition it includes a port number field Like all Annex status commands you cannot change an Annex configuration from this window ...

Page 299: ...through 3 and port 8 In addition you can enter all When you use port statistics appear Understanding the Port Totals Box Annex Async Port Status displays information in the Port Totals and Port Information boxes The Port Totals box gives you statistics for all asynchronous ports from the time the Annex was last booted or reset This box includes the following fields Num Ports displays the total num...

Page 300: ...the field displays Go flow control is allowed Stop flow control is not allowed None flow control is not applicable for this port Unknown the flow control status cannot be identified Out Flow State shows the current status of output flow control If the field displays Go flow control is allowed Stop flow control is not allowed None flow control is not applicable for this port Unknown the flow contro...

Page 301: ... protocol that is active on a port This field can display the following codes Cli indicates that this is a CLI port opened by a device connected to the port or by a connection from a host as a virtual CLI psvr indicates that this is a slave port vcli indicates that this is a virtual port dp defines a dedicated port lpd indicates that the port is using the Annex line printer daemon ppp indicates th...

Page 302: ...ync Port Status command removes the Annex Async Port Status window from your display Viewing Asynchronous Port Status Information Using the Command To display information about the asynchronous ports you entered 1 Create an Annex List in the main window and select a single Annex For more information about creating Annex lists see Chapter 4 Using the Main Window 2 Hold the mouse button on the Statu...

Page 303: ...anding the Annex Interface Status Window Displaying the Annex Interface Status Window Displaying the Window The Interface command appears in the Status menu To display the window 1 Create an Annex list in the main window For more information about creating Annex lists see Chapter 4 Using the Main Window 2 Select a single Annex from the list 3 Hold the mouse button on the Status menu choose Interfa...

Page 304: ...indow TheAnnexInterfaceStatus windowdisplaysinformationinGeneralInformation and Statistics boxes Like all Annex status commands you cannot change an Annex configuration from this window Reading the General Information Box The General Information box gives you basic interface information for the Annex you selected This box includes the following categories Intf Name provides a text description of t...

Page 305: ...can display Up or Down Last Change indicates the time at which the interface entered its current operational state Reading the Statistics Box The Statistics box displays statistics related to traffic on each interface Thisboxusesaseparatelineforinformationaboutincomingandoutgoing traffic It includes the following categories Intf Name provides a text description of the interface Octets shows the to...

Page 306: ...o errors Unknown Protocols lists the number of inbound packets discarded because of unknown or unsupported protocols Queue Length displays the number of outbound packets in the packet queue Using Push Buttons Annex Interface Status uses the following push buttons displays the standard File Selection window which includes the default text directory You can enter a file name in the Selection field a...

Page 307: ...us Window Understanding the Annex PRI Channels Status Window Viewing PRI Channels Status Information Displaying the Annex PRI Channels Status Window Displaying the Window The PRI Channels command originates in the Status menu To display the window 1 Create an Annex list in the main window For more information about creating Annex lists see Chapter 4 Using the Main Window 2 Select a single ISDN Pri...

Page 308: ... Channels Status window Figure 20 4 Annex PRI Channels Status Window Understanding the Annex PRI Channels Status Window The Annex PRI Channels Status window displays information in the Async Information and Sync Information boxes In addition it includes the Channel s fieldandSort Options buttons LikeallAnnexstatuscommands youcannot change an Annex configuration from this window ...

Page 309: ... Channel s field accepts one or more B channel numbers 1 Enter one or more B channel numbers You can separate numbers with commas or indicate a range of numbers using dashes For example you might enter 1 20 to specify two channels or 1 10 20 to specify channels 1 through 10 and channel 20 In addition you can enter all 2 Press ISDN Primary Rate Annex statistics appear see the previous Figure 20 4 o...

Page 310: ... box lists information about asynchronous or V 120 calls The Sync Information box includes information about synchronous calls Each box lists information in the following categories Channel lists the B channel number you entered in the Channel s field Call Type categorizes a call using a code and a number representing the modem or the logical connection assigned to a call The Async Information box...

Page 311: ...dow displays a window explaining the Annex PRI Channels Status command removes the Annex PRI Channels Status window from your display and returns you to the main window Viewing PRI Channels Status Information Using the Command To display Information about the PRI channels you entered 1 Create an Annex List in the main window and select a single ISDN Primary Rate Annex For more information about An...

Page 312: ...cludes Displaying the Annex PRI Internal CSU Status Window Understanding the Annex PRI Internal CSU Status Window Viewing PRI Internal CSU Status Information Displaying the Annex PRI Internal CSU Status Window Displaying the Window The PRI Internal CSU command originates in the Status menu To display the window 1 Create an Annex list in the main window For more information about creating Annex lis...

Page 313: ...l CSU Status Window Understanding the Annex PRI Internal CSU Status Window The Annex PRI Internal CSU Status window displays information in the PRI CSU Alarms PRI CSU Status and Interval Information boxes In addition it includes the Interval s field You can enter information in this field Like all Annex status commands you cannot change an Annex configuration from this window ...

Page 314: ...atistics for one or more intervals Current to see PRI Internal CSU statistics for the current interval Total to display cumulative statistics for each of the 96 intervals If you select Specified you must complete the text field described in step 2 If you chose Current or Total you can skip to step 3 2 Enter one or more interval numbers in the text field To enter specific intervals separate interva...

Page 315: ...f if the T1 engine is not receiving AIS Red History indicates whether a Red alarm occurred since the T1 Engine has been online This field displays True if an alarm occurred or False if an alarm did not occur Red reports the current status of the Red alarm This field displays On if the T1 engine is detecting loss of frame synchronization and is sending a Yellow alarm to the network The field displa...

Page 316: ...ace receivers If the engine is not detecting pulses the T1 line transmits AIS all ones unframed on the T1 network interface This field displays True when the engine is not detecting pulses and False when it is detecting pulses Loopback Mode indicates loopback status This field can display NoLoop to show that the signal is not looped through the T1 engine LocalLoop to indicate that the outoing sign...

Page 317: ...umber of BiPolar Violation BPV errors For AMI coded signals a BPV event occurs when there are two consecutive pulses of the same polarity For B8ZS coded signals a BPV event occurs when there are two consecutive pulses of the same polarity that are not part of the zero substitution code CRC Errors lists the number of CRC errors A CRC error occurs when the CRC field calculated by the installation ba...

Page 318: ...ere Error Seconds lists the number of seconds with 320 or more CRC or OOF errors Unavailable Seconds lists the number of 1 second intervals during which service was unavailable Cntrl Slip Seconds Controlled Slip Seconds lists the number of seconds with one or more controlled slips Bursty Err Seconds Bursty Error Seconds lists the number of seconds with more than one but less than 320 CRC errors Se...

Page 319: ...ndow explaining the PRI Internal CSU Status command You can save information here removes the Annex PRI Internal CSU Status window from your display an returns you to the main window Viewing PRI Internal CSU Status Information Using the Command To display information about the PRI channels you entered 1 Create an Annex List in the main window and select a single Annex For more information about An...

Page 320: ...nnex T1 Internal CSU command provides information about the Annex T1 network interface This section includes Displaying the Annex T1 Internal CSU Status Window Understanding the Annex T1 Internal CSU Status Window Viewing T1 Internal CSU Status Information Displaying the Annex T1 Internal CSU Status Window Displaying the Window The T1 Internal CSU command originates in the Status menu To display t...

Page 321: ...tatus window appears Figure 20 6 Figure 20 6 Annex T1 Internal CSU Status Window Understanding the Annex T1 Internal CSU Status Window The Annex T1 Internal CSU Status window displays information in the T1 Alarms T1 Status and Interval Information boxes In addition it includes the Interval s field You can enter information in this field Like all Annex status commands you cannot change an Annex con...

Page 322: ...istics for one or more intervals Current to see T1 statistics for the current interval Total to display cumulative statistics for each of the 96 intervals If you select Specified you must complete the text field described in step 2 If you chose Current or Total you can skip to step 3 2 Enter one or more interval numbers in the text field To enter specific intervals separate interval numbers with c...

Page 323: ...the T1 engine is not receiving AIS Red History indicates whether a Red alarm occurred since the T1 Engine has been online This field displays True if an alarm occurred or False if an alarm did not occur Red reports the current status of the Red alarm This field displays On if the T1 engine is detecting loss of frame synchronization and is sending a Yellow alarm to the network The field displays Of...

Page 324: ...chronization This field displays True if the Drop Insert Interface is receiving ones pulses and is in frame synchronization or False if the Drop Insert Interface is out of frame synchronization or not receiving pulses and is sending AIS all ones unframed Signal Loss indicates whether the T1 engine is detecting pulses on the T1 network interface receivers This field displays True if the engine is n...

Page 325: ...ics appear in this box This column displays a number from 1 to 96 Current or Total Out of Frame Errors lists the number of Out of Frame OOF events that occurred An OOF event begins when the network interface sends two of four incorrect consecutive frame synchronizing bits and ends when reframe occurs BiPolar Violations lists the number of BiPolar Violation BPV errors For AMI coded signals a BPV ev...

Page 326: ...econds with one or more controlled slips Bursty Err Seconds Bursty Error Seconds lists the number of seconds with more than one but less than 320 CRC errors Using Push Buttons The Annex T1 Internal CSU Status window uses the following push buttons displays status information about the Annex you selected displays the standard File Selection window which includes the default text directory You can e...

Page 327: ...nex T1 Internal CSU Status window appears 4 Select an Interval s option You can select Specified Current or Total If you select Current or Total go to step 5 5 Enter the interval numbers you need in the Interval s field You can enter one or more numbers a range of numbers separated by commas or dashes or all 6 Press T1 engine status information appears in the T1 Alarms T1 Status and Interval Infor...

Page 328: ...splay the window 1 Create an Annex list in the main window For more information about creating Annex lists see Chapter 4 Using the Main Window 2 Select a single Annex that contains a T1 DS1 interface from the list 3 Hold the mouse button on the Status menu and select T1 4 Choose Modem Calls and release the mouse button The Annex Modem Calls Status window appears Figure 20 7 The name of the Annex y...

Page 329: ...plays statistics for all internal modems This box includes the following categories Modem lists each modem in the Annex Total Calls provides a count of the number of times the line is seized on the modem Total Failures provides a count of the number of call failures for the modem Ring Count provides a count of the number of times the modem asserted rings on a call Offhook Count provides a count of...

Page 330: ...Status window displays a window explaining the Annex Modem Calls Status command You can save information here removes the Annex Modem Calls Status window from your display and returns you to the main window Viewing T1 Modem Calls Status Information Using the Command To display information about the T1 interface you entered 1 Create an Annex List in the main window and select a single Annex For mor...

Page 331: ...tatus Window Understanding the Annex DVS Status Window Viewing Annex DVS Status Information Displaying the Annex DVS Status Window Displaying the Window The DVS command originates in the Status menu To display the window 1 Create an Annex list in the main window For more information about creating Annex lists see Chapter 4 Using the Main Window 2 Select a single Annex that contains a tunnel from t...

Page 332: ...us window displays information in the GRE Information and the Tunnel Information boxes Like all Annex status commands you cannot change an Annex configuration from this window Understanding the GRE Information Box The GRE Information box provides statistics for GRE packets This box displays information in the Received and Transmitted fields and the Dropped Packets Info box The Received and Transmi...

Page 333: ...a count of the number of GRE packets dropped on transmit The Dropped Packets Info box provides information in the Bad Checksum field Bad Checksum provides a count of the number of GRE packets received with bad checksums Understanding the Tunnel Information Box The Tunnel Information box displays data about all active tunnels This box includes the following categories Device Type lists the interfac...

Page 334: ...o return to the Annex DVS Status window displays a window explaining the Annex DVS command You can save information here removes the Annex DVS Status window from your display and returns you to the main window Viewing Annex DVS Status Information Using the Command To display information about the tunnels you entered 1 Create an Annex List in the main window and select a single Annex For more infor...

Page 335: ...scovering Annexes using a Search Device Updating and Saving Discover Annexes Lists Using the Discover Annexes Network Window The Discover Annexes Network command can find Annexes running Annex software Release 13 2 and subsequent releases To find Annexes running software releases prior to 13 2 use the Discover Annexes Search Device command Using the Discover Annexes Search Device Window Discover A...

Page 336: ...he Discover Annexes Search Device Window Displaying the Window TheDiscover Annexes Search Device window appears in the Configure menu To display the window Move the pointer to the Configure menu and choose Discover Annexes followed by Search Device The Discover Annexes Search Device window appears Figure 20 9 Figure 20 9 Discover Annexes Search Device Window ...

Page 337: ...rent time Using Text Fields This text fields control the identification process You can complete the following fields Search Device accepts the name or IP address of any network device that stores information about nodes devices and addresses on your network You can use a device name or IP address here Discover Annexes Search Device uses the Annex Manager default community string to communicate wi...

Page 338: ... goes to a search device requests a list of addresses in its Address Translation table and attempts to communicate with each address via SNMP If communication is successful Annex Manager compares the object identifier of the device to the value of an Annex object identifier If there is a match the device is an Annex If there is no match the output box displays information about the device based on...

Page 339: ...e Annex list displayed in the main window with the Annexes displayed in the Discovery Output box When you use this button Annex Manager connects each Annex again in case there was a change in status saves the Annexes displayed in the Discovery Output box to a file When you use this button the standard File selection window displays allowing you to enter a path and file name storesthevaluesyouenter...

Page 340: ...ve the pointer to the Configure menu choose Discover Annexes and then choose Search Device The Discover Annexes Search Device window appears 2 Enter a search device name or its IP address in the Search Device field 3 Enter a number of seconds in the SNMP Timeout field Ifyoudonotcompletethisfield theprocessusesthecurrentSNMP default 4 Enter a number in the SNMP Retries field Ifyoudonotcompletethisf...

Page 341: ...e main window Annex list with the discovery list and allows you to save the discovery list in a file Updating and Saving Lists To update and save a list 1 Use Discover Annexes Search Device 2 Choose Annex Manager replaces the main window list with the discovery list and connects each Annex again in case there was a change in status 3 Choose The Annex List Selection window displays Figure 20 10 Fig...

Page 342: ...and choosing When you complete this window Annex manager saves the list For more detailed information about the Annex Manager standard File Selection window seeChapter 3 WorkingwithAnnexManager Windows Using the Discover Annexes Network Command The Discover Annexes Network command finds available Annexes on a any network and adds them to the main window Annex List box Displaying the Window To disp...

Page 343: ...etwork Internet Address accepts an IP address for the network on which Annex Manager is to find available Annexes Subnet Mask defines the network portion of the IP address Timeout defines the length of time in seconds that Annex Manager waits for a response This window includes three push buttons activates the discovery process removes this window from your display displays a separate window that ...

Page 344: ...rk window appears see Figure 20 11 on page 20 51 2 Enter an Internet Address and a Subnet Mask for the network you want to search You must complete both the Internet Address and the Subnet Mask fields 3 Enter a number of seconds in the Timeout field This field automatically displays 10 seconds It uses a 10 second default if you leave the field blank 4 Press Annex Manager displays a window informin...

Page 345: ...oadcast address When Annex Manager completes this process it displays a window informing you about the number of Annexes that were found Figure 20 13 Figure 20 13 Creating Annex List Window Annex Manager adds the Annexes it finds to the main window AnnexList box If this process found Annexes that exist in the main window list a warning window lists duplicate Annexes and does not add them to the li...

Page 346: ...am book ch20 54 Tue May 6 13 24 47 1997 Annex Manager User Guide Chapter 20 Displaying Status Information 20 54 Part 4 Control and Status Commands ...

Page 347: ...he User Datagram Protocol UDP which is part of the TCP IP protocol suite Annex Manager provides the user interface that enables Network Managers to access Annexes and their information Annex Manager uses The SNMP protocol to send queries to the agents located in each Annex Agents located on the Annexes Each agent collects information about its Annex and provides that information to the Network Man...

Page 348: ... client in the client server model The management station can run an application specifically written for the Annex and its MIBs e g Annex Manager or a generic application that communicates with other non Bay Networks devices e g SunNet Manager HP OpenView NetView for AIX The generic application must include the definitions of the MIBs supported by the Annex Through Annex Manager the management st...

Page 349: ...nex Manager transmits a get set or get next command the agent is expected to respond with an error message or with the requested data Annex Manager uses a timeout and retry mechanism to guarantee the delivery of the SNMP If a timeout occurs Annex Manager does not know whether the command was not received by the agent or whether the response from the agent was lost The agent can also generate an un...

Page 350: ... match the message string with an existing Community String list If there is no match the SNMP agent discards the message without responding to the sender Annex Manager uses one of the Community Strings defined in the Annex configuration file This file which is downloaded during Annex initialization defines up to four Community Strings If the file does not contain community strings public is used ...

Page 351: ...ow_snmp_sets Parameter The Annex default setting for the allow_snmp_sets parameter does not permit parameter value changes because the header of the set command transmits the community string in clear text which may be a security risk To allow Annex Manager to modify parameters through SNMP you must use the na or admin tools to change allow_snmp_sets to yes You cannot set this parameter using SNMP...

Page 352: ... MIBs by the Annex SNMP agent This section includes MIB Object Hierarchy Describing and Naming Objects Trap Hosts and Traps Annex Restrictions on Standard MIBs MIB Object Hierarchy MIBs define the hierarchy of managed objects MIB objects represent data that the Annex can retrieve or configuration information that it can modify Annex Manager manages Annexes by retrieving or changing the value of MI...

Page 353: ...Annex private enterprise MIB Trap Hosts and Traps TheAnnexemploystwomethodstodefinethehostaddressesituseswhen generating SNMP trap messages The first method defines up to ten static trap receivers in the configuration file using the snmp trap host syntax For detailed information about the SNMP trap host syntax see the Remote Annex Administrator s Guide for UNIX The second method loads the trap hos...

Page 354: ...sinthesupportedstandard MIBs This section lists the supported standard MIBs Table 21 1 and outlines the differences between the Annex parameters and specific standard MIB objects Table 21 1 Supported Standard MIBs MIB Name RFC Number MIB II RFC 1213 Character MIB RFC 1316 RS 232 MIB RFC 1317 Parallel Printer MIB RFC 1318 AppleTalk MIB RFC 1243 RIP version 2 MIB RFC 1389 Ethernet MIB RFC 1398 DS1 M...

Page 355: ...lined in Table 21 2 Table 21 2 RFC 1213 MIB II Objects Object Name Get Set Restrictions Read Object Limitations ifAdminStatus Read only Returns only up 1 and down 2 ifOperStatus None Returns only up 1 and down 2 atEntry Cannot create new rows None ipRouteEntry Cannot create new rows None ipRouteProto None Returns only local 2 icmp 4 and rip 8 ipRouteType None Returns only invalid 2 direct 3 indire...

Page 356: ...estrictions The Annex supports the char group with the restrictions outlined in Table 21 4 Table 21 4 RFC 1316 Character MIB Objects continued on next page Object Name Restrictions Read Object Limitations dot3StatsSQETestErrors Not supported None dot3StatsInternalMac ReceiveErrors Not supported None Object Name Restrictions Read Object Limitations charPortAdminStatus Read only Returns only enabled...

Page 357: ...Read Object Limitations charPortOutFlowType Supports only none 1 xonXoff 2 and hardware 3 None charPortAdminOrigin Read only None charPortName Read only None charPortSessionMaximum Maximum value is 16 None charSessKill Read only None charSessState None Returns only connected 2 charSessConnectionId None Returns only null charPort objects for virtual ports Read only read write objects apply only to ...

Page 358: ...d Object Limitations rs232PortInSpeed rs232PortOutSpeed Setting one sets both Can set only to a supported value See Setting Port Speed below None rs232AsyncPortParity none 1 mark 4 or space 5 all map to none 1 Returns only none 1 odd 2 or even 3 rs232AsyncPortStopBits dynamic 4 maps to one 1 Returns only one 1 two 2 or one and half 3 rs232SyncPortClockSource Accepts external 2 only Returns interna...

Page 359: ...ed to zero Setting the port speed to zero when rs232AsyncPortAutobaud is disabled results in a bad value error To disable autobaud you must first set the port speed to a non zero value and then set rs232AsyncPortAutobaud to disabled 2 This ensures that the port is not left in a state without a declared speed For example you can set a port to 9600 autobaud by setting 9600 in rs232PortInSpeed or rs2...

Page 360: ... The Annex supports rip2GlobalGroup rip2IfStatTable and rip2IfConfTable It does not support rip2PeerTable Table 21 6 describes additional restrictions Table 21 6 RFC 1389 RIPv2 MIB Objects Object Name Restrictions Read Object Limitations rip2IfStatStatus Read only None rip2IfConfDomain Not supported None RipIfConfAuthKey Not supported None ripIfConfStatus Read only None ...

Page 361: ...d in Table 21 7 Table 21 7 RFC 1243 AppleTalk Object Name Restrictions Read Object Limitations atportType Read only None atportNetStart Not supported None atportNetEnd Not supported None atportNetAddress Not supported None atportStatus Read only None atportZone Read only None atportIfIndex Read only None ddpOutRequests Not supported None ddpInLocalDatagrams Not supported None ddpNoProtocolHandlers...

Page 362: ...ons dsx1LineType Supports only dsx1esf 2 and dsx1D4 3 Returns esf or d4 dsx1Line Coding Supports only dsx1B8zs 2 and dsx1AMI 5 Returns b8zs or ami dsx1SendCode Not supported None dsx1Circuit Identifier 128 character limit None dsx1SignalMode Read only RobbedBit only dsx1Fdl Supports only dsx1Ansi T1 403 2 and dsx1Att 54016 4 Returns ansi or att dsx1CurrentSEFSs Not supported None dsx1Current PCVs ...

Page 363: ...Vs Not supported None dsx1IntervalLESs Not supported None dsx1IntervalDMs Not supported None dsx1IntervalLCVs Not supported None dsx1TotalSEFs Not supported None dsx1TotalPCVs Not supported None dsx1TotalLESs Not supported None dsx1TotalDMs Not supported None dsx1TotalLCVs Not supported None dsx1FarEndCurrentTable Not supported None dsx1FarEndIntervalTable Not supported None dsx1FarEndTotalTable N...

Page 364: ...am book ch21 18 Tue May 6 13 24 47 1997 Annex Manager User Guide Chapter 21 Annex Manager and SNMP 21 18 Part 4 Control and Status Commands ...

Page 365: ...References to additional information in other Annex documentation A list containing the parameter type allowable values default value and the Annex Manager lists in which the parameter appears Each parameter description includes an Annex Manager default value If you use the Site Parameters command to change default values in help messages the values listed in this section do not agree with your he...

Page 366: ...curity reasons AnnexManagerdisplaysonlyset orunset forthevalueofthisparameter The Annex and the security server can communicate only when the value of this parameter is the same as the value of the Annex in the security server acp_keys file alarmsyslog allows the Annex to generate a syslog at the warning level when it detects any alarm event To use this feature you must enable syslogging on an Ann...

Page 367: ...d of the point to point SLIP PPP link anxt1ChanIpAddr returns the IP address associated with the B channel When needed this IP address is used for calls over the B channel anxt1ChanRing specifies if Annex should provide the audible ring to the central office on incoming calls Type Async Values enabled or disabled Default disabled Lists Async Port PPP SLIP Type Async Values IP address Default 0 0 0...

Page 368: ...ircuit The type of circuit affects the number of bits per second that the circuit can carry as well as the usage and error statistics anxt1SwitchType selects the switch type compatible with the PRI provider Type T1 DS0 Values wink_in wink_out wink_bi loop_in loop_out loop_bi ground_in ground_out ground_bi immediate_in immediate_out immediate_bi Default loop_bi Lists DSO Channel T1_DS0 Type WAN Mod...

Page 369: ... the Appletalk hint used by the Annex on a specific port You can enter an ID in decimal or hexadecimal notation Each ID has two parts separated by a dot A network address ranges from 0 to 65534 0x0000 to 0xFFFE A node address ranges from 0 to 255 0x00 to 0xFE For example 191 253 0x00BF 253 and 191 0xFD designate the same address Type Async Values enabled or disabled Default enabled Lists Async Por...

Page 370: ...ty attn command authoritative_agent allows an Annex to send an ICMP Address Mask reply to a host that broadcasts a subnet mask request authorized_groups specifies the LAT protocol remote group codes that are accessible to users on an Annex port You can enter all none a series of numbers separated by commas e g 1 5 7 or a range of numbers separated by dashes e g 1 5 200 255 Type Async Values enable...

Page 371: ...must enter a value in the speed parameter before you choose disabled here backward_key defines the character sequence that opens the next lower numbered session established at a port We recommend that you use a sequence with a character Thekeydisplaysas Ifyouusemorethanoneletterornumber Annex Manager separates characters with a slash For example a b displays as a b banner controls whether the Anne...

Page 372: ...tion in which an Annex sends an administrative broadcast message When you choose network the Annex sends a message from the network side of the connection If you choose port it sends a message from the port side You can use this parameter only when the mode parameter is set to slave bypass removes the T1 engine from the network You should enter enabled when you first install an Annex or when the T...

Page 373: ... AppleTalk session that was initiated through a call to an ISDN Primary Rate Annex CallDef_at_guest allows guests to log into an AppleTalk session through a call to an ISDN Primary Rate Annex If you choose enabled and a client requests guest access the ISDN Primary Rate Annex asks ACP for username guest privileges Type Annex Values enabled or disabled Default enabled Lists Annex Only Basic Async P...

Page 374: ...meter and for enable_security the ISDN Primary Rate Annex uses ACP to get security information about the client including authentication logging and zone access information If you choose disabled the ISDN Primary Rate Annex uses only local security CallDef_attn_string defines a control character sequence that returns users to the CLI prompt Users can define a temporary control character sequence u...

Page 375: ... displays as a b CallDef_banner controls whether the ISDN Primary Rate Annex banner and message of the day are displayed on CLI connections CallDef_broadcast_ direction controls the direction in which an ISDN Primary Rate Annex sends an administrative broadcast message When you choose network the ISDN Primary Rate Annex sends a message from the network side of the connection If you choose port it ...

Page 376: ...N Primary Rate Annex expects eight bit ASCII input You should not choose enabled unless the terminal can transmit only seven bit characters CallDef_cli_inactivity specifies the number of minutes the ISDN Primary Rate Annex remains idle before disconnecting a CLI session Entering 0 disables the timer entering 255 causes the ISDN Primary Rate Annex to disconnect as soon as it exits from its last job...

Page 377: ...rity activates the host based security policy for access from CLI to the network If you choose enabled the user must be authorized via the host based ACP security server to connect to a network host The security policy in the security server scans the etc acp_restrict file to authorize a connection to a host from the ISDN Primary Rate Annex CallDef_dedicated_ arguments defines the command line arg...

Page 378: ...ddresses exist in the acp_dialup file the Annex uses those values The the acp_dialup file contains a remote address but not a local address the Annex uses the remote address from the file and the Annex IP address for the local address If the file does not contain a matching user name the Annex uses values from the local_address and remote_address parameters If both parameters contain addresses the...

Page 379: ...ontrol character sequence to define the CLI erase character CallDef_erase_line uses a control character sequence to define the CLI line erase character Type Annex Values enabled or disabled Default disabled Lists Annex Only PPP SLIP Sync Call_Defaults Type Annex Values enabled or disabled Default disabled Lists Annex Only Call Defaults PPP SLIP Type Annex Values enabled or disabled Default enabled...

Page 380: ... Annex behavior for received characters If you enter a number other than 0 the Annex does not forward characters until it receives the number of characters you entered If you enter 0 the Annex uses values in CallDef_forwarding_timer If you use CallDef_forwarding_count and CallDef_forwarding_timer parameters the Annex uses the value that occurs first Setting CallDef_forwarding_count to 1 or CallDef...

Page 381: ... on the network when heavy serial input occurs CallDef_hardware_tabs allows an ISDN Primary Rate Annex to convert ASCII tab characters to the correct number of spaces when a terminal does not support hardware tabs This parameter works only for CLI sessions CallDef_Imask_7bits allows an ISDN Primary Rate Annex to mask input to seven bits If you choose disabled the Annex expects eight bit ASCII inpu...

Page 382: ...e set CallDef_input_is_activity and CallDef_output_is_activity to disabled CallDef_input_is_ activity defines activity as input If you choose enabled the ISDN Primary Rate Annex resets the inactivity timer to 0 when it receives input through an established call CallDef_input_start_ char defines the control character sequence that restarts input if CallDef_port_input_flow_control is set to xonXoff ...

Page 383: ...dates or other system packets The Annex does not check incoming packets for the presence of the IPSO CallDef_ipx_security controls whether IPX security is enabled for incoming calls CallDef_ixany_flow_ control treats any input character as a start XON character if output was suspended by a stop XOFF character Type Annex Values any character Default displays as S Lists Annex Only Call Defaults Flow...

Page 384: ...x using CLI to echo line erase for a video terminal If you choose enabled the Annex erases all characters on the line and moves the cursor back to the beginning of the line If you choose disabled it echoes the line erase character for hard copy terminals making the deleted line visible and positioning the print head at the beginning of the next line CallDef_local_address defines the IP address for...

Page 385: ... using CLI into lowercase characters This parameter is used for older terminals that do not support lowercase characters CallDef_map_to_lower allows an ISDN Primary Rate Annex to convert lowercase characters sent to a terminal using CLI into uppercase characters This parameter is used for older terminals that do not support lowercase characters Type Annex Values 0 to 16 characters Default null str...

Page 386: ...des see the Remote Annex Administrator s Guide for UNIX and the Annex Administrator s Guide for DOS You can enter cli to allow a dialed terminal or incoming modem access to CLI CLI provides access to the network and connections to other hosts via the telnet connect rlogin and tn3270 commands The tn3270 command is available only when option_key is set to an appropriate value slip to specify that a ...

Page 387: ...w an ISDN Primary Rate Annex to communicate via the telnet command This option works with the CallDef_dedicated_arguments parameter tn3270 to allow an ISDN Primary Rate Annex to communicate via the tn3270 command This option works with the CallDef_dedicated_arguments parameter CallDef_net_inactivity defines the amount of time an ISDN Primary Rate Annex call can remain inactive before it is termina...

Page 388: ... enabled a line feed terminates both the input and the output lines CallDef_output_flow_ control definesthemethodthatadeviceusestostartorstopoutputfromanISDNPrimary Rate Annex You can choose none to disable flow control start stop to designate flow control by recognizing xon and xoff characters eia to indicate that flow control is delegated to a lower level Type Annex Values minutes or seconds Def...

Page 389: ... restarts output if CallDef_output_flow_control is set to start stop CallDef_output_stop_ char defines the control character sequence that stops output if CallDef_output_flow_control is set to start stop Type Annex Values enabled or disabled Default enabled Lists Annex Only Idle Timer Modem Modem Internal Call Defaults Type Annex Value any character Default displays as Q Lists Annex Only Flow Cont...

Page 390: ...t exceed 32 characters You can enter a to display Annex c to display a colon and a space d to display the date and time e g Mon Mar 14 13 59 42 1996 i to display an Annex IP address j to display a new line l to display the location of the port If no location is defined the port number e g port 10 appears n to display an Annex name or its IP address p to display the port number of a virtual CLI con...

Page 391: ...e VCI interface is configured CallDef_port_password defines a password for an ISDN Primary Rate Annex call You can use this password as a back up for host based security if the security servers do not respond or as an additional line of security after you enter a user name and password For security reasons Annex Manager displays this value as set or unset If you use SecurID set CallDef_port_passwo...

Page 392: ...es 0x0 to 0x1F of the ASCII character set can be sent as clear text and which should be protocol escaped CallDef_ppp_mru defines the maximum receive unit MRU that an ISDN Primary Rate Annex requests as its local MRU Type Annex Values enabled or disabled Default disabled Lists Annex Only Modem Modem Internal Security Call Defaults Type Annex Values 0 to 16 characters Default null string Lists Annex...

Page 393: ...e following list all ipcp atcp ipxcp ipcp atcp ipcp ipxcp atcp ipxcp ipcp atcp ipxcp CallDef_ppp_ password_remote contains the password that an ISDN Primary Rate Annex provides when the remote PPP peer asks for authentication For security reasons Annex Manager displays this parameter value as set or unset Type Annex Values all ipcp atcp ipxcp ipcp atcp ipcp ipxcp atcp ipxcp ipcp atcp ipxcp Default...

Page 394: ...ssword authentication protocol none CallDef_ppp_ username_remote contains the username by which the ISDN Primary Rate Annex identifies itself when the remote PPP peer asks for authentication CallDef_printer_host specifies the IP address or fully qualified domain name of a machine running a Berkeley style lpd server The tn3270 command uses this server for the print screen function Type Annex Values...

Page 395: ...dition you can enter text that appears in the prompt as long as your entire entry does not exceed 32 characters You can enter a to display Annex c to display a colon and a space d to display the date and time e g Mon Mar 14 13 59 42 1996 i to display an Annex IP address j to display a new line character l to display the port location If no location is defined the port number e g port 10 appears n ...

Page 396: ... parameter works with the who command CallDef_resolve_ protocol definesthedefaulthostprotocolthatestablishesaconnectionwhenthecommand does not specify a protocol If you enter any the system attempts a LAT connect first if that fails it attempts to establish a telnet connection Type Annex Values any character Default displays as R Lists Annex Only Cmd Line Editing Call Defaults Ctrl Ctrl R Type Ann...

Page 397: ... that the transmit clock is internal and the receive clock is external CallDef_short_break allows an ISDN Primary Rate Annex to return a user to the CLI prompt after receiving a break of less than two seconds Type Annex Values 5 6 7 or 8 Default 8 Lists Annex Only Basic Async Port Modem Modem Internal Call Defaults Type Annex Values none odd even Default none Lists Annex Only Basic Async Port Mode...

Page 398: ... to enabled SLIP and PPP calls use the ACP security server The Annex determines whether CLI users are authorized to execute SLIP or PPP commands CallDef_slip_subnet_ mask contains the PRI Annex IP subnet mask for a SLIP interface The subnet mask defines which portion of the IP address is the network subnet and host The parameter default is based on the network portion of the Annex IP address Setti...

Page 399: ...he connection You can use 0 the Annex Manager default value to set the keep alive time to 120 minutes or you can enter 255 to disable the keep alive mechanism CallDef_telnet_crlf converts a carriage return in a Telnet session to a carriage return followed by a line feed If you enter disabled a carriage return translates to a carriage return followed by a null string CallDef_telnet_escape defines t...

Page 400: ... MRU that the ISDN Primary Rate Annex requests as its local MRU CallDef_vci_login_port_ password enablestheISDNPrimaryRateAnnexpasswordwhentheDECServercommand interface is configured i e when CallDef_cli_interface is set to vci For more information please refer to the Annex Interface for VMS Environments Administrator s Guide Type Annex Values 0 to 16 characters Default null string Lists Annex Onl...

Page 401: ... enabled a deleted character looks as if it was erased If you choose disabled the Annex echoes the erase characters for a hard copy terminal It displays a backslash one or more deleted characters and a slash For example typing asdf g displays as asdf fd g circuit_timer indicates the time interval in tens of milliseconds between the transmission of LAT packets For example if you enter 9 the time in...

Page 402: ...es the Annex to disconnect as soon as it exits from its last job Unlike inactivity_timer this timer does not disconnect a CLI session with active jobs cli_interface allows you to control the prompt that appears for VMS or UNIX environments If you enter uci this parameter provides a standard UNIX interface with prompts defined by the cli_prompt and prompt parameters If you enter vci the standard VM...

Page 403: ...ed 32 characters You can enter a to display Annex c to display a colon and a space d to display the date and time e g Mon Mar 14 13 59 42 1996 i to display an Annex IP address j to display a new line l to display the location of the port If no location is defined the port number e g port 10 appears n to display an Annex name or its IP address p to display the port number of a virtual CLI connectio...

Page 404: ...s and services It must reside in the usr spool erpcd bfs directory connect_security activates the host based security policy for access from CLI to the network If you choose enabled the user must be authorized via the host based ACP security server to connect to a network host The security policy in the security server scans the etc acp_restrict file to authorize a connection to a host from the An...

Page 405: ...does not include the start stop or parity bits daylight_savings allows the Annex to adjust for daylight savings time in your geographic location dedicated_address defines one host and one TCP port to which this port can connect To use this parameter set the Mode parameter to dedicated Type Async Values both flow_control modem_control none Default none Lists Async Port Flow Control Modem Modem Inte...

Page 406: ... for call A number between 0 and 65535 This parameter is obsolete in Annex software Release 10 1 and in subsequent releases Please use the dedicated_arguments parameter def_session_mode defines the default session mode when the DECServer command interface is configured i e when cli_interface is set to vci For more information please refer to the Annex Interface for VMS Environments Administrator s...

Page 407: ...slash If you do not set this parameter the Annex provides the network zone list demand_dial allows a port to use demand dialing You cannot use this parameter unless the option_key parameter enables demand dialing DHCP_broadcast determines whether or not an Annex broadcasts for DHCP services if the preferred DHCP servers are not available Type Annex Values 0 to 100 characters Default null string Li...

Page 408: ...t a local address the Annex uses the remote address from the file and the Annex IP address for the local address If the file does not contain a matching user name the Annex uses values from the local_address and remote_address parameters If both parameters contain addresses the Annex uses these values If both parameters are set to 0 0 0 0 the Annex negotiates for both addresses with the remote PPP...

Page 409: ...ase the parameters in non volatile memory and reconfigure the Annex do_compression starts TCP IP header compression on a SLIP link When you choose enabled the Annex negotiates for TCP IP compression for both sides of the connection dsx1fdl adescribes the facilities data link use This allows the telephone company to read the statistics maintained by an Annex and to perform diagnostic tests dsx1Line...

Page 410: ...Therefore you must choose in the Reset Parameters window to prevent the reset process and to use the parameter value you entered echo directs an Annex to echo all characters as a user types This parameter applies only to the CLI level enable_security allows you to activate the security system Cancel Type Async Values unknown high low Default unknown Lists Async Port Type Async Values enabled or di...

Page 411: ...ssion established at a port Xylogics recommends that you use a sequence with a character The key displays as If you use more than one letter or number Annex Manager separates characters with a slash For example a b displays as a b Type Async Values any character Default displays as Lists Async Port Command Line Editing Ctrl Ctrl Delete Type Async Values any character Default displays as U Lists As...

Page 412: ...ex forwards received data If new data arrives before the timer expires the Annex resets the timer If you enter 0 the Annex uses 5 which is the Annex Manager default value Setting forwarding_count to 1 or forwarding_timer to 0 may have a severe effect on the network when heavy serial input occurs group_value specifies the LAT protocol remote group codes that can access local services offered by an ...

Page 413: ...no host table In this case the Annex requires a name server to resolve every host name image_name provides the file name for the operational code that loads by default when you boot an Annex You can enter a name using up to 100 characters imask_7bits allows an Annex to mask input to seven bits If you choose disabled the Annex expects eight bit ASCII input Type Async Values enabled or disabled Defa...

Page 414: ...ter a number of minutes here set input_is_activity and output_is_activity to disabled and set port_type to dialin inet_addr defines the Annex IP address This 32 bit address contains four 8 bit fields separated by periods Each field contains a number ranging from 0 to 255 or a hexadecimal number The IP address always displays in decimal notation input_buffer_size provides the number of 256 byte blo...

Page 415: ... delegated to a lower level e g a parallel port input_is_activity defines activity as input If you choose enabled the Annex sets the inactivity timer when it receives input at the port input_start_char defines the control character sequence that restarts input if input_flow_control is set to start stop Type Async Values none start stop eia Default none Lists Async Port Printer Port Flow Control Mo...

Page 416: ...ist and does not copy broadcast packets ipencap_type indicates whether the Annex LAN interface encapsulates IP packets in Ethernet Version 2 format or IEEE 802 3 Data Link Layer format ipso_class specifies the U S Department of Defense basic IP Security Option IPSO classification level included in TCP packets generated on Annex CLI dedicated or adaptive asynchronous ports The option is not added t...

Page 417: ...ame that stores the uploaded Annex dump image on the Novell file server ipx_dump_username provides user name for logging on to the Novell file server before the Annex sends a dump file to the server ipx_file_server contains the name of the Novell file server from which an Annex boots Type Annex Values enabled or disabled Default disabled Lists Annex Only IPX Type Annex Values 0 to 16 characters De...

Page 418: ...col The packets serve only as notices to remote nodes that the host services are available lat_key restricts access to LAT specific Annex commands parameters functions and the LAT protocol within the Annex Each Annex requires a unique key value You must contact your supplier to obtain a LAT key After you set the key your system administrator must reboot the Annex Type Annex Values raw802_3 etherne...

Page 419: ...to decode the LAT host data b packets which change asynchronous port parameters Refer to your LAT host documentation for details If you enter enabled and the LAT host sends a data b slot message requesting that flow control XON XOFF be turned off the Annex turns off flow control and passes XON XOFF characters to the host This scenario can adversely affect XON XOFF and the terminal cursor keys Type...

Page 420: ...at the beginning of the next line load_broadcast defines during a boot whether the Annex requests the configuration or message of the day files from other hosts This parameter works only if the files are not available on the preferred load host load_dump_gateway specifies the gateway IP address A gateway is required if the preferred load or dump host is on a different network or subnet than the An...

Page 421: ...ge from the Flash ROMs Since the Annex cannot dump back to itself you should include a secondary interface here by entering self net or self sl port number local_address defines the IP address for the port on the Annex side of the link This IP address is used only when mode is set to slip ppp or autodetect location defines a port location or description that displays at the CLI who command lock_en...

Page 422: ...the Strict Source Routing and Record option only if it can reach the next routing address directly Drops packets that do not have either setting and sends an ICMP Destination Unreachable message with a Source Route Failed code If you enter disabled the Annex accepts packets with Loose Source Routing and Record or Strict Source Routing and Record only when the Annex itself is the destination If it ...

Page 423: ...mber nn where nn represents the two digits that follow 03 to mark a T1 Drop and Insert Interface DS0 as mapped to modem number nn where nn represents the two digits that follow 04 to mark a T1 Network Interface DS0 as mapped in voice mode directly to the Drop and Insert Interface When you use 04 the next two digits must be 00 05 to mark a T1 Network Interface DS0 as mapped in data mode directly to...

Page 424: ...modem calls for which the Annex keeps accounting information You can use this parameter only for RA6100 Cabletron CSMIM T1 and Cabeltron MODMIM products max_vcli determines the maximum number of virtual CLI connections the Annex can create at a time Entering 255 allows a number of connections limited only by the available memory of the Annex Type Async Values enabled or disabled Default disabled L...

Page 425: ...and the Annex Administrator s Guide for DOS You can enter cli to allow a port connected to a terminal or incoming modem access to CLI CLI provides access to the network and connections to other hosts via the telnet connect rlogin and tn3270 commands The tn3270 command is available only when option_key is set to an appropriate value slave to indicate that a port provides access to modems serial lin...

Page 426: ...sing ARAP auto detect to allow a port to identify the incoming protocol of a packet and to convert to IPX PPP ARAP or CLI auto adapt to allow a port to detect whether packets are incoming or outgoing For incoming packets the port behaves as if it were in auto detect mode For outgoing packets it operates in slave mode ndp to allow Novell dial in dial out and routing ipx to allow dial in Novell acce...

Page 427: ...e This parameter works onlywhencli_interface issettovci andvci_login_port_password issettoenabled For security reasons Annex Manager displays values as set or unset mop_login_prompt defines the prompt that appears for all ports using a VMS interface This parameter works only when cli_interface is set to vci Type Async Values cli slave adaptive unused slip call dedicated ppp arap auto detect auto a...

Page 428: ...ys values as set or unset mop_pref_host contains the Ethernet address of the preferred MOP load or dump host This address consists of six parts separated by dashes Each part contains a hexadecimal value motd_file contains the message of the day file name that is maintained on the load host This file resides in the directory you choose during the host installation process typically usr spool erpcd ...

Page 429: ...y when you specify a host in pref_name1_addr name_server_2 definesthetypeofnameserviceusedwiththesecondarynameserver TheAnnex uses this service when the service specified in name_server_1 is not available This parameter works only when you specify a host in pref_name2_addr nameserver_broadcast defines whether the Annex broadcasts a name server request if the preferred name servers do not respond T...

Page 430: ...ports that do not have a DSR signal ports with partial modem control lines net_inactivity defines the amount of time an asynchronous interface port can remain inactive before the port is reset The net_inactivity_units parameter determines whether the number you enter here is in minutes or seconds net_inactivity_units determines the unit of time used for the serial protocol inactivity timer of the ...

Page 431: ...minal interprets carriage returns and line feeds for CLI When you enter disabled a carriage return or a line feed terminates the input line and a carriage return followed by a line feed terminates output lines When you enter enabled a line feed terminates both the input and the output lines node_id containstheaddressanAnnextriestoacquireatthestartofanAppleTalksession If the address you enter here ...

Page 432: ... start or stop output from an Annex You can choose none to disable flow control start stop to designate flow control by recognizing xon and xoff characters eia to indicate that flow control is delegated to a lower level e g a parallel port output_is_activity defines activity as output If you enter enabled the Annex sets the inactivity timer when it sends output from the port Lists Annex Values opt...

Page 433: ...es for RIP updates TTL is a field in IP packets that limits their lifetime on the network Each time a packet crosses a router the router decrements the packet TTL by 1 When the value reaches 0 the packet is discarded parity defines the type of parity that the asynchronous port uses Type Async Value any character Default displays as Q Lists Async Port Flow Control Ctrl Ctrl Q Type Async Values any ...

Page 434: ...sed with demand dialing on the port The number you enter must be compatible with the modem connected to the port port_modem_config sets other parameters for a specific modem configuration Each value you choose here sets values in the mode port_type speed control_lines input_flow_control output_flow_control need_dsr bidirectional_modem and broadcast parameters The dialinautobaud and dialinoutautoba...

Page 435: ...put_flow_control to eia output_flow_control to eia need_dsr to enabled bidirectional_modem to disabled and broadcast_direction to port Dialinoutautobaud sets mode to adaptive autobaud to enabled port_type to dialin speed to 115200 or the highest speed that the hardware supports control_lines to both input_flow_control to eia output_flow_control to eia need_dsr to disabled bidirectional_modem to en...

Page 436: ...ipx port_type to dialin autobaud to enabled speed to 115200 or the highest speed that the hardware supports control_lines to both input_flow_control to eia output_flow_control to eia need_dsr to enabled bidirectional_modem to disabled and broadcast_direction to port You can set any parameter included in port_modem_config separately For example you can choose dialin and then change the speed parame...

Page 437: ...ssword for local password protection You can use this password as a back up for host based security if the security servers do not respond or as an additional line of security after you enter a username and password For security reasons Annex Manager displays this value as set or unset If you use SecurID set port_password to a null string Please refer to the Annex Administrator s Guide for UNIX fo...

Page 438: ...ager default value to specify that the keep alive time is the value set in the tcp_keepalive parameter or 255 to disable the keep alive mechanism for the port port_type defines the type of device attached to a port port_user_name defines a default user name for this port Type Async Values enabled or disabled Default disabled Lists Async Port Modem Modem Internal Security Type Async Values 0 to 255...

Page 439: ...a unique node number for an IPX PPP connection assigned to a specific port You can enter a 12 digit hexadecimal number here using dashes to separate sets of two numbers e g 00 00 00 00 00 00 You cannot use a number that has1inthelastbitofthefirstoctet sincethesenumbersarereservedformulticast addresses or 0xFF FF FF FF FF FF which is reserved as a broadcast node address ppp_mru defines the maximum ...

Page 440: ...ord For security reasons Annex Manager displays this value as set or unset ppp_security_protocol defines the security check for the peer that the Annex requires before it starts the network control protocol If the Annex wants to use security and the peer refuses the Annex closes the link You can enter chap to use challenge handshake protocol pap to use password authentication protocol chap pap to ...

Page 441: ...ervices When enabled the client broadcasts DHCP messages pref_DHCP2_addr contains the IP address of the DHCP server that the client attempts to use as the backup source for DHCP services when the primary DHCP server does not respond When enabled the client broadcasts DHCP messages Type Async Values chap pap chap pap none Default none Lists Async Port PPP Security Type Async Values 0 to 15 characte...

Page 442: ...ou should set this address to the IP address of the boot host pref_name1_addr contains the IP address of the host specified in the name_server_1 parameter pref_name2_addr contains the IP address of the host listed in the name_server_2 parameter or the address of a back up host that serves if name_server_2 is set to none Type Annex Value IP address Default 0 0 0 0 Lists Annex Only Basic Annex Type ...

Page 443: ...i_block_in_calls facilitates ISDN Primary Rate Annex shutdown by automating incoming call attrition If you choose enabled existing calls are allowed to terminate but new incoming calls are blocked pri_block_out_calls facilitates ISDN Primary Rate Annex shutdown by automating outgoing call attrition If you choose enabled existing calls are allowed to terminate but new outgoing calls are blocked Typ...

Page 444: ...other end is used You can enter an 8 digit hexadecimal number here pri_ipx_node defines a unique node number for an IPX PPP connection to an ISDN Primary Rate Annex You can enter a 12 digit hexadecimal number here using dashes to separatesetsoftwonumbers e g 00 00 00 00 00 00 Youcannotuseanumber that has 1 in the last bit of the first octet since these numbers are reserved for multicast addresses ...

Page 445: ...bs controlswhethertheAnnexsendstabcharacterstoaprinter Ifyouenterdisabled the Annex converts a tab character to the corresponding number of spaces printer_host specifies the IP address or fully qualified domain name of a machine running a Berkeley style lpd server The tn3270 command uses this server for the print screen function Type Printer Values enabled or disabled Default disabled LIsts Printe...

Page 446: ...or more information printer_tcp_keepalive overrides tcp_keepalive for connections from applications such as aprint or rtelnet to one or more printer ports If you use 0 the Annex Manager default value the keep alive timer uses the value set by the tcp_keepalive parameter You can enter 255 to disable the keep alive mechanism for the printer port printer_type specifies the type of printer attached to...

Page 447: ...re entry does not exceed 32 characters You can enter a to display Annex c to display a colon and a space d to display the date and time e g Mon Mar 14 13 59 42 1996 i to display an Annex IP address j to display a new line character l to display the port location If no location is defined the port number e g port 10 appears n to display an Annex name or its IP address p to display the port number o...

Page 448: ...ntains the IP address for a host at the other end of the serial line This parameter works only when the mode parameter is set to autodetect slip or ppp reset_idle_time_on defines whether input or output resets the idle timer The idle time is the time lapse between activity and inactivity at the device This parameter works with the who command Type Async Values 0 to 32767 Default 0 Lists Async Port...

Page 449: ...xclude rip_advertise defines the networks for which the Annex advertises routes You can enter all none or a list of one to eight IP addresses in decimal format preceded by include or exclude rip_auth contains the password that controls authentication for RIP 2 packets Type Annex Values 4 to 120 Default 8 Lists Annex Only LAT Type Interface Values all none or one to eight IP addresses preceded by i...

Page 450: ...horizon controls the split horizon algorithm for RIP You can enter off to disable split horizon split to enable split horizon without poison Split horizon prevents a route from being advertised over the interface on which it was learned poison to enable split horizon with poison reverse Poison reverse advertises the route over the interface on which it was learned but sets the hop count to 16 rip_...

Page 451: ...subnet rip_send_version controls the RIP versions that an Annex sends over IP interfaces You can choose rip 1 to send version 1 packets to the broadcast address rip 2 to send version 2 packets to the RIP multicast address compatibility to send version 2 packets to the broadcast address rip_sub_accept controls whether subnet routes are accepted over the SLIP PPP and Ethernet interfaces You can ente...

Page 452: ... reside on the same subnetwork as the Annex Manager host you are not able to contact the Annex after you reboot the Annex or after you reset the routing subsystem rts_signal controls the RTS Request to Send signal for the port Entering a value for an idle port produces an error condition If you change the value for this parameter and then reset a port or reboot an Annex the parameter returns to it...

Page 453: ...nter all to define the Annex as a file server for the configuration operational image and message of the day files config to define the Annex as a file server for configuration files image to define the Annex as a file server for Annex operational code motd to define the Annex as a file server for the message of the day file none to indicate that the Annex is not a file server Type Annex Values en...

Page 454: ...ble is full the Annex removes the service that is idle the longest If all services are busy and the table is full the Annex discards a new service session_limit_annex specifies the maximum number of active sessions the Annex allows at one time session_limit_port specifies the maximum number of active sessions the Annex allows on a port at one time You can enter 1 to indicate that there is no maxim...

Page 455: ...ver the SLIP interface If you entered sl and a number in load_dump_sequence you must enter a valid address here This parameter value overrides values in pref_load_addr and pref_dump_addr slip_mtu_size sets the maximum transmission unit MTU size on a SLIP CSLIP port This parameter forces the SLIP interface to use large 1006 or small 256 MTUs Type Async Values enabled or disabled Default disabled Li...

Page 456: ...he Annex IP subnet mask for a SLIP interface The subnet mask defines which portion of the IP address is the network subnet and host The parameter default is based on the network portion of the Annex IP address Setting this parameter incorrectly can cause routing problems slip_tos allows an Annex to send interactive traffic such as telnet rlogin and ftp control sessions before it sends other traffi...

Page 457: ...port subnet_mask contains the Annex IP subnet mask The Subnet Mask defines which portion of the IP address is the network subnet and host The parameter default is based onthenetworkportionoftheAnnexIPaddress Settingthisparameterincorrectly can cause routing problems sysContact identifies the contact person for this managed node including information on how to contact this person Type Async Values ...

Page 458: ...er to the Remote Annex Administrator s Guide for UNIX for a detailed syslog configuration description and to your Unix system documentation syslog_host contains the IP address of the host that logs Annex messages If you use the Annex Manager default setting 0 0 0 0 the Annex broadcasts its log messages Type Annex Default n a Values 0 to 255 characters Lists Annex Only Type Annex Default n a Values...

Page 459: ...rors including CLI errors warning to log minor problems notice to log time server queries and information about responses info to start and end CLI sessions and Annex jobs created by rlogin telnet connect ping and tap commands debug to start and end any Annex process For more information about event logging please refer to the Remote Annex Administrator s Guide for UNIX syslog_port routes syslog m...

Page 460: ...lue to set the keep alive time to 120 minutes or you can enter 255 to disable the keep alive mechanism The port_tcp_keepalive and printer_tcp_keepalive parameters override values in this parameter for those individual ports tdi_distance indicates the length of the cable that runs between the equipment and the Drop and Insert Interface tdi_framing selects the superframe format used on the T1 Drop a...

Page 461: ...null string telnet_escape defines the character that returns a CLI user to the telnet prompt You can press and enter U to disable the telnet escape character term_var identifies the type of terminal using the CLI connection You must enter a valid terminal type for the host The Annex passes the terminal type setting to the host Type T1DS1 Values b8zs ami Default b8zs Lists DS1 Line T1_DS1 Type Asyn...

Page 462: ...ains the string that precedes all files e g image name configuration and motd files when you boot an Annex via tftp The string value is determined by the system serving the tftp requests It does not precede the tftp_dump_name time_broadcast defines whether the Annex broadcasts for the current time if the preferred load host is not available or does not provide a time server Type Annex Values path ...

Page 463: ...erapositivenumber of minutes for time zones west of Greenwich Mean Time GMT or a negative number for time zones east of GMT For example you would enter 300 for U S Eastern Standard Time which is five hours west of GMT or 60 for Paris which is one hour east of GMT tmux_delay provides the maximum number of milliseconds during which small packets can accumulatetoformlargerpackets Whenthetimeexpires t...

Page 464: ...able If the number of host addresses exceeds the number you enter here the Annex discards the oldest entry tmux_max_mpx specifies the largest user packet that can be placed in a TMux packet The Annex does not multiplex larger packets but passes them directly to the IP layer tni_circuit_id contains the transmission vendor s circuit identifier used for customer service calls Type Annex Values enable...

Page 465: ...n Users cannot access T1 lines when you change this parameter value You can select noloop to prevent the signal from looping through the T1 engine payloadloop to allow the incoming signal to be looped through the T1 engine after it passes through the framing function lineloop to cause the incoming signal to loop to the network without passing through the T1 engine localloop to cause the T1 engine ...

Page 466: ... users vci_autobaud indicates whether the Annex automatically detects line speed when a connection is opened and whether it sets matching terminal port characteristics on the next login This parameter works only when the DECServer command interface is configured i e when cli_interface is set to vci For more information please refer to the Annex Interface for VMS Environments Administrator s Guide ...

Page 467: ...r more information please refer to the Annex Interface for VMS Environments Administrator s Guide vci_login_timeout enables alogintimerwhen theDECServercommandinterface is configured i e when cli_interface is set to vci For more information please refer to the Annex Interface for VMS Environments Administrator s Guide Type Async Values enabled or disabled Default disabled Lists Async Port Type Asy...

Page 468: ...lCLIconnectionifthesecurity server does not respond For local password protection you can set enable_security to enabled choose disabled for vcli_security and enter a password here vcli_security controls user validation on virtual CLI connections to and from an Annex If you choose enabled the Annex enables connection security for all virtual CLI connections and executes the same user validation in...

Page 469: ...de Part 5 Reference Information zone provides the AppleTalk zone name that the Annex uses at start up You must use spaces to separate zone names e g general engineering lab To escape embedded spaces use the backslash Type Annex Values 0 to 32 characters Default null string Lists Annex Only AppleTalk ...

Page 470: ...am book ch22 106 Tue May 6 13 24 47 1997 Annex Manager User Guide Chapter 22 Annex Parameters 22 106 Part 5 Reference Information ...

Page 471: ... one of the conditions described below If you check these situations and still cannot connect to the Annex call technical support Did you enter a correct Annex name or IP address Annex Manager can connect to an Annex if the name or IP address you entered are correct The Annex name you enter must match a name in the Annex in the local etc hosts file Is the Annex booted Open a direct connection to a...

Page 472: ...nnex if you change the configuration file Check the disabled_modules parameter using the admin or na tool If this parameter indicates that SNMP is disabled the Annex discards SNMP messages You should remove snmp from the list of disabled modules and reboot the Annex Did you enter the correct community name The community name you enter must match an entry in the Annex s configuration file Check the...

Page 473: ...based on the value of the allow_snmp_sets parameter If allow_snmp_sets is set to disabled you can use the telnet command to reach the Annex and run the superuser admin CLI command to set allow_snmp_sets to yes The Annex default value does not allow changes to configuration parameters through SNMP Annex Manager and the Annex SNMP agent use SNMP version 1 The only security check performed by the SNM...

Page 474: ...box select All Parameters click Apply and enter all ports on the Annex in the Script Port Entry window This may take some time for Annexes with a large number of asynchronous ports Saving Parameters in Scripts Some Annex configuration parameters include sensitive information These parameters include all the Annex and port password parameters the option key that applies only for a specific Annex an...

Page 475: ...hen you run Annex Manager in an OpenLook OpenWindows environment make sure that the latest xnews server patch is installed If the application appears to hang after simple actions like a menu selection it is likely that the xnews server and OpenLook window manager are causing the problem OpenLook Window Manager Close Menu Item Do not use the OpenLook Window Manager Close menu option from the menu b...

Page 476: ...nager mainwindowisnotplacedwithinafewseconds theinitializationwindow may appear as a small sliver You can expand this window It disappears automatically when Annex Manager completes its start up Cut and Paste Some operating systems seem to have a problem cutting and pasting text from one portion of a window to another This issue does not seem to be exclusive to Annex Manager Help on File Selection...

Page 477: ...eate the file Resetting Modems If you encounter problems resetting modems using the Reset commands or the Modem windows in the Setup mode increasing the SNMP timeout values may alleviate this problem Boot Status Annex Manager does not automatically update the current status of each Annex e g NOT REACHABLE when you attempt a boot operation You must select Verify Annex State from the Status menu to ...

Page 478: ...am book ch23 8 Tue May 6 13 24 47 1997 Annex Manager User Guide Chapter 23 Troubleshooting 23 8 Part 5 Reference Information ...

Page 479: ...ter 22 4 anxt1Dsx1LineType parameter 22 4 anxt1SwitchType parameter 22 4 AppleTalk window 14 1 arap_v42bis parameter 22 5 Async Port Status command 20 5 to 20 10 displaying the window 20 5 to 20 6 entering port information 20 7 port information box 20 8 port totals box 20 7 push buttons 20 10 step by step instructions 20 10 understanding the window 20 6 to 20 10 Async Ports window 7 2 at_guest par...

Page 480: ...CallDef_input_start_char parameter 22 18 CallDef_input_stop_char parameter 22 19 CallDef_ipso_class parameter 22 19 CallDef_ipx_security parameter 22 19 CallDef_ixany_flow_control parameter 22 19 CallDef_latb_enable parameter 22 20 CallDef_line_erase parameter 22 20 CallDef_local_address parameter 22 20 CallDef_location parameter 22 21 CallDef_long_break parameter 22 21 CallDef_map_to_lower parame...

Page 481: ...li_prompt parameter 22 39 cli_security parameter 22 40 Compare command 18 1 to 18 10 comparing an Annex and a script 18 6 comparing two Annexes 18 5 comparing two scripts 18 7 displaying the window 18 1 to 18 2 options 18 3 to 18 4 push buttons 18 9 reading comparison output 18 7 selecting Annexes and scripts 18 5 step by step instructions 18 9 to 18 10 comparing and copying parameters 18 1 to 18 ...

Page 482: ...rmation box 20 40 to 20 41 understanding the tunnel information box 20 41 to 20 42 understanding the window 20 40 to 20 42 E echo parameter 22 46 Edit Async Ports continued window 7 4 Edit Async Ports window 7 4 Edit Modem window 12 1 Edit WAN Module window 8 4 enable_security parameter 22 46 environment variables DISPLAY 1 8 GUI_AM_DIR 1 8 PATH 1 8 setting 1 8 erase_char parameter 22 47 erase_lin...

Page 483: ... xxix to xxx memory requirements xxxii platforms supported xxxii system requirements xxxii IP window 14 3 ip_forward_broadcast parameter 22 52 ipencap_type parameter 22 52 ipso_class parameter 22 52 IPX window 14 6 ipx_do_checksum parameter 22 53 ipx_dump_password parameter 22 53 ipx_dump_path parameter 22 53 ipx_dump_username parameter 22 53 ipx_file_server parameter 22 53 ipx_frame_type paramete...

Page 484: ...ut_start_char parameter 22 69 output_stop_char parameter 22 69 output_ttl parameter 22 69 P parameter groups 15 1 to 15 9 creating 15 3 to 15 8 modifying user defined groups 15 8 predefined list of 15 1 to 15 2 User Defined Parameter Groups command 15 3 to 15 9 parameter types displaying 15 5 parameters changing values of 4 14 displaying values of 4 14 selecting 4 12 to 4 14 See also individual pa...

Page 485: ...r 22 81 printer_hardware_tabs parameter 22 81 printer_host parameter 22 81 printer_map_to_upper parameter 22 82 printer_name parameter 22 82 printer_tcp_keepalive parameter 22 82 printer_type parameter 22 82 printer_width parameter 22 83 prompt parameter 22 83 ps_history_buffer parameter 22 84 push buttons 2 16 R radio buttons 2 17 redisplay_line parameter 22 84 Remote Address window 11 1 remote_a...

Page 486: ...ndow 13 1 to 13 4 SNMP Settings window 10 1 to 10 3 understanding the window fields 5 6 understanding the windows 5 3 WAN Modules windows 8 1 to 8 7 short_break parameter 22 91 Show command 16 2 to 16 6 controlling amount of output from 16 4 displaying parameter values 16 6 displaying the window 16 2 errors generated by 16 16 to 16 17 output box 16 5 prerequisites for using 16 1 push buttons 16 6 ...

Page 487: ...4 sysContact parameter 22 93 sysLocation parameter 22 94 syslog_facility parameter 22 94 syslog_host parameter 22 94 syslog_mask parameter 22 95 syslog_port parameter 22 95 sysName parameter 22 94 T T1 Internal CSU Status command 20 28 to 20 35 alarms box 20 31 displaying the window 20 28 to 20 29 entering interval information 20 30 interval information box 20 33 to 20 34 push buttons 20 34 status...

Page 488: ...rameter 22 103 vcli_groups parameter 22 104 vcli_password parameter 22 104 vcli_security parameter 22 104 verbose output button 16 4 View Script command 17 1 to 17 6 displaying the window 17 3 list box 17 5 message box 17 5 push buttons 17 6 text field 17 5 W WAN interface 8 3 WAN Modules window 8 2 Warning windows 3 13 window management 2 1 to 2 24 check buttons 2 18 icons 2 8 to 2 9 keyboard com...

Reviews: