5-11
Customizin
g
displayed keys
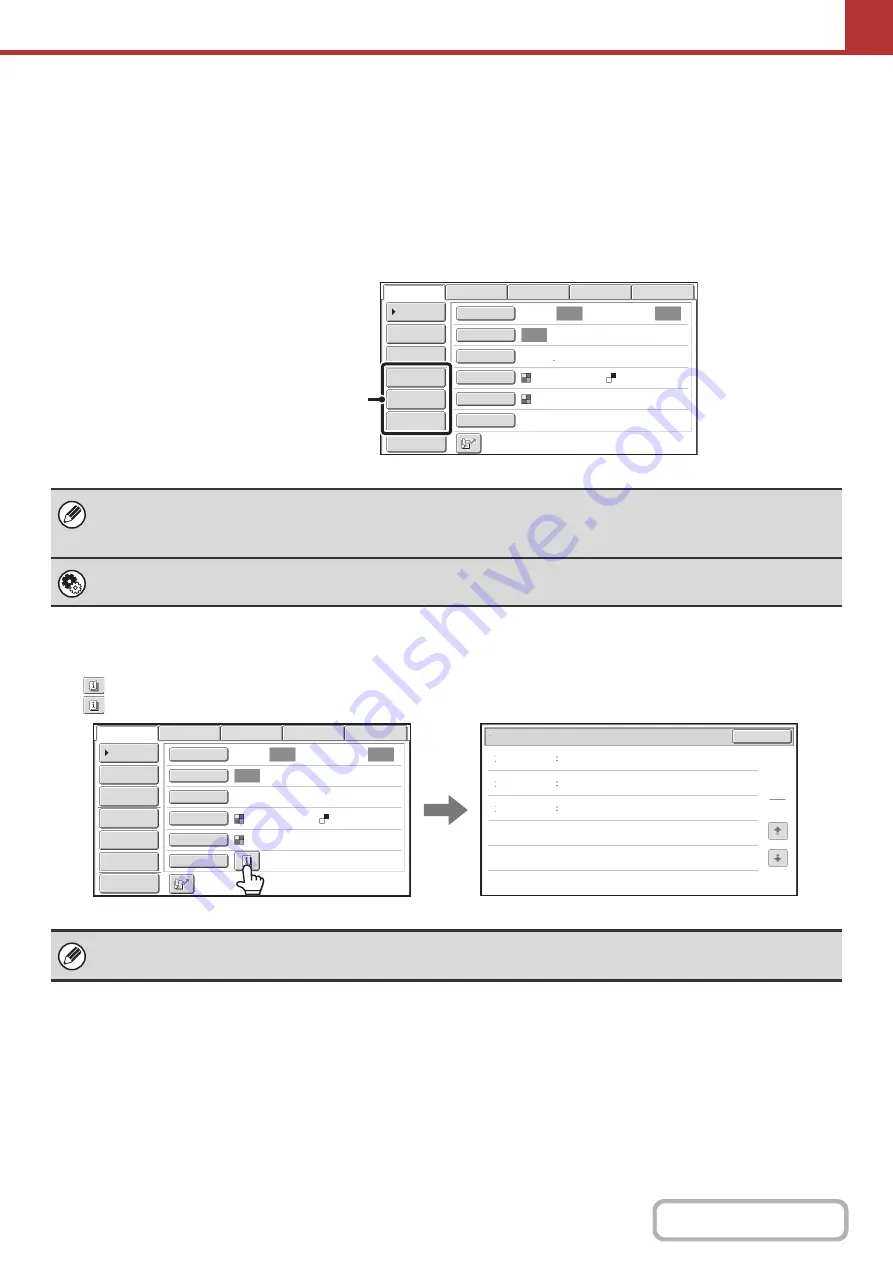
Special mode keys and other keys can be displayed in the base screen. Set these keys to functions that you frequently
use to access the functions with a single touch. The customized keys are configured using "Customize Key Setting" in
the Web pages.
In USB memory mode...
Customized keys do not initially appear, however, up to three keys can be added.
Example: When "Dual Pa
g
e Scan", "Job Build", and "Mixed Size Ori
g
inal" are assi
g
ned to the customized keys
Checkin
g
what special modes are selected
The
key appears in the base screen when a special mode or 2-sided scanning is selected.
The
key can be touched to display the selected special modes. To close the screen, touch the [OK] key.
• Displaying a program key in the base screen will enable you to retrieve the program by simply touching the key.
STORING SCAN OPERATIONS (Programs)
(page 5-73)
• The functions that can be selected for the customized keys vary depending on the mode.
System Settin
g
s (Administrator): Customize Key Settin
g
Registration is performed in [System Settings] - [Operation Settings] - "Customize Key Setting" in the Web page menu.
The special mode settings cannot be changed from the review screen. To change a setting, touch the [OK] key to close the
review screen and then touch the [Special Modes] key and select the setting that you wish to change.
Auto
Auto
Auto
Job Build
Mixed Size
Original
Dual Page
Scan
Send Settings
Address Entry
Address Book
USB Mem. Scan
Fax
Internet Fax
PC Scan
Special Modes
Color Mode
File Format
Resolution
Exposure
Original
Scan:
Scan
Send:
Text
200X200dpi
Auto/Grayscale
Mono2
Preview
These three keys can be changed
as desired.
Timer
Erase
Mixed Size
Original
On
Day of the Week:Monday
Time:21:30
Edge:1/2inch
Center:1/2inch
Function Review
OK
1
1
Auto
Auto
Auto
File
Quick File
Address Review
Send Settings
Address Entry
Address Book
USB Mem. Scan
Fax
Internet Fax
PC Scan
Special Modes
Color Mode
File Format
Resolution
Exposure
Original
Scan:
Scan
Send:
Text
200X200dpi
Auto/Grayscale
Mono2
Preview
Содержание MX-M266N
Страница 6: ...Make a copy on this type of paper Envelopes and other special media Tab Paper Transparency film ...
Страница 8: ...Assemble output into a pamphlet Create a stapled pamphlet Staple output Create a blank margin ...
Страница 11: ...Conserve Print on both sides of the paper Print multiple pages on one side of the paper ...
Страница 12: ...Print without a computer Print a file in a USB memory device Print a file stored in the machine ...
Страница 34: ...Search for a file abc Search for a file using a keyword Search by checking the contents of files ...
Страница 35: ...Organize my files Delete a file Delete all files Periodically delete files Change the folder ...
Страница 259: ...3 19 PRINTER Contents 4 Click the Print button Printing begins ...
Страница 267: ...3 27 PRINTER Contents 1 Select Layout 2 Select Long edged binding or Short edged binding Macintosh 1 2 ...


