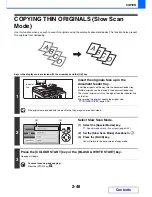
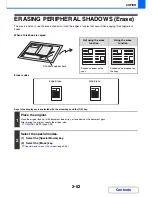


2-58
COPIER
Contents
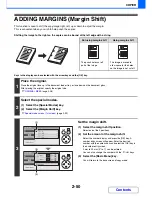
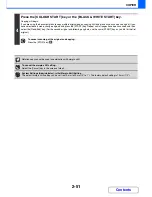
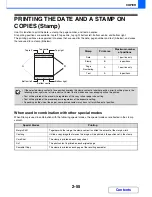
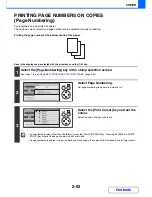
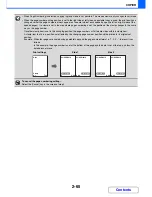
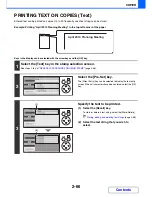
ADDING THE DATE TO COPIES (Date)
The date can be printed on copies. The position of the date, colour, format, and page (first page only or all pages) can
be selected.
Example: Printing APRIL 4, 2010 in the top right corner of the paper.
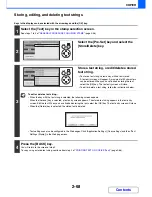
Keys in the display can be selected with the arrow keys and the [OK] key.
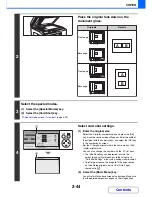
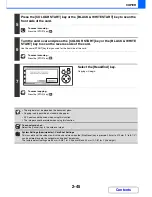
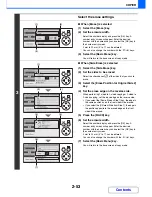
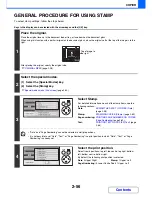
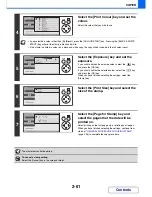
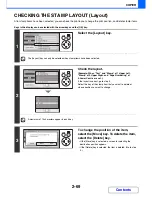
1
Select the [Date] key in the stamp selection screen.
See steps 1 to 4 of "
GENERAL PROCEDURE FOR USING STAMP
" (page 2-56).
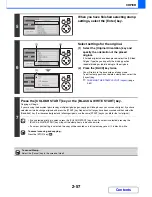
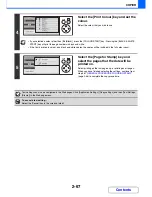
2
Select Date.
Set date items details in steps 3 to 7.
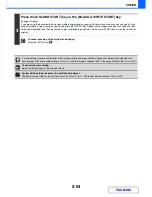
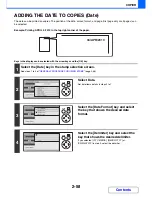
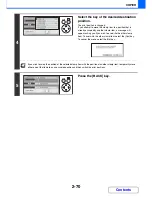
3
Select the [Date Format] key and select
the key that shows the desired date
format.
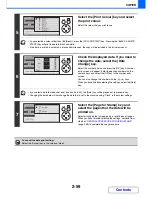
4
Select the [Delimiter] key and select the
key that shows the desired delimiter.
If you selected [YYYY/MM/DD], [MM/DD/YYYY], or
[DD/MM/YYYY] in step 3, select the delimiter.
04/APR/2010
OK
BACK
OK
BACK
OK
BACK
Содержание MX-C310
Страница 5: ...Make a copy on this type of paper Envelopes and other special media Transparency film ...
Страница 7: ...Assemble output into a pamphlet Create a pamphlet Staple output Create a blank margin for punching ...
Страница 10: ...Conserve Print on both sides of the paper Print multiple pages on one side of the paper ...
Страница 33: ...Search for a file abc Search for a file using a keyword ...
Страница 34: ...Organize my files Delete a file Periodically delete files ...
Страница 224: ...3 18 PRINTER Contents 4 Click the Print button Printing begins ...
Страница 706: ...MXC310 EX Z1 Operation Guide MX C310 MX C380 MX C400 MODEL ...