Chapter 5: Using the EMX
73
If one or both of the first two digits for a specific coordinate are
alphabetical characters, these alphabetical characters are replaced
with dashes (-).
6.
Press the FUNC button to display the serial number of the sensor,
which is shown as "s:XX," where XX are two digits of the serial
number. The LCD will cycle through the serial number from the first
two digits to the final two.
For example, if the serial number is AE17A00022, the LCD display
shows the following information one after another:
s:AE --> s:17 --> s:A0 --> s:00 --> s:22
Note: Some alphabets cannot be properly displayed due to the LCD
display restriction. For example, Q looks like 9, Z looks like 2, and M
looks like
. Check the sensor's label or the web interface when
you have doubts.
Asset Sensor Information
The LCD display can show the asset sensor state on each FEATURE port
as well as the asset tag state of each rack unit. For the Raritan asset
sensor, a rack unit refers to a tag port.
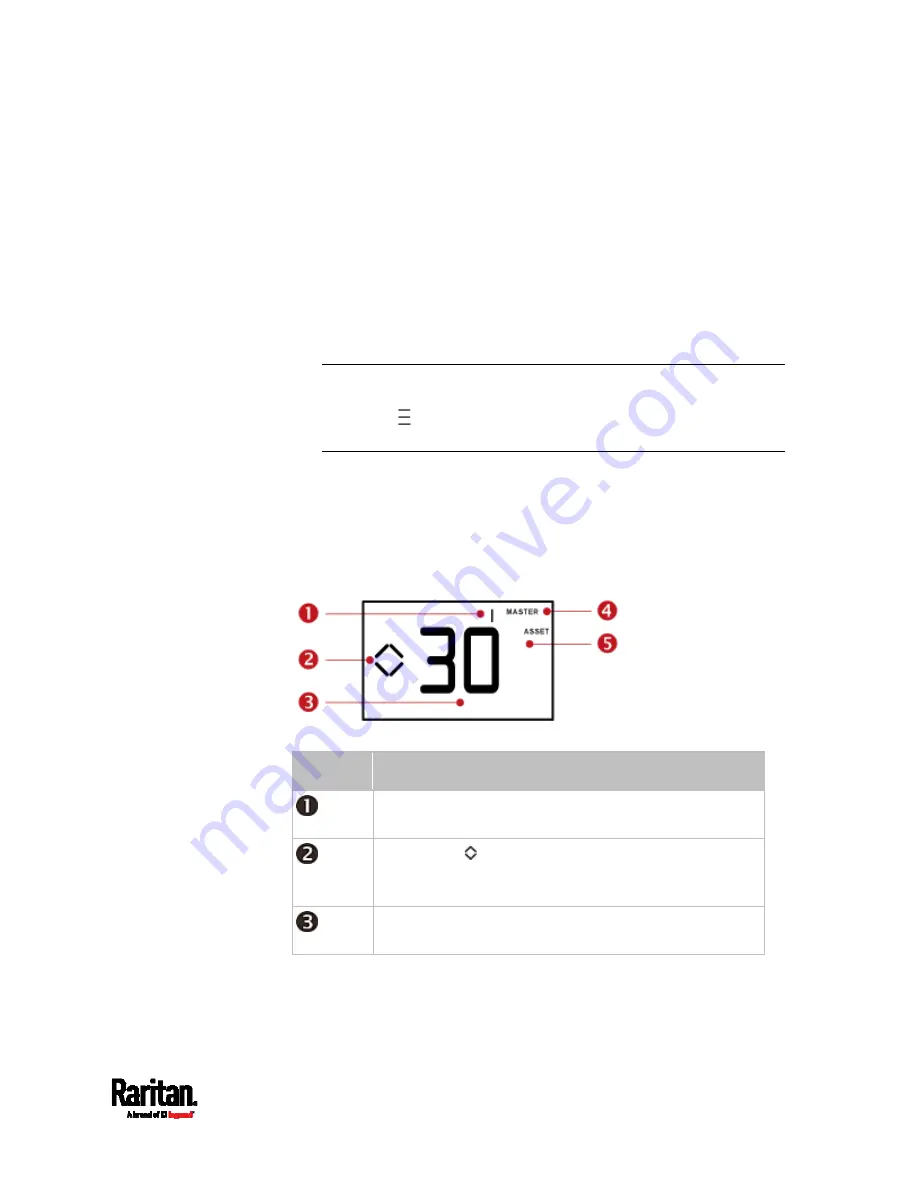
Below illustrates the asset strip information.
Section
Example information
"1" refers to the asset strip connected to the first
FEATURE port.
This symbol
indicates that you can switch between
diverse rack units now by pressing the Up or Down
button.
"30" indicates that the selected target is the 30th rack
unit.
Содержание EMX2-111
Страница 69: ...Chapter 4 Connecting External Equipment Optional 57...
Страница 78: ...Chapter 5 Using the EMX 66 EMX2 888...
Страница 442: ...Appendix A Specifications 430 RS 485 Pin signal definition 6 D bi direction al Data 7 8...
Страница 488: ...Appendix E LDAP Configuration Illustration 476 2 The EMX_Admin role is created...
Страница 507: ...Appendix G RADIUS Configuration Illustration 495 Note If your EMX uses PAP then select PAP...
Страница 508: ...Appendix G RADIUS Configuration Illustration 496 10 Select Standard to the left of the dialog and then click Add...
Страница 509: ...Appendix G RADIUS Configuration Illustration 497 11 Select Filter Id from the list of attributes and click Add...
Страница 512: ...Appendix G RADIUS Configuration Illustration 500 14 The new attribute is added Click OK...
Страница 513: ...Appendix G RADIUS Configuration Illustration 501 15 Click Next to continue...


