


Chapter 4: Connecting External Equipment (Optional)
35
Connecting Composite Asset Strips (AMS-Mx-Z)
A composite asset strip is named AMS-Mx-Z, where x is a number, such
as AMS-M2-Z or AMS-M3-Z. It is a type of asset strip that functions the
same as regular MASTER asset strips except for the following
differences:
It has two RJ-45 connectors.
Multiple composite asset strips can be daisy chained.
It contains less tag ports than regular asset strips.
For example, AMS-M2-Z contains two tag ports, and AMS-M3-Z
contains three tag ports only.
The composite asset strip is especially useful for tracking large devices
such as SAN boxes in the cabinet.
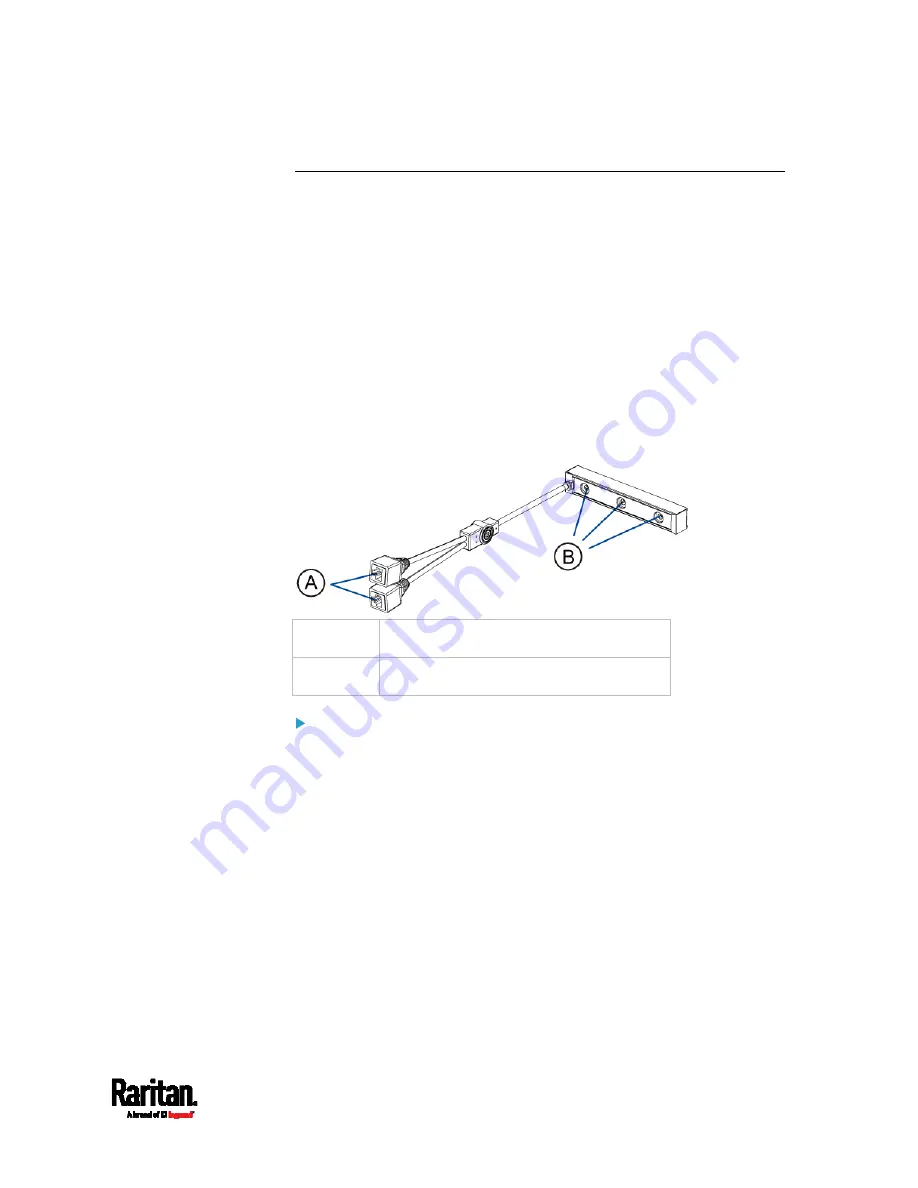
The following diagram illustrates AMS-M3-Z.
A
Two RJ-45 connectors
B
Tag ports
To connect composite asset strips to the EMX device:
1.
Connect a composite asset strip to the EMX device via a standard
network patch cable (CAT5e or higher).
a.
Connect one end of the cable to the RJ-45 port labeled "Input" on
the composite asset strip.
b.
Connect the other end of the cable to the FEATURE port on the
EMX device.
2.
Affix an asset tag to the IT device. Then connect this asset tag to the
composite asset strip by plugging the tag connector into the tag port
on the composite asset strip. For details, see
Connecting Regular
Asset Strips to the EMX
(on page 28).
3.
If necessary, daisy chain additional composite asset strips to track
more IT devices.
a.
Get a standard network patch cable that is within 2 meters.
Содержание EMX2-111
Страница 69: ...Chapter 4 Connecting External Equipment Optional 57...
Страница 78: ...Chapter 5 Using the EMX 66 EMX2 888...
Страница 442: ...Appendix A Specifications 430 RS 485 Pin signal definition 6 D bi direction al Data 7 8...
Страница 488: ...Appendix E LDAP Configuration Illustration 476 2 The EMX_Admin role is created...
Страница 507: ...Appendix G RADIUS Configuration Illustration 495 Note If your EMX uses PAP then select PAP...
Страница 508: ...Appendix G RADIUS Configuration Illustration 496 10 Select Standard to the left of the dialog and then click Add...
Страница 509: ...Appendix G RADIUS Configuration Illustration 497 11 Select Filter Id from the list of attributes and click Add...
Страница 512: ...Appendix G RADIUS Configuration Illustration 500 14 The new attribute is added Click OK...
Страница 513: ...Appendix G RADIUS Configuration Illustration 501 15 Click Next to continue...


