


Chapter 6: Using the Web Interface
144
If the two do not satisfy your needs, add new roles.
To create a role:
1.
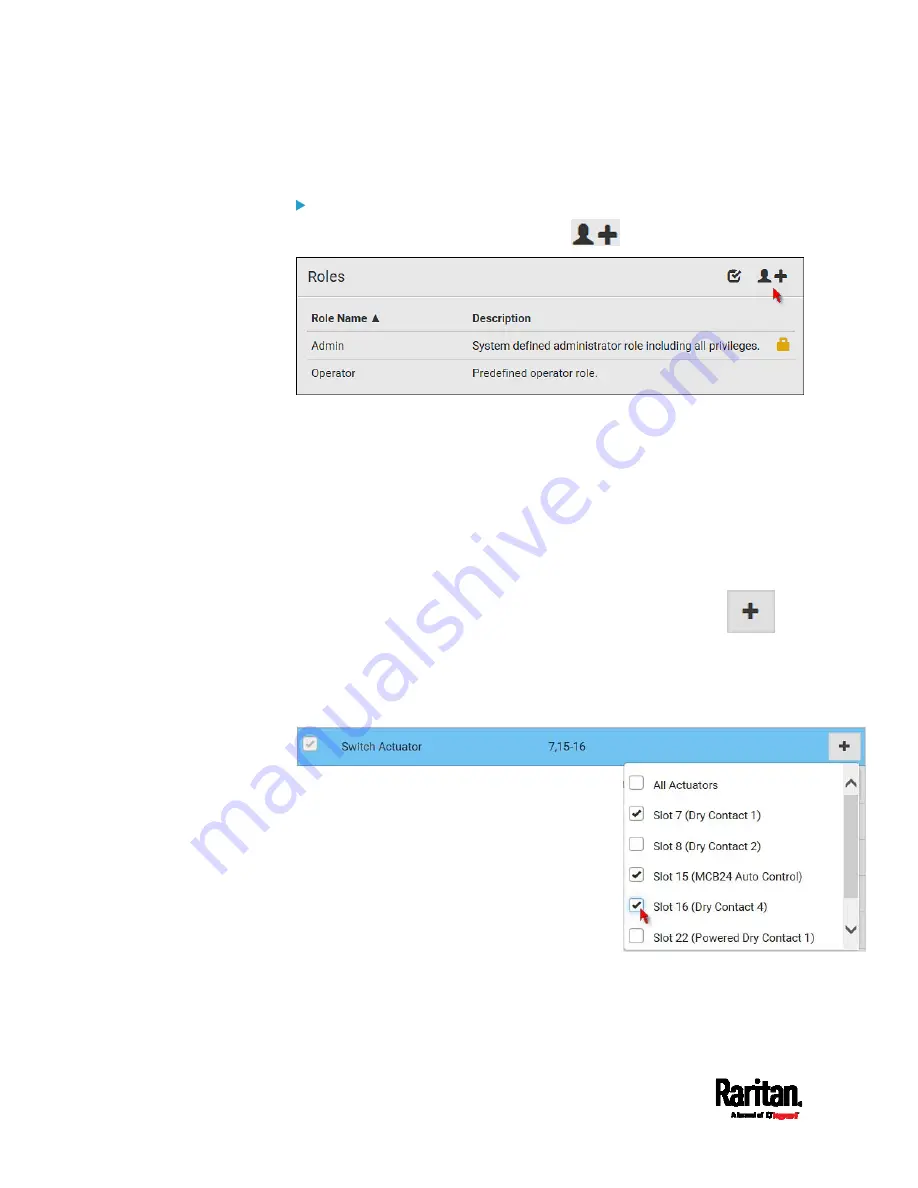
Choose User Management > Roles >
.
2.
Assign a role name.
1 to 32 characters long
Case sensitive
Spaces are permitted as of release 3.3.0
3.
Type a description for the role in the Description field.
4.
Select the desired privilege(s).
The 'Administrator Privileges' includes all privileges.
The 'Unrestricted View Privileges' includes all 'View' privileges.
5.
To select any privilege requiring the argument setting, click
to select the desired arguments.
For example, you can specify the actuators that are allowed to be
switched on/off for the 'Switch Actuator' privilege as shown
below.
6.
Click Save.
Now you can assign the role to any user. See
Creating Users
(on page
Editing or Deleting Users
(on page 142).
Содержание EMX2-111
Страница 69: ...Chapter 4 Connecting External Equipment Optional 57...
Страница 78: ...Chapter 5 Using the EMX 66 EMX2 888...
Страница 442: ...Appendix A Specifications 430 RS 485 Pin signal definition 6 D bi direction al Data 7 8...
Страница 488: ...Appendix E LDAP Configuration Illustration 476 2 The EMX_Admin role is created...
Страница 507: ...Appendix G RADIUS Configuration Illustration 495 Note If your EMX uses PAP then select PAP...
Страница 508: ...Appendix G RADIUS Configuration Illustration 496 10 Select Standard to the left of the dialog and then click Add...
Страница 509: ...Appendix G RADIUS Configuration Illustration 497 11 Select Filter Id from the list of attributes and click Add...
Страница 512: ...Appendix G RADIUS Configuration Illustration 500 14 The new attribute is added Click OK...
Страница 513: ...Appendix G RADIUS Configuration Illustration 501 15 Click Next to continue...


