4 - 19
MELSEC-A
4 INSTALLATION, WIRING AND MAINTENANCE OF THE PRODUCT
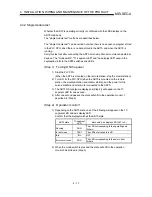
(Step 5) Internal information 2 monitor
1) The AD75 OS version will appear on the 17-segment LED for reference.
Version
[V000]
2) The axis display LED for each axis will turn OFF.
3) When the mode switch is pressed, the state will shift to the input information
n monitor state described in (Step 6).
(Step 6) Input information n monitor
1) Each time the mode switch is pressed, the following input signal names will
sequentially appear on the 17-segment LED.
2) The signal state of each axis displayed on the 17-segment LED is displayed
with the axis display LED for each axis.
Confirm that the display matches each signal state.
•
When signal is ON ........................ Axis display LED turns ON
•
When signal is OFF....................... Axis display LED turns OFF
17-segment LED
Target signal name
Remarks
SVON
Servo ON (
Md.116
Servo status: b1)
ULMT
Upper limit signal
LLMT
Lower limit signal
V-P
Speed/position changeover signal
DOG
Near-point dog signal
Changes sequentially
with each press of the
mode switch.
(Step 7) Shifting to operation monitor 1, and ending the operation
monitor
1) When the mode switch is pressed, the state will return to the operation
monitor 1 (Step 2).
Each time the mode switch is then pressed, the operation monitors between
(Step 2) and (Step 6) will be repeated.
2) To end the operation monitor, enter the monitor state between (Step 2) and
(Step 6) required by the user.
POINT
(1) The operation monitor described in this section is a function that allows the
AD75 state, control state of each axis and state of the input signals to be
confirmed. This monitor can be operated at any time.
(2) If the AD75 is not operating correctly, use the operation monitors as necessary.
(3) As another display on the above 17-segment LED, if a watch dog timer error
occurs in the AD75, "FALT" will appear.
If a watch dog timer error occurs in the AD75, the PLC CPU must be reset.
If the watch dog timer error still occurs in the AD75 even after resetting the PLC
CPU, the AD75 module must be replaced.
Contact your nearest dealer or sales office.
Содержание A1SD75M1
Страница 2: ......
Страница 20: ...A 18 MEMO...
Страница 22: ...MEMO...
Страница 27: ...1 5 MELSEC A 1 PRODUCT OUTLINE MEMO...
Страница 42: ...1 20 MELSEC A 1 PRODUCT OUTLINE MEMO...
Страница 52: ...2 10 MELSEC A 2 SYSTEM CONFIGURATION MEMO...
Страница 111: ...5 21 MELSEC A 5 DATA USED FOR POSITIONING CONTROL MEMO...
Страница 115: ...5 25 MELSEC A 5 DATA USED FOR POSITIONING CONTROL MEMO...
Страница 123: ...5 33 MELSEC A 5 DATA USED FOR POSITIONING CONTROL MEMO...
Страница 127: ...5 37 MELSEC A 5 DATA USED FOR POSITIONING CONTROL MEMO...
Страница 167: ...5 77 MELSEC A 5 DATA USED FOR POSITIONING CONTROL MEMO...
Страница 193: ...5 103 MELSEC A 5 DATA USED FOR POSITIONING CONTROL MEMO...
Страница 276: ...5 186 MELSEC A 5 DATA USED FOR POSITIONING CONTROL MEMO...
Страница 332: ...7 18 MELSEC A 7 MEMORY CONFIGURATION AND DATA PROCESS MEMO...
Страница 334: ...MEMO...
Страница 422: ...9 64 MELSEC A 9 MAIN POSITIONING CONTROL MEMO...
Страница 446: ...10 24 MELSEC A 10 ADVANCED POSITIONING CONTROL MEMO...
Страница 472: ...11 26 MELSEC A 11 MANUAL CONTROL MEMO...
Страница 576: ...12 104 MELSEC A 12 CONTROL AUXILIARY FUNCTIONS MEMO...
Страница 673: ...Appendix 5 MELSEC A APPENDICES Axis address mm inch degree pulse Axis address mm inch degree pulse...
Страница 679: ...Appendix 11 MELSEC A APPENDICES Initial value Axis 1 Axis 2 Axis 3 Remarks 0 0 0 1 1 0 0 0 0 0 300 0 0 0...
Страница 683: ...Appendix 15 MELSEC A APPENDICES Initial value Axis 1 Axis 2 Axis 3 Remarks 0 0 1 0 0 50 80 0 0 980...
Страница 691: ...Appendix 23 MELSEC A APPENDICES Initial value Axis 1 Axis 2 Axis 3 Remarks 0 0 0 0 0 50 80 0 0 0 0 0 980 4000 0...
Страница 745: ......

