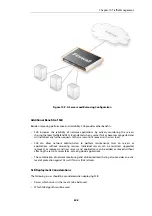
An important consideration which has been discussed previously, is allowance in the
Pipe Total
values for the overhead used by VPN protocols. As a rule of thumb, a pipe total of 1700 bps is
reasonable for a VPN tunnel where the underlying physical connection capacity is 2 Mbps.
It is also important to remember to insert into the pipe all non-VPN traffic using the same
physical link.
The
pipe chaining
can be used as a solution to the problem of VPN overhead. A limit which allows
for this overhead is placed on the VPN tunnel traffic and non-VPN traffic is inserted into a pipe
that matches the speed of the physical link.
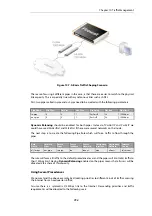
To do this we first create separate pipes for the outgoing traffic and the incoming traffic. VoIP
traffic will be sent over a VPN tunnel that will have a high priority. All other traffic will be sent at
the
best effort
priority (see above for an explanation of this term). Again, a 2/2 Mbps symmetric
link is assumed.
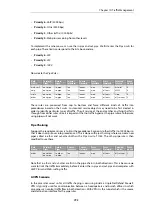
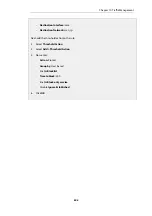
The pipes required will be:
•
vpn-in
•
Priority 6:
VoIP 500 Kbps
•
Priority 0:
Best effort
Total: 1700
•
vpn-out
•
Priority 6:
VoIP 500 Kbps
•
Priority 0:
Best effort
Total: 1700
•
in-pipe
•
Priority 6:
VoIP 500 Kbps
Total: 2000
•
out-pipe
•
Priority 6:
VoIP 500 Kbps
Total: 2000
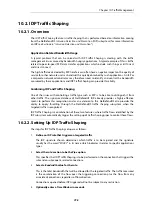
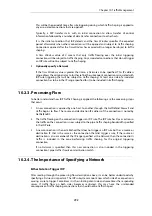
The following pipe rules are then needed to force traffic into the correct pipes and precedence
levels:
Rule
Name
Forward
Pipes
Return
Pipes
Src
Int
Source
Network
Dest
Int
Destination
Network
Selected
Service
Prece
dence
vpn_voip_out
vpn-out
out-pipe
vpn-in
in-pipe
lan
lannet
vpn
vpn_remote_net
H323
6
vpn_out
vpn-out
out-pipe
vpn-in
in-pipe
lan
lannet
vpn
vpn_remote_net
all_services
0
vpn_voip_in
vpn-in
in-pipe
vpn-out
out-pipe
vpn
vpn_remote_net
lan
lannet
H323
6
vpn_in
vpn-in
in-pipe
vpn-out
out-pipe
vpn
vpn_remote_net
lan
lannet
all_services
0
out
out-pipe
in-pipe
lan
lannet
wan
all-nets
all_services
0
Chapter 10: Traffic Management
796
Содержание NetDefendOS
Страница 30: ...Figure 1 3 Packet Flow Schematic Part III Chapter 1 NetDefendOS Overview 30 ...
Страница 32: ...Chapter 1 NetDefendOS Overview 32 ...
Страница 144: ...Chapter 2 Management and Maintenance 144 ...
Страница 220: ... Enable DHCP passthrough Enable L2 passthrough for non IP protocols 4 Click OK Chapter 3 Fundamentals 220 ...
Страница 267: ... SourceNetwork lannet DestinationInterface any DestinationNetwork all nets 4 Click OK Chapter 3 Fundamentals 267 ...
Страница 284: ...Chapter 3 Fundamentals 284 ...
Страница 360: ...The ospf command options are fully described in the separate NetDefendOS CLI Reference Guide Chapter 4 Routing 360 ...
Страница 392: ...Chapter 4 Routing 392 ...
Страница 396: ...Web Interface 1 Go to Network Ethernet If1 2 Select Enable DHCP 3 Click OK Chapter 5 DHCP Services 396 ...
Страница 419: ... Host 2001 DB8 1 MAC 00 90 12 13 14 15 5 Click OK Chapter 5 DHCP Services 419 ...
Страница 420: ...Chapter 5 DHCP Services 420 ...
Страница 424: ...2 Now enter Name lan_Access Action Expect Interface lan Network lannet 3 Click OK Chapter 6 Security Mechanisms 424 ...
Страница 573: ...Chapter 6 Security Mechanisms 573 ...
Страница 575: ...This section describes and provides examples of configuring NAT and SAT rules Chapter 7 Address Translation 575 ...
Страница 607: ...Chapter 7 Address Translation 607 ...
Страница 666: ...Chapter 8 User Authentication 666 ...
Страница 775: ...Chapter 9 VPN 775 ...
Страница 819: ...Chapter 10 Traffic Management 819 ...
Страница 842: ...Chapter 11 High Availability 842 ...
Страница 866: ...Default Enabled Chapter 13 Advanced Settings 866 ...
Страница 879: ...Chapter 13 Advanced Settings 879 ...

