•
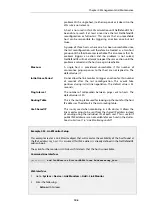
Network: mgmt-net
4.
For Authentication enter:
•
Community: Mg1RQqR
5.
Click OK
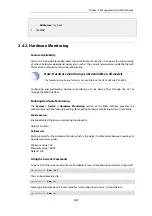
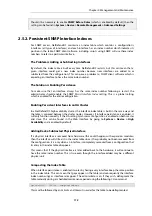
Should it be necessary to enable SNMP Before Rules (which is enabled by default) then the
setting can be found in System > Device > Remote Management > Advanced Settings.
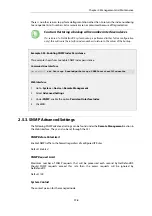
Example 2.34. Enabling SNMP Version 3 Monitoring
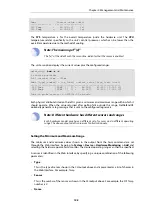
This example is similar to the SNMP versions 1 and 2c example above, but uses SNMP version 3
instead. It enables SNMPv3 access via the lan interface from the network mgmt-net. Both
SNMPv3 authentication and encryption will be enabled and authentication will be done using
the local database called
AdminUsers
.
Command-Line Interface
gw-world:/> add RemoteManagement RemoteMgmtSNMP my_snmp_v3
Interface=lan
Network=mgmt-net
SNMPversion=SNMPv3
LocalUserDatabase=AdminUsers
Snmp3SecurityLevel=authPriv
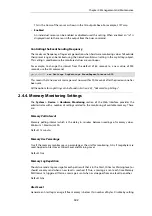
Should it be necessary to enable SNMP Before Rules (which is enabled by default) then the
command is:
gw-world:/> set Settings RemoteMgmtSettings SNMPBeforeRules=Yes
Web Interface
1.
Go to: System > Device > Remote Management > Add > SNMP Management
2.
Now enter:
•
Name: my_snmp_v3
•
SNMP Version: SNMPv3
•
Security Level: authPriv
3.
For Access Filter enter:
•
Interface: lan
•
Network: mgmt-net
4.
For Authentication enter:
•
Local User Database: AdminUsers
5.
Click OK
Chapter 2: Management and Maintenance
114
Содержание NetDefendOS
Страница 30: ...Figure 1 3 Packet Flow Schematic Part III Chapter 1 NetDefendOS Overview 30 ...
Страница 32: ...Chapter 1 NetDefendOS Overview 32 ...
Страница 144: ...Chapter 2 Management and Maintenance 144 ...
Страница 220: ... Enable DHCP passthrough Enable L2 passthrough for non IP protocols 4 Click OK Chapter 3 Fundamentals 220 ...
Страница 267: ... SourceNetwork lannet DestinationInterface any DestinationNetwork all nets 4 Click OK Chapter 3 Fundamentals 267 ...
Страница 284: ...Chapter 3 Fundamentals 284 ...
Страница 360: ...The ospf command options are fully described in the separate NetDefendOS CLI Reference Guide Chapter 4 Routing 360 ...
Страница 392: ...Chapter 4 Routing 392 ...
Страница 396: ...Web Interface 1 Go to Network Ethernet If1 2 Select Enable DHCP 3 Click OK Chapter 5 DHCP Services 396 ...
Страница 419: ... Host 2001 DB8 1 MAC 00 90 12 13 14 15 5 Click OK Chapter 5 DHCP Services 419 ...
Страница 420: ...Chapter 5 DHCP Services 420 ...
Страница 424: ...2 Now enter Name lan_Access Action Expect Interface lan Network lannet 3 Click OK Chapter 6 Security Mechanisms 424 ...
Страница 573: ...Chapter 6 Security Mechanisms 573 ...
Страница 575: ...This section describes and provides examples of configuring NAT and SAT rules Chapter 7 Address Translation 575 ...
Страница 607: ...Chapter 7 Address Translation 607 ...
Страница 666: ...Chapter 8 User Authentication 666 ...
Страница 775: ...Chapter 9 VPN 775 ...
Страница 819: ...Chapter 10 Traffic Management 819 ...
Страница 842: ...Chapter 11 High Availability 842 ...
Страница 866: ...Default Enabled Chapter 13 Advanced Settings 866 ...
Страница 879: ...Chapter 13 Advanced Settings 879 ...

