3.
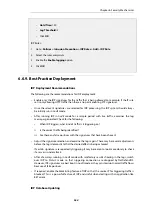
Select the Anti-Virus option
4.
Enable Anti-Virus
5.
Set the Anti-Virus Profile to
av_audit_profile
6.
Select OK
6.5.5. The Anti-Virus Cache
All anti-virus scans performed with the HTTP ALG use a common
anti-virus cache
. This cache is an
allocation of volatile memory which contains the URLs of recently scanned files that were
blocked by the anti-virus mechanism.
If a virus has been detected using the cache, the
URLForbidden
banner file is displayed indicating
that the URL has been blocked. This is the same banner file which is used with
Web Content
Filtering
(WCF) and can be modified by the administrator (see
Section 6.3.4.5, “Customizing WCF
). Note that the banner file is not displayed when a virus is detected in large files for
the first time.
Use of the Cache and Log Events
There are no additional log messages related to cache operation. The same
virus_found
log
message will be generated by NetDefendOS if an anti-virus scan has actually been done or if the
file URL was found in the cache. Cache usage is not indicated in the log events generated.
The Lifetime for Cache Entries
By default, an entry stays in the cache for a set period of time which is determined by the global
setting
Anti-Virus Cache Lifetime
. After the lifetime expires, the entry is removed from the cache
and a fresh anti-virus scan of the file is done by NetDefendOS if a new download is requested.
This means that if the problem with the file is fixed between the URL entering the cache and
being deleted from the cache (by default, the cache lifetime is 20 minutes) then the file will be
successfully downloaded on the next attempt.
The administrator may not have control over the file problem being rectified if it is located on the
public Internet. However, they may be able to fix the issue if the file is located on a local
webserver that might be located in a DMZ.
Example 6.30. Changing the Anti-Virus Cache Lifetime
This example changes the lifetime of an entry in the anti-virus cache to 15 minutes.
Command-Line Interface
gw-world:/> set Settings MiscSettings AVCache_Lifetime=15
Web Interface
1.
Go to: System > Advanced Settings > Misc. Settings
Chapter 6: Security Mechanisms
550
Содержание NetDefendOS
Страница 30: ...Figure 1 3 Packet Flow Schematic Part III Chapter 1 NetDefendOS Overview 30 ...
Страница 32: ...Chapter 1 NetDefendOS Overview 32 ...
Страница 144: ...Chapter 2 Management and Maintenance 144 ...
Страница 220: ... Enable DHCP passthrough Enable L2 passthrough for non IP protocols 4 Click OK Chapter 3 Fundamentals 220 ...
Страница 267: ... SourceNetwork lannet DestinationInterface any DestinationNetwork all nets 4 Click OK Chapter 3 Fundamentals 267 ...
Страница 284: ...Chapter 3 Fundamentals 284 ...
Страница 360: ...The ospf command options are fully described in the separate NetDefendOS CLI Reference Guide Chapter 4 Routing 360 ...
Страница 392: ...Chapter 4 Routing 392 ...
Страница 396: ...Web Interface 1 Go to Network Ethernet If1 2 Select Enable DHCP 3 Click OK Chapter 5 DHCP Services 396 ...
Страница 419: ... Host 2001 DB8 1 MAC 00 90 12 13 14 15 5 Click OK Chapter 5 DHCP Services 419 ...
Страница 420: ...Chapter 5 DHCP Services 420 ...
Страница 424: ...2 Now enter Name lan_Access Action Expect Interface lan Network lannet 3 Click OK Chapter 6 Security Mechanisms 424 ...
Страница 573: ...Chapter 6 Security Mechanisms 573 ...
Страница 575: ...This section describes and provides examples of configuring NAT and SAT rules Chapter 7 Address Translation 575 ...
Страница 607: ...Chapter 7 Address Translation 607 ...
Страница 666: ...Chapter 8 User Authentication 666 ...
Страница 775: ...Chapter 9 VPN 775 ...
Страница 819: ...Chapter 10 Traffic Management 819 ...
Страница 842: ...Chapter 11 High Availability 842 ...
Страница 866: ...Default Enabled Chapter 13 Advanced Settings 866 ...
Страница 879: ...Chapter 13 Advanced Settings 879 ...

