firewall that is configured for SSL VPN.
The IP address will be the same as the
Server IP
configured in the interface's
SSL VPN
object.
The port can also be specified after the IP address if it is different from the default value of
443
.
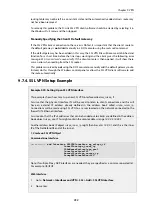
With
https
, the firewall will send a certificate to the browser that is not CA signed and this
must be accepted as an exception by the user before continuing.
2.
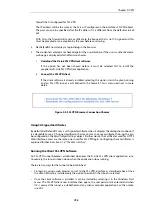
NetDefendOS now displays a login dialog in the browser.
3.
The credentials entered are checked against the user database. If the user is authenticated, a
web page is displayed which offers two choices:
i.
Download the D-Link SSL VPN client software
If this option has not been chosen before, it must be selected first to install the
proprietary D-Link SSL VPN client application.
ii.
Connect the SSL VPN client
If the client software is already installed, selecting this option starts the client running
and an SSL VPN tunnel is established to the firewall. This is discussed next in more
detail.
Figure 9.5. SSL VPN Browser Connection Choices
Using CA Signed Certificates
By default, NetDefendOS uses a self-signed certificate when it displays the dialog shown above. If
it is desirable to use a CA signed certificate, that may or may not use certificate chaining, this can
be configured on the
RemoteMgmtSettings
object. In other words, the certificates used for HTTPS
Web Interface access are the same ones used for SSL VPN login. Configuring these certificates is
explained further in
Section 2.1.4, “The Web Interface”
.
Running the Client SSL VPN Software
An SSL VPN tunnel becomes established whenever the D-Link SSL VPN client application runs.
Conversely, the tunnel is taken down when the application stops running.
There are two ways for the tunnel to be established:
•
To login by using a web browser to surf to the SSL VPN interface as described above. Once
the client software is installed, only the option to establish the tunnel is selected.
•
Once the client software is installed, it can be started by selecting it in the Windows
Start
menu. The SSL VPN client user interface then opens, the user password is entered and when
OK
is pressed the tunnel is established and any client computer application can then make
use of it.
Chapter 9: VPN
756
Содержание NetDefendOS
Страница 30: ...Figure 1 3 Packet Flow Schematic Part III Chapter 1 NetDefendOS Overview 30 ...
Страница 32: ...Chapter 1 NetDefendOS Overview 32 ...
Страница 144: ...Chapter 2 Management and Maintenance 144 ...
Страница 220: ... Enable DHCP passthrough Enable L2 passthrough for non IP protocols 4 Click OK Chapter 3 Fundamentals 220 ...
Страница 267: ... SourceNetwork lannet DestinationInterface any DestinationNetwork all nets 4 Click OK Chapter 3 Fundamentals 267 ...
Страница 284: ...Chapter 3 Fundamentals 284 ...
Страница 360: ...The ospf command options are fully described in the separate NetDefendOS CLI Reference Guide Chapter 4 Routing 360 ...
Страница 392: ...Chapter 4 Routing 392 ...
Страница 396: ...Web Interface 1 Go to Network Ethernet If1 2 Select Enable DHCP 3 Click OK Chapter 5 DHCP Services 396 ...
Страница 419: ... Host 2001 DB8 1 MAC 00 90 12 13 14 15 5 Click OK Chapter 5 DHCP Services 419 ...
Страница 420: ...Chapter 5 DHCP Services 420 ...
Страница 424: ...2 Now enter Name lan_Access Action Expect Interface lan Network lannet 3 Click OK Chapter 6 Security Mechanisms 424 ...
Страница 573: ...Chapter 6 Security Mechanisms 573 ...
Страница 575: ...This section describes and provides examples of configuring NAT and SAT rules Chapter 7 Address Translation 575 ...
Страница 607: ...Chapter 7 Address Translation 607 ...
Страница 666: ...Chapter 8 User Authentication 666 ...
Страница 775: ...Chapter 9 VPN 775 ...
Страница 819: ...Chapter 10 Traffic Management 819 ...
Страница 842: ...Chapter 11 High Availability 842 ...
Страница 866: ...Default Enabled Chapter 13 Advanced Settings 866 ...
Страница 879: ...Chapter 13 Advanced Settings 879 ...

