•
Secure Shell (SSH) CLI sessions.
•
Any CLI session through the local console interface.
•
Secure Copy (SCP) sessions.
•
Web Interface sessions connected by HTTP or HTTPS.
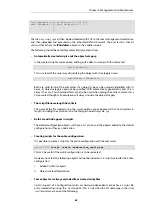
The command without any options gives a summary of currently open sessions:
gw-world:/> sessionmanager
Session Manager status
----------------------
Active connections
:
3
Maximum allowed connections :
64
Local idle session timeout
:
900
NetCon idle session timeout :
600
To see a list of all sessions use the
-list
option. Below, is some typical output showing the local
console session:
gw-world:/> sessionmanager -list
User
Database
IP
Type
Mode
Access
-------- ---------------- ---------
------- -------
--------
local
<empty>
0.0.0.0
local
console
admin
If the user has full administrator privileges, they can forcibly terminate another management
session using the
-disconnect
option of the
sessionmanager
command.
The
sessionmanager
command options are fully documented in the
CLI Reference Guide
.
2.1.6. CLI Scripts
To allow the administrator to easily store and execute sets of CLI commands, NetDefendOS
provides a feature called
CLI scripting
. A
CLI script
is a predefined sequence of CLI commands
which can be executed after they are saved to a file and the file is then uploaded to the
NetDefend Firewall.
The steps for creating a CLI script are as follows:
1.
Create a text file with a text editor containing a sequential list of CLI commands, one per
line.
The D-Link recommended convention is for these files to use the file extension
.sgs
(S
ecurity
G
ateway
S
cript
). The filename, including the extension, should not be more than 16
characters.
2.
Upload the file to the NetDefend Firewall using
Secure Copy
(SCP). There are a number of
third party software products that can provide SCP on various computer platforms. Script
files must be stored in a directory below the root called script. For example, a typical SCP
console command for uploading might be:
> scp my_script.sgs [email protected]:script/
SCP uploading is discussed further in
.
3.
Use the CLI command
script -execute
to run the script file.
Chapter 2: Management and Maintenance
58
Содержание NetDefendOS
Страница 30: ...Figure 1 3 Packet Flow Schematic Part III Chapter 1 NetDefendOS Overview 30 ...
Страница 32: ...Chapter 1 NetDefendOS Overview 32 ...
Страница 144: ...Chapter 2 Management and Maintenance 144 ...
Страница 220: ... Enable DHCP passthrough Enable L2 passthrough for non IP protocols 4 Click OK Chapter 3 Fundamentals 220 ...
Страница 267: ... SourceNetwork lannet DestinationInterface any DestinationNetwork all nets 4 Click OK Chapter 3 Fundamentals 267 ...
Страница 284: ...Chapter 3 Fundamentals 284 ...
Страница 360: ...The ospf command options are fully described in the separate NetDefendOS CLI Reference Guide Chapter 4 Routing 360 ...
Страница 392: ...Chapter 4 Routing 392 ...
Страница 396: ...Web Interface 1 Go to Network Ethernet If1 2 Select Enable DHCP 3 Click OK Chapter 5 DHCP Services 396 ...
Страница 419: ... Host 2001 DB8 1 MAC 00 90 12 13 14 15 5 Click OK Chapter 5 DHCP Services 419 ...
Страница 420: ...Chapter 5 DHCP Services 420 ...
Страница 424: ...2 Now enter Name lan_Access Action Expect Interface lan Network lannet 3 Click OK Chapter 6 Security Mechanisms 424 ...
Страница 573: ...Chapter 6 Security Mechanisms 573 ...
Страница 575: ...This section describes and provides examples of configuring NAT and SAT rules Chapter 7 Address Translation 575 ...
Страница 607: ...Chapter 7 Address Translation 607 ...
Страница 666: ...Chapter 8 User Authentication 666 ...
Страница 775: ...Chapter 9 VPN 775 ...
Страница 819: ...Chapter 10 Traffic Management 819 ...
Страница 842: ...Chapter 11 High Availability 842 ...
Страница 866: ...Default Enabled Chapter 13 Advanced Settings 866 ...
Страница 879: ...Chapter 13 Advanced Settings 879 ...

