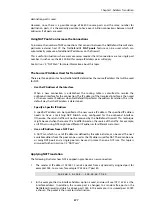
•
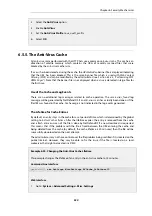
Hold Time: 120
•
Log Threshold: 2
•
Click OK
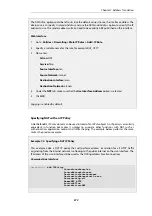
IDP Rules:
1.
Go to: Policies > Intrusion Prevention > IDP Rules > Add > IDP Rule
2.
Select the rule
examplerule
3.
Enable the Enable logging option
4.
Click OK
6.6.9. Best Practice Deployment
IDP Deployment Recommendations
The following are the recommendations for IDP employment:
•
Enable only the IDP signatures for the traffic that is being allowed. For example, if the IP rule
set is only allowing HTTP traffic then there is no point enabling FTP signatures.
•
Once the relevant signatures are selected for IDP processing, the IDP system should always
be initially run in
Audit
mode.
•
After running IDP in
Audit
mode for a sample period with live traffic, examines the log
messages generated. Check for the following:
i.
When IDP triggers, what kind of traffic is it triggering on?
ii.
Is the correct traffic being identified?
iii.
Are there any false positives with the signatures that have been chosen?
•
Adjust the signature selection and examine the logs again. There may be several adjustments
before the logs demonstrate that the desired effect is being achieved.
If certain signatures are repeatedly triggering it may be reason to look more closely to check
if a server is under attack.
•
After a few days running in
Audit
mode with satisfactory results showing in the logs, switch
over IDP to
Protect
mode so that triggering connection are dropped by NetDefendOS.
However, IDS signatures are best kept in
Audit
mode as they can interrupt normal traffic flows
because of false positives.
•
If required, enable the blacklisting feature of IDP so that the source IP for triggering traffic is
blocked. This is a powerful feature of IDP and useful when dealing with an application like
BitTorrent.
IDP Database Updating
Chapter 6: Security Mechanisms
564
Содержание NetDefendOS
Страница 30: ...Figure 1 3 Packet Flow Schematic Part III Chapter 1 NetDefendOS Overview 30 ...
Страница 32: ...Chapter 1 NetDefendOS Overview 32 ...
Страница 144: ...Chapter 2 Management and Maintenance 144 ...
Страница 220: ... Enable DHCP passthrough Enable L2 passthrough for non IP protocols 4 Click OK Chapter 3 Fundamentals 220 ...
Страница 267: ... SourceNetwork lannet DestinationInterface any DestinationNetwork all nets 4 Click OK Chapter 3 Fundamentals 267 ...
Страница 284: ...Chapter 3 Fundamentals 284 ...
Страница 360: ...The ospf command options are fully described in the separate NetDefendOS CLI Reference Guide Chapter 4 Routing 360 ...
Страница 392: ...Chapter 4 Routing 392 ...
Страница 396: ...Web Interface 1 Go to Network Ethernet If1 2 Select Enable DHCP 3 Click OK Chapter 5 DHCP Services 396 ...
Страница 419: ... Host 2001 DB8 1 MAC 00 90 12 13 14 15 5 Click OK Chapter 5 DHCP Services 419 ...
Страница 420: ...Chapter 5 DHCP Services 420 ...
Страница 424: ...2 Now enter Name lan_Access Action Expect Interface lan Network lannet 3 Click OK Chapter 6 Security Mechanisms 424 ...
Страница 573: ...Chapter 6 Security Mechanisms 573 ...
Страница 575: ...This section describes and provides examples of configuring NAT and SAT rules Chapter 7 Address Translation 575 ...
Страница 607: ...Chapter 7 Address Translation 607 ...
Страница 666: ...Chapter 8 User Authentication 666 ...
Страница 775: ...Chapter 9 VPN 775 ...
Страница 819: ...Chapter 10 Traffic Management 819 ...
Страница 842: ...Chapter 11 High Availability 842 ...
Страница 866: ...Default Enabled Chapter 13 Advanced Settings 866 ...
Страница 879: ...Chapter 13 Advanced Settings 879 ...

