


1.
Go to: Objects > Services > Add > TCP/UDP Service
2.
Now enter:
•
Name: pop3_client_service
•
Type: TCP
•
Destination: 110
•
ALG: pop3_client_alg
3.
Click OK
C. Create an IP Rule for email traffic from the mail server:
1.
Go to: Policies > Firewalling > Main IP Rules > Add > IP Rule
2.
Now enter:
•
Name: pop3_mail
•
Action: Allow
•
Service: pop3_client_service
•
Source Interface: lan
•
Source Network: lan_net
•
Destination Interface: dmz
•
Destination Network: mail_server_ip
3.
Click OK
Note that clients initiates the POP3 connection so they are the source for the IP rule.
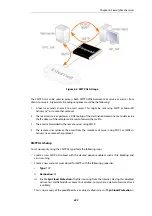
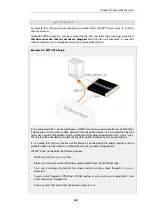
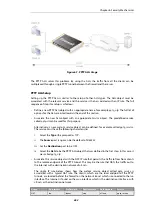
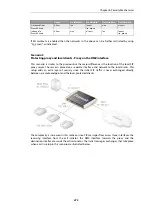
6.2.8. The PPTP ALG
The PPTP ALG is provided to deal with a specific issue when PPTP tunnels are used with NAT.
Let us suppose we have two clients A and B on a protected inner network behind a NetDefend
Firewall. The firewall is connected to the external Internet and a NAT rule is defined to allow
traffic from the clients to flow to the Internet. Both clients will therefore appear to have from the
same IP address as they make connections to servers across the Internet.
One client A now establishes a PPTP tunnel to an external host C across the Internet. The tunnel
endpoints are the client and the external server. Because of the NAT IP rule, the tunnel
connection will appear to be coming from the external IP address on the firewall.
This first connection will be successful but when the second client B also tries to connect to the
same server C at the same endpoint IP address, the first connection for A will be lost. The reason
is that both clients are trying to establish a PPTP tunnel from the same external IP address to the
same endpoint.
Chapter 6: Security Mechanisms
461
Содержание NetDefendOS
Страница 30: ...Figure 1 3 Packet Flow Schematic Part III Chapter 1 NetDefendOS Overview 30 ...
Страница 32: ...Chapter 1 NetDefendOS Overview 32 ...
Страница 144: ...Chapter 2 Management and Maintenance 144 ...
Страница 220: ... Enable DHCP passthrough Enable L2 passthrough for non IP protocols 4 Click OK Chapter 3 Fundamentals 220 ...
Страница 267: ... SourceNetwork lannet DestinationInterface any DestinationNetwork all nets 4 Click OK Chapter 3 Fundamentals 267 ...
Страница 284: ...Chapter 3 Fundamentals 284 ...
Страница 360: ...The ospf command options are fully described in the separate NetDefendOS CLI Reference Guide Chapter 4 Routing 360 ...
Страница 392: ...Chapter 4 Routing 392 ...
Страница 396: ...Web Interface 1 Go to Network Ethernet If1 2 Select Enable DHCP 3 Click OK Chapter 5 DHCP Services 396 ...
Страница 419: ... Host 2001 DB8 1 MAC 00 90 12 13 14 15 5 Click OK Chapter 5 DHCP Services 419 ...
Страница 420: ...Chapter 5 DHCP Services 420 ...
Страница 424: ...2 Now enter Name lan_Access Action Expect Interface lan Network lannet 3 Click OK Chapter 6 Security Mechanisms 424 ...
Страница 573: ...Chapter 6 Security Mechanisms 573 ...
Страница 575: ...This section describes and provides examples of configuring NAT and SAT rules Chapter 7 Address Translation 575 ...
Страница 607: ...Chapter 7 Address Translation 607 ...
Страница 666: ...Chapter 8 User Authentication 666 ...
Страница 775: ...Chapter 9 VPN 775 ...
Страница 819: ...Chapter 10 Traffic Management 819 ...
Страница 842: ...Chapter 11 High Availability 842 ...
Страница 866: ...Default Enabled Chapter 13 Advanced Settings 866 ...
Страница 879: ...Chapter 13 Advanced Settings 879 ...