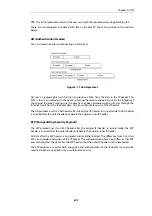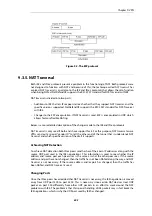
gw-world:/> set Interface IPsecTunnel MyIPsecTunnel PSK=MyPSK
Web Interface
First create a Pre-shared Key:
1.
Go to: Objects > Key Ring > Add > Pre-shared key
2.
Enter a name for the pre-shared key, for example
MyPSK
3.
Choose Hexadecimal Key and click Generate Random Key to generate a key to the
Passphrase textbox
4.
Click OK
Then, apply the pre-shared key to the IPsec tunnel:
1.
Go to: Network > Interfaces and VPN > IPsec
2.
Select the target IPsec tunnel object
3.
Under the Authentication tab, choose Pre-shared Key and select MyPSK
4.
Click OK
9.3.8. Using ID Lists with Certificates
When certificates are used as the authentication method for IPsec tunnels, NetDefendOS will
accept all remote peers that are capable of presenting a CA signed certificate. This can be a
potential problem, especially when using roaming clients.
A Typical Scenario
Consider the scenario of traveling employees being given access to the internal corporate
networks using IPsec with certificates. The organization administers their own Certificate
Authority, and certificates have been issued to the employees. Different groups of employees are
likely to have access to different parts of the internal networks. For example, members of the
sales force might access servers running the order system, while technical engineers would
access technical databases.
The Problem
Since the IP addresses of the traveling employees VPN clients cannot be known beforehand, the
incoming IPsec connections from clients cannot be differentiated. This means that the firewall is
unable to correctly administer access to different parts of the internal networks using only the
client's IP address.
The ID List Solution
Identification lists
(ID lists) provide a solution to this problem. A NetDefendOS
ID List
object
contains one or more
ID
objects as children. An
IPsec Tunnel
object can then have its
Remote ID
property set to an
ID list
object. For a particular tunnel to be used by a particular client, the
Chapter 9: VPN
697
Содержание NetDefendOS
Страница 30: ...Figure 1 3 Packet Flow Schematic Part III Chapter 1 NetDefendOS Overview 30 ...
Страница 32: ...Chapter 1 NetDefendOS Overview 32 ...
Страница 144: ...Chapter 2 Management and Maintenance 144 ...
Страница 220: ... Enable DHCP passthrough Enable L2 passthrough for non IP protocols 4 Click OK Chapter 3 Fundamentals 220 ...
Страница 267: ... SourceNetwork lannet DestinationInterface any DestinationNetwork all nets 4 Click OK Chapter 3 Fundamentals 267 ...
Страница 284: ...Chapter 3 Fundamentals 284 ...
Страница 360: ...The ospf command options are fully described in the separate NetDefendOS CLI Reference Guide Chapter 4 Routing 360 ...
Страница 392: ...Chapter 4 Routing 392 ...
Страница 396: ...Web Interface 1 Go to Network Ethernet If1 2 Select Enable DHCP 3 Click OK Chapter 5 DHCP Services 396 ...
Страница 419: ... Host 2001 DB8 1 MAC 00 90 12 13 14 15 5 Click OK Chapter 5 DHCP Services 419 ...
Страница 420: ...Chapter 5 DHCP Services 420 ...
Страница 424: ...2 Now enter Name lan_Access Action Expect Interface lan Network lannet 3 Click OK Chapter 6 Security Mechanisms 424 ...
Страница 573: ...Chapter 6 Security Mechanisms 573 ...
Страница 575: ...This section describes and provides examples of configuring NAT and SAT rules Chapter 7 Address Translation 575 ...
Страница 607: ...Chapter 7 Address Translation 607 ...
Страница 666: ...Chapter 8 User Authentication 666 ...
Страница 775: ...Chapter 9 VPN 775 ...
Страница 819: ...Chapter 10 Traffic Management 819 ...
Страница 842: ...Chapter 11 High Availability 842 ...
Страница 866: ...Default Enabled Chapter 13 Advanced Settings 866 ...
Страница 879: ...Chapter 13 Advanced Settings 879 ...


