


LMV
Series
Technical
Instructions
Document
No.
LV5
‐
1000
SCC
Inc.
Page
17
Section
7
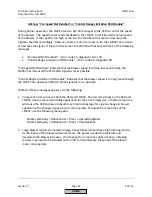
AZL
Says
“
Measurement
not
Successful
”
When
Measuring
the
Delay
Time
for
O2
Trim
When
setting
the
low
fire
point
or
the
high
fire
point
on
the
O
2
control
curve,
the
AZL
measures
what
is
called
the
“delay
time”
(Tau
time).
The
delay
time
is
defined
as
the
length
of
time
it
takes
a
change
in
the
air
damper
position
to
be
detected
by
the
O
2
sensor.
This
time
is
longer
at
low
fire
and
shorter
at
high
fire
due
to
gas
velocity.
If
an
error
occurs
while
trying
to
measure
this
delay
time,
the
AZL
says
“
Measurement
not
Successful
”.
To
troubleshoot
this,
check
the
following:
1)
Verify
that
OptgMode
is
set
to
“man
deact”
using
the
following
menu
path:
Params
&
Display
>
O2Contr/Alarm
>
Gas/Oil
Settings
>
OptgMode
2)
Verify
that
LowfireAdaptPtNo
is
set
to
2
(combustion
curve
point
2)
or
higher
if
desired.
By
default,
this
parameter
is
set
to
“X”
(undefined).
The
menu
path
for
this
parameter
is:
Params
&
Display
>
O2Contr/Alarm
>
Gas/Oil
Settings
>
Control
Param
>
LowfireAdaptPtNo
3)
If
both
of
the
above
parameters
are
set
correctly,
then
it
is
possible
that
the
O
2
readings
on
the
ratio
control
curve
were
set
incorrectly.
When
setting
each
point
on
the
O
2
control
curve,
the
LMV5
will
prompt
with
the
message
“When
value
stable
continue
w
ENTER”.
Pressing
ENTER
then
sets
the
%O
2
for
the
ratio
control
curve.
If
ENTER
is
pressed
too
early
before
the
O
2
value
has
stabilized,
a
non
‐
representative
O
2
value
will
be
entered
for
the
ratio
control
curve.
If
this
is
the
case,
go
back
into
the
O
2
control
curve
and
at
each
point
wait
to
get
a
stable
reading
before
pressing
ENTER
to
ensure
that
the
O
2
reading
is
representative
of
the
current
air
damper
position.
30
‐
60
seconds
is
not
too
long
to
wait
once
the
arrow
(>)
turns
into
a
colon
(:)
indicating
that
the
actuators
have
stopped
moving.
HOME
Summary of Contents for LMV 5 Series
Page 2: ...Intentionally Left Blank ...
Page 41: ...LMV Series Technical Instructions Document No LV5 1000 SCC Inc Page 7 Section 2 HOME ...
Page 42: ...Technical Instructions LMV Series Document No LV5 1000 Section 2 Page 8 SCC Inc HOME ...
Page 43: ...LMV Series Technical Instructions Document No LV5 1000 SCC Inc Page 9 Section 2 HOME ...
Page 44: ...Technical Instructions LMV Series Document No LV5 1000 Section 2 Page 10 SCC Inc HOME ...
Page 45: ...LMV Series Technical Instructions Document No LV5 1000 SCC Inc Page 11 Section 2 HOME ...
Page 46: ...Technical Instructions LMV Series Document No LV5 1000 Section 2 Page 12 SCC Inc HOME ...
Page 47: ...LMV Series Technical Instructions Document No LV5 1000 SCC Inc Page 13 Section 2 HOME ...
Page 48: ...Technical Instructions LMV Series Document No LV5 1000 Section 2 Page 14 SCC Inc HOME ...
Page 49: ...LMV Series Technical Instructions Document No LV5 1000 SCC Inc Page 15 Section 2 HOME ...
Page 50: ...Technical Instructions LMV Series Document No LV5 1000 Section 2 Page 16 SCC Inc HOME ...
Page 51: ...LMV Series Technical Instructions Document No LV5 1000 SCC Inc Page 17 Section 2 HOME ...
Page 52: ...Technical Instructions LMV Series Document No LV5 1000 Section 2 Page 18 SCC Inc HOME ...
Page 53: ...LMV Series Technical Instructions Document No LV5 1000 SCC Inc Page 19 Section 2 HOME ...
Page 54: ...Technical Instructions LMV Series Document No LV5 1000 Section 2 Page 20 SCC Inc HOME ...
Page 55: ...LMV Series Technical Instructions Document No LV5 1000 SCC Inc Page 21 Section 2 HOME ...
Page 373: ...Intentionally Left Blank ...