


Creating and Saving Protocols
33
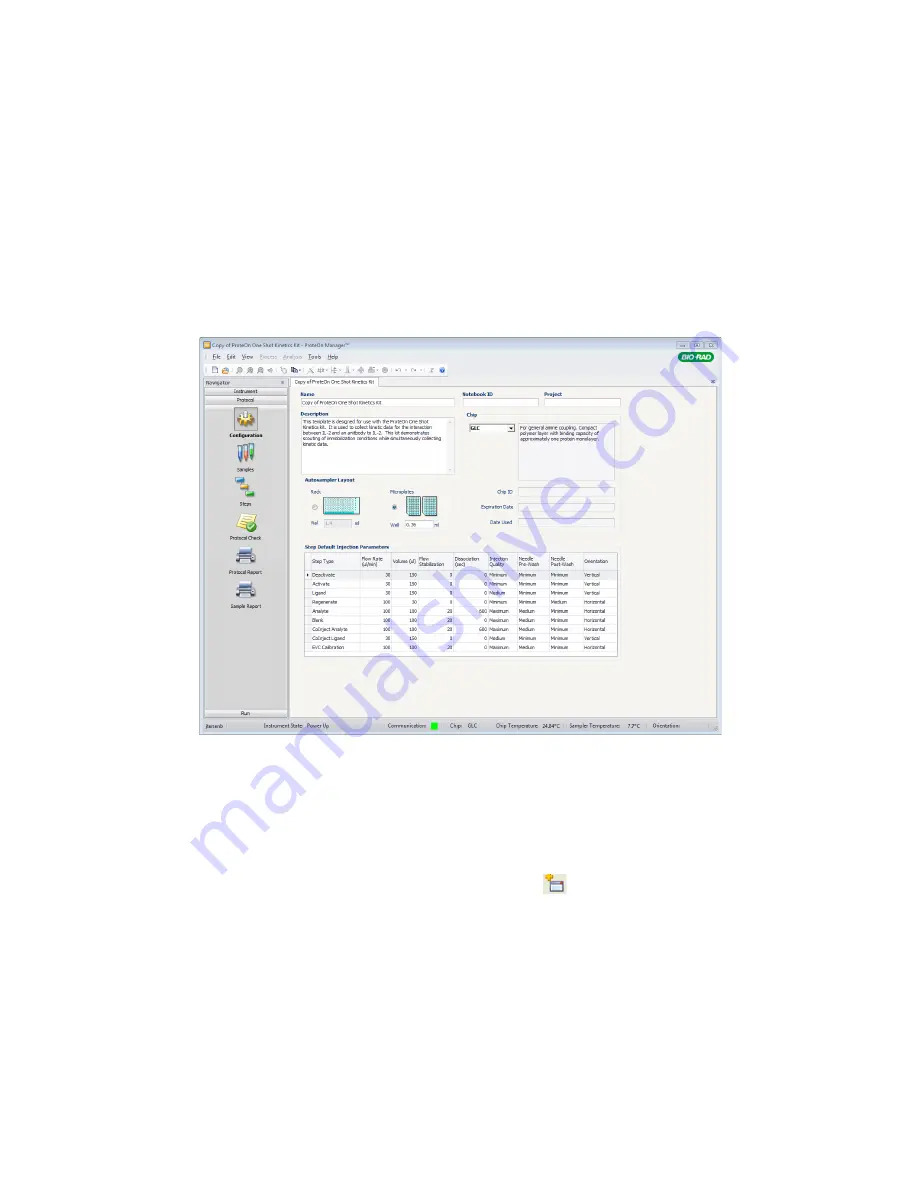
4. In the Steps screen, select a step and change its value in the Step
Details area of the screen.
Note:
To change the configuration for all the active steps, change
its value in the Step Default Injection Parameters table on the
Configuration screen.
5. Click Instrument in the navigation panel to access the Instrument
Control screen.
6. Change the active buffer position, initialize the chip, and set the sensor
chip and autosampler temperatures.
7. To create sample panels, do one of the following:
•
Click Protocol in the navigation panel, and then click Samples. In
the Protocol Samples screen, click Add
once for each new
rack or plate required for the experiment. Enter information for the
Summary of Contents for XPR36
Page 1: ...ProteOn XPR36 Protein Interaction Array System Protein Interaction Analysis User Manual...
Page 2: ......
Page 3: ...ProteOn XPR36 Protein Interaction Array System Version 3 1 User Manual...
Page 4: ......
Page 10: ...ProteOn XPR36 System viii...
Page 166: ...ProteOn XPR36 System Analysis 148...
Page 188: ...ProteOn XPR36 Maintenance 170...
Page 194: ...ProteOn XPR36 System ProteOn System Troubleshooting 176...
Page 226: ...ProteOn XPR36 System A ProteOn XPR36 Instrument and Peripherals 208...
Page 250: ...ProteOn XPR36 System E Ordering Information 232...
Page 264: ...ProteOn XPR36 System F Security Edition Configuration Guide 246...
Page 276: ...ProteOn XPR36 System Glossary 258...
Page 287: ......


