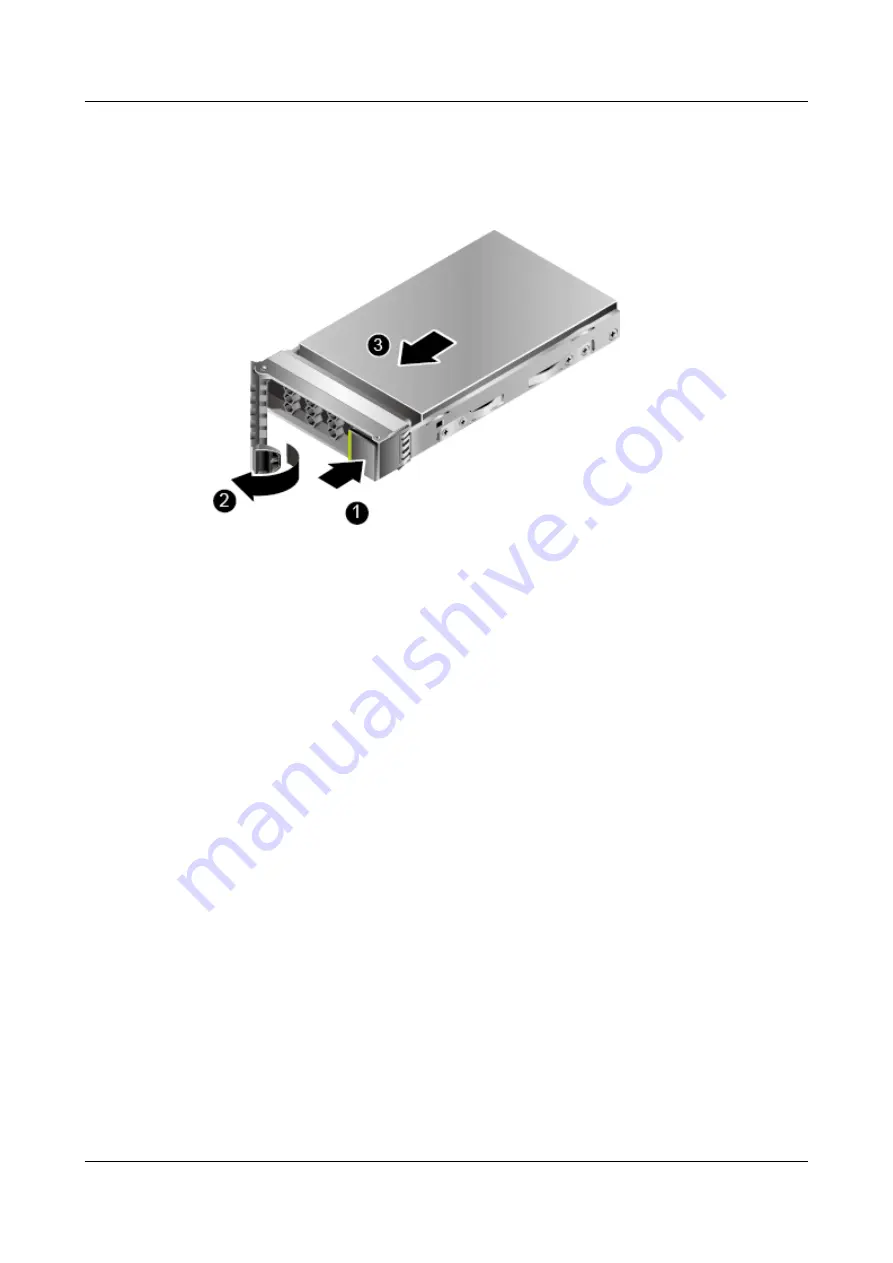
Step 5
Push the ejector release button on the hard disk. See step (1) in
The ejector lever automatically ejects.
Figure 7-8
Removing a hard disk
Step 6
Hold the ejector lever, and pull out the hard disk for about 3 cm (1.18 in.). See step (2) in
. Wait for at least 30 seconds until the hard disk stops working. Then remove the
hard disk from the RH2288 V3. See step (3) in
Step 7
Place the removed hard disk in an ESD bag.
Step 8
(Optional) If you do not install a new hard disk immediately, install a filler panel in the slot.
----End
7.6 Installing a Hard Disk
Install a hard disk to replace the original one or add a new hard disk.
You do not need to power off the RH2288 V3 before installing a hard disk.
After a failed hard disk is disconnected from the disk backplane, wait for 30 seconds before
removing it and inserting a new one. The alarm persists after a new hard disk is installed and
will be cleared after the RAID array is rebuilt. Do not frequently hot-swap a hard disk to
prevent new alarms.
Procedure
Step 1
Wear an ESD wrist strap. For details, see
Step 2
Remove the hard disk to be replaced. For details, see
.
Step 3
Take the spare hard disk out of its ESD bag.
Step 4
Fully raise the ejector lever and push the hard disk into the chassis along the guide rails until
it does not move. See step (1) in
RH2288 V3 Server
User Guide
7 Replacing Parts
Issue 32 (2019-03-28)
Copyright © Huawei Technologies Co., Ltd.
137


