Getting Started 9
Inserting Paper
You have three ways to insert paper for printing:
S
Manually, one sheet at a time from the paper support on the back of
the Ensemble unit. (See below.)
S
Manually, one sheet at a time from the front paper tray of the
optional cut sheet feeder (page 14).
S
Automatically, up to 30 sheets from the back paper tray with the
optional cut sheet feeder (page 12).
"
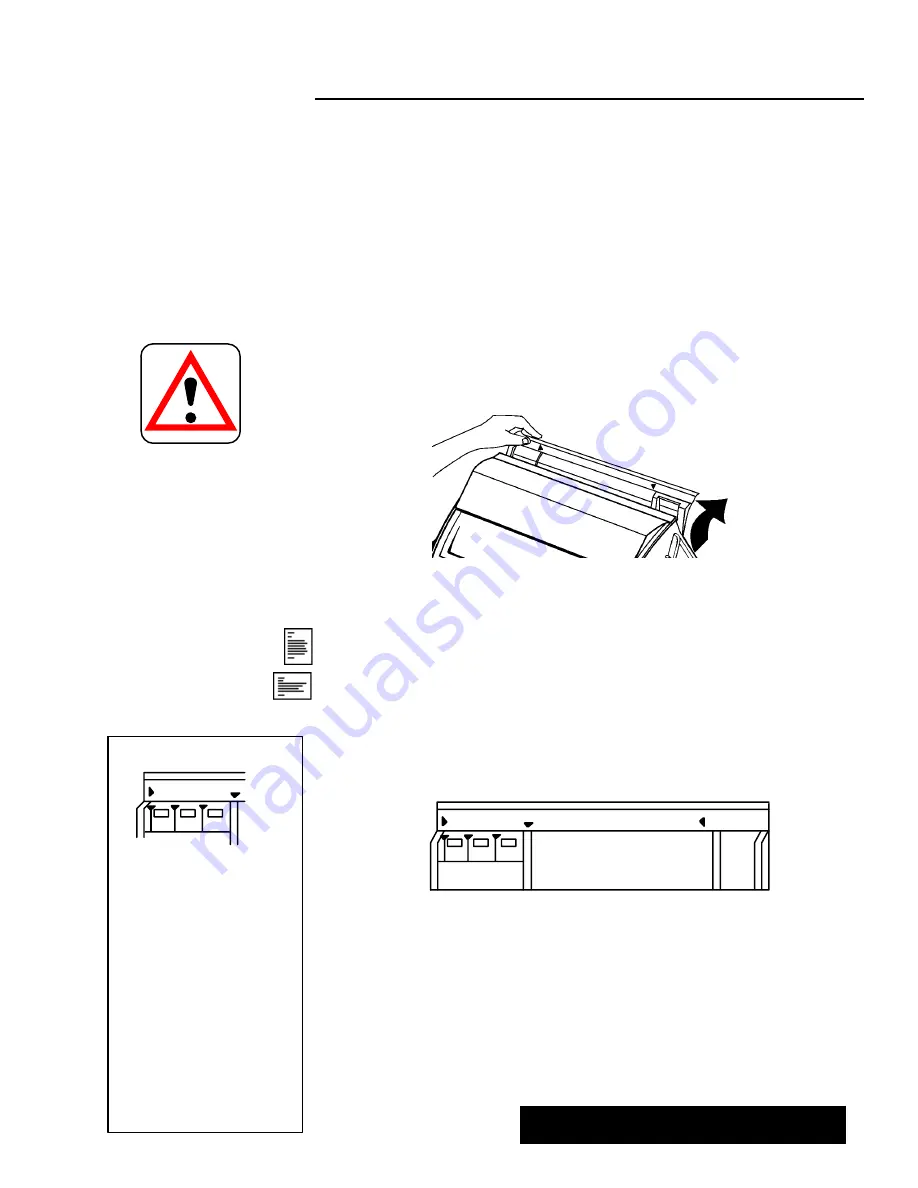
To manually insert paper from the paper support:
1. Turn on Ensemble and open the paper support.
2. Center and hold a sheet ofpaper in the paper support using the marks
on the paper support.
Ifpaper is wider than 8.5", use the alignment marks on
the paper guide sticker. (See box at left for instructions on installing the
sticker.) Alignment marks are provided for landscape printing with A4,
Letter and B5 paper sizes. For A3 portrait positioning, use the A4
landscape mark. For B4 portrait positioning, use the B5 landscape mark.
For any other paper widths greater than 8.5", estimate your paper
alignment between points A and B.
A
B
A4
LTR
B5
3. Press
PAPER INSERT
to automatically advance the paper to the printing
position.
4. Ifpaper appears to be crooked, press and hold
PAPER INSERT
to take
the paper completely out, then reinsert it.
CAUTION:
Do not use the platen
knob to insert paper. For
proper paper insertion,
you must use the PAPER
INSERT key.
The platen
knob should only be used
to remove jammed paper.
Portrait Orientation
Landscape Orientation
To install the paper guide
sticker:
1. Remove the adhesive backing
from the strip. With the text
facing you, hold the strip by the
right edge.
2. Push the left edge of the strip
up against the right side of the
raised section that is point B.
3. With the edges butted
together, gently push the
adhesive strip onto the paper
guide area.
B
A4
LTR
B5
Summary of Contents for Ensemble PDP-100J
Page 11: ......
Page 71: ...Getting Started 60 Optional Accessories Fax Modem Data Modem Scanner Cut Sheet Feeder ...
Page 72: ......
Page 83: ......
Page 152: ......
Page 217: ...Spreadsheet 203 The following dialog box appears ...
Page 219: ......
Page 262: ......
Page 269: ......
Page 284: ......
Page 301: ......
Page 306: ...Calculator 287 Cut and paste Handling Error or Overflow Conditions To clear an error ...
Page 308: ...Calculator 289 Converting Measurements S S S S S S To convert ...
Page 312: ......
Page 325: ......
Page 327: ...Book Reader 306 To close a book Using Information and Text To read a book ...
Page 330: ......
Page 333: ......
Page 337: ...Text File Editor 314 ...
Page 338: ......
Page 345: ......
Page 349: ...Scanner 324 What to do if an error occurs Error Condition Message Solution ...
Page 350: ......
Page 379: ......
Page 387: ...Appendix 360 Color Clip Art SNOWMAN TEA TIGER TURTLECA WANDFLOW WATERLIL ...
Page 396: ...Appendix 369 Print Functions Function Description Example ...
Page 405: ...Appendix 378 Fonts Occidental Font Symbols keyboard International keyboard Math Symbols ...
Page 406: ...Appendix 379 Ping Pong Font Pointer keyboard Numbers keyboard Symbols keyboard Other Symbols ...
Page 407: ...Appendix 380 Shattuck Avenue Font Symbols keyboard International keyboard Math Symbols ...
Page 408: ...Appendix 381 URW Mono Font Symbols keyboard International keyboard Math Symbols ...
Page 409: ...Appendix 382 URW Roman Font Symbols keyboard International keyboard Math Symbols ...
Page 410: ...Appendix 383 URW Sans Font Symbols keyboard International keyboard Math Symbols ...
Page 414: ......
Page 418: ...Glossary 390 ...
Page 420: ...Glossary 392 0 1 1 1 ...
Page 421: ...Glossary 393 text style sheet ...
Page 422: ...Glossary 394 ...
Page 423: ......
Page 428: ...Index 399 D cont d 1 0 1 1 1 1 0 1 0 1 1 0 2 1 0 0 0 1 0 ...
Page 430: ...Index 401 F cont d 1 1 0 0 1 0 0 0 0 0 0 0 0 0 G 1 0 1 ...
Page 436: ...Index 407 S cont d 1 3 3 1 1 0 1 4 0 3 0 0 1 1 3 1 3 1 0 1 1 1 0 1 3 1 0 1 2 ...
Page 440: ......


