6 – Modules
4
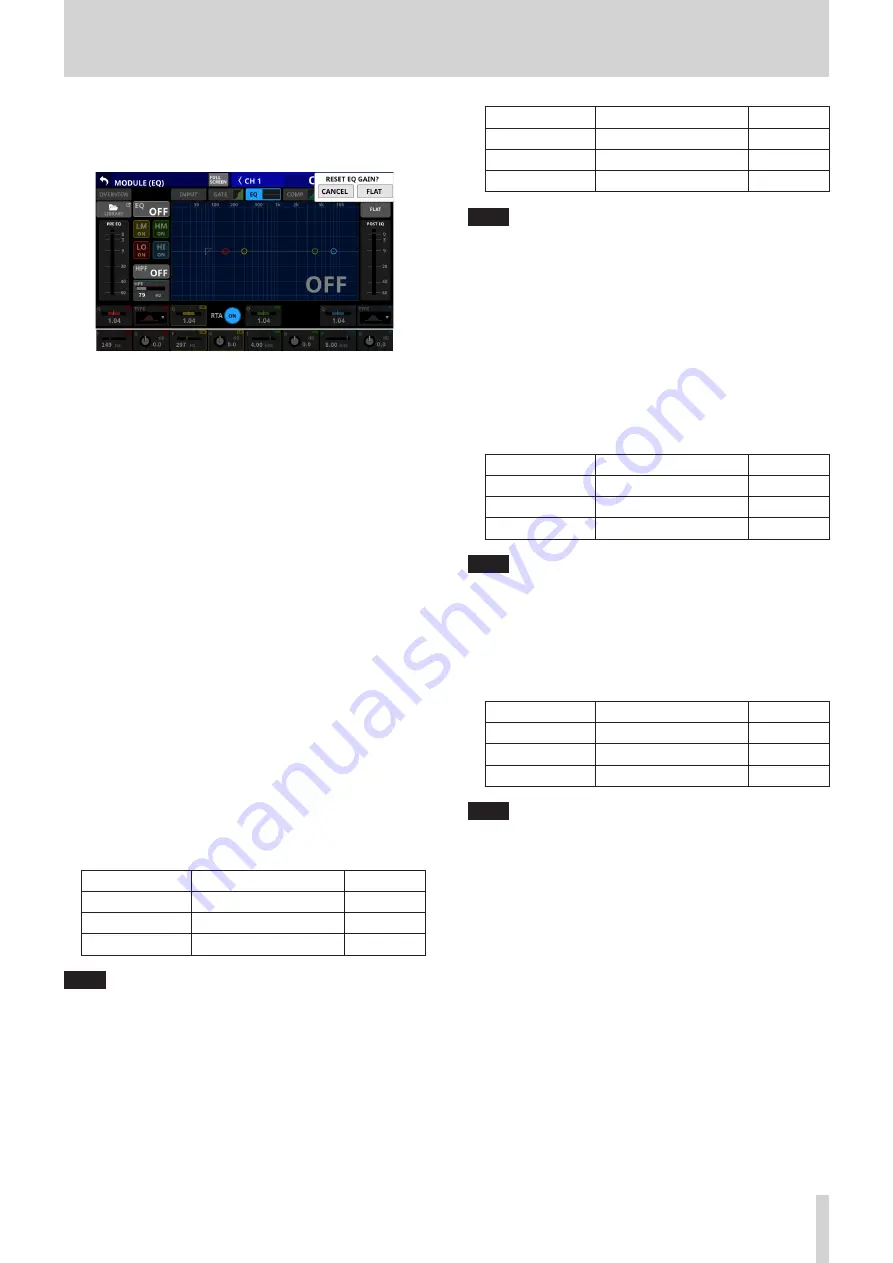
FLAT button
Tap this button to open a confirmation message for resetting
the gain settings for all bands to 0 dB.
Tap the FLAT button to set the EQ gain settings to 0 dB. In addition,
if the HI band TYPE was set to LPF, this will be changed to PEAK.
5
PRE EQ level meter(s)
This shows the signal levels input to the EQ.
6
EQ band ON/OFF buttons
Tap these buttons to turn the EQ bands on/off. (Default: ON)
When on, the setting for the corresponding band will be
applied to the overall frequency response in the graph area.
When off, the corresponding parameter will appear gray. Moreover,
the setting for the corresponding band will not be applied to the
overall frequency response in the graph area. Instead, the frequency
response of that band will be shown separately as a gray line.
7
HPF button (CH 1-40 modules only)
Tap this button to turn the HPF on/off. (Default: OFF)
When this is on, this button and the HPF part of the HPF/EQ
frequency response graph will appear highlighted.
8
HPF frequency (CH 1–40 modules only)
This adjusts the cutoff frequency of the HPF.
Range: 20 Hz - 1.0 kHz (default: 79 Hz)
When the selection frame is shown, turn LCD knob 2 (lit blue)
to adjust it.
9
POST EQ level meter(s)
This shows the level of the signal output from the EQ.
0
EQ parameters (LO band)
This shows the EQ LO band parameters and can be used to
adjust them.
When the selection frame is shown, use the corresponding
LCD knobs to adjust the values.
Parameter name Range
default
G
-18.0 dB - +18.0 dB
0 dB
F
20 Hz - 20.0 kHz
149Hz
Q
0.10 - 17.31
1.04
NOTE
Tap the EQ gain area while pressing the HOME key on the top
panel to set the EQ gain to 0 dB.
q
TYPE button (LO band)
o
This shows the LO band EQ type.
o
Tap this button to open the type selection menu.
Options: PEAK (default), L.SHELF
w
EQ parameters (LM band)
This shows the EQ LM band parameters and can be used to
adjust them. When the selection frame is shown, use the
corresponding LCD knobs to adjust the values.
Parameter name Range
default
G
-18.0 dB - +18.0 dB
0 dB
F
20 Hz - 20.0 kHz
297 Hz
Q
0.10 - 17.31
1.04
NOTE
Tap the EQ gain area while pressing the HOME key on the top
panel to set the EQ gain to 0 dB.
e
RTA button
Tap this button to turn the real-time analyzer (RTA) function
on/off for each touchscreen separately. (Default: ON)
When this is on, the button becomes highlighted, and audio
signal frequency response meters for the PRE FADER position
of input modules or POST FADER position of output modules
are shown behind the EQ response graph.
r
EQ parameters (HM band)This shows the EQ HM
band parameters and can be used to adjust them.
When the selection frame is shown, use the corresponding
LCD knobs to adjust the values.
Parameter name Range
default
G
- 18.0 dB - +18.0 dB
0 dB
F
20 Hz - 20.0 kHz
4.0 kHz
Q
0.10 - 17.31
1.04
NOTE
Tap the EQ gain area while pressing the HOME key on the top
panel to set the EQ gain to 0 dB.
t
EQ parameters (HI band)
This shows the EQ HI band parameters and can be used to
adjust them.
When the selection frame is shown, use the corresponding
LCD knobs to adjust the values.
Parameter name Range
default
G
-18.0 dB - +18.0 dB
0 dB
F
20 Hz - 20.0 kHz
8.0 kHz
Q
0.10 - 17.31
1.04
NOTE
Tap the EQ gain area while pressing the HOME key on the top
panel to set the EQ gain to 0 dB.
y
TYPE button (HI band)
o
This shows the HI band EQ type.
o
Tap this button to open the type selection menu.
Options: PEAK (default), H.SHELF, LPF
u
EQ/GEQ frequency response graph
o
This shows graphs of the EQ and GEQ frequency
responses. This shows the overall frequency response. RTA
bar meters are also shown.
o
When EQ and GEQ are on, a graph of their sound
responses will be shown highlighted.
o
When EQ and GEQ are off, the response graph for EQ
without GEQ will be shown and appear gray.
o
When EQ is on and GEQ is off, the response graph for EQ
only will be shown highlighted.
o
When EQ is off and GEQ is on, the response graph for EQ
only will be gray and the response graph for GEQ only will
be shown highlighted.
TASCAM Sonicview 16/Sonicview 24
97


