3 - Preparation
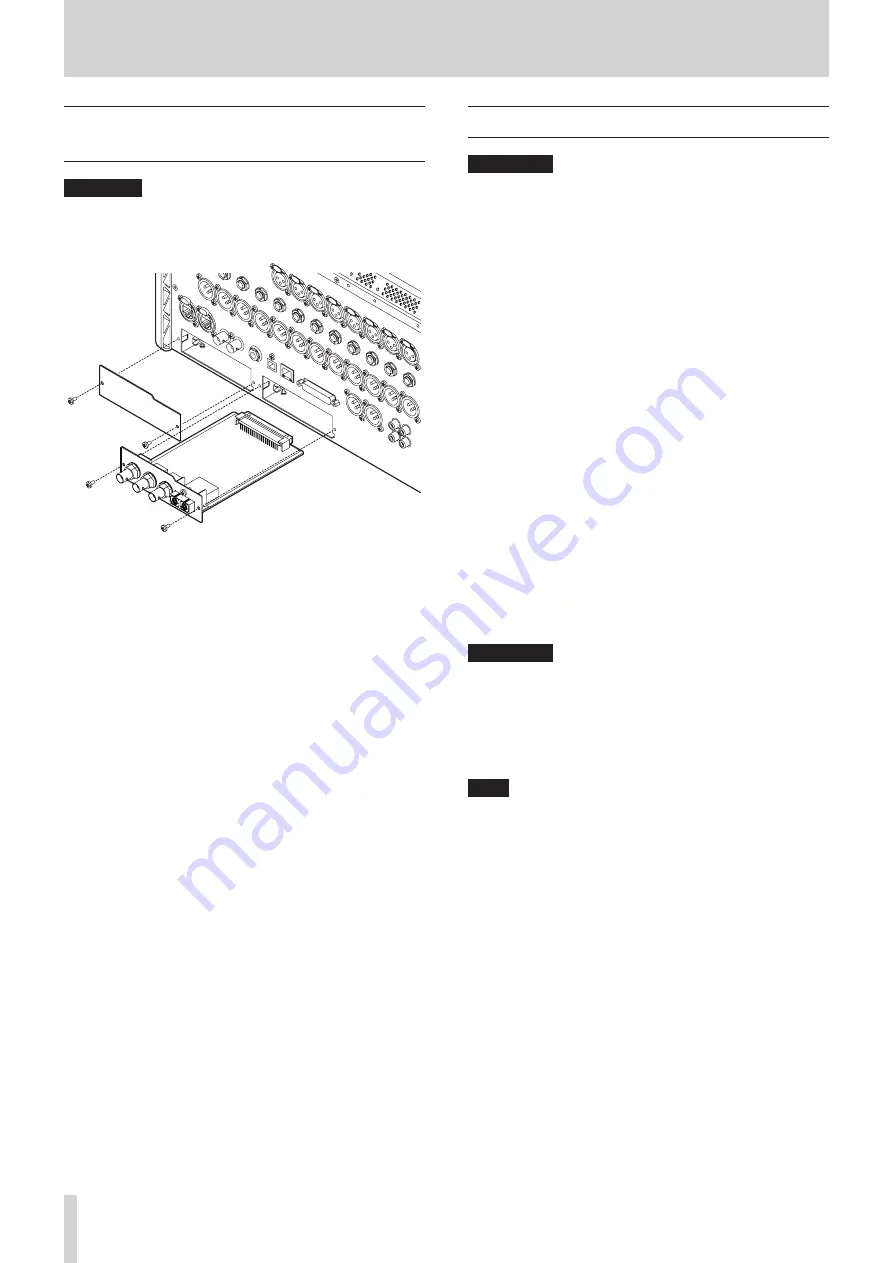
Installing expansion cards (sold
separately)
ATTENTION
Before installing or removing an expansion card (sold
separately), disconnect the power cord from the outlet or the
unit.
1. Remove the two screws from the plain panel and remove
the panel itself. (If a different card is already installed,
remove it.)
2. Insert the expansion card into the card slot. Align the edges
of the expansion card with the white guides inside the slot
and insert it securely. Push the expansion card in until its
backplate reaches the rear panel of the unit, leaving no gap,
and clicks into place. Do not force the card into the slot. If
you cannot insert the card properly, remove it once and try
reinserting it.
3. Use the two removed screws to secure the expansion card.
4. Turn the unit on, and check Menu Screen > Rear Panel
Setup > SLOT SETUP screen to confirm that it has
recognized the installed expansion card. (See “SLOT SETUP
screen” on page 58.)
If “SLOT 1 (None)” or something similar appears, the
expansion card might not be installed correctly or the
screws might not be tightened securely. Insert the
expansion card securely into the unit again.
Turning the power on and off
V
CAUTION
i
Turn down the volume of the sound system connected to the
unit before starting up or shutting down the unit.
i
Do not wear connected headphones when turning the unit
on and off. Loud noises could damage the speakers or harm
your hearing.
Before turning the power on
1. Minimize output faders along with monitor out and
headphone volumes on this unit.
2. Minimize the output levels of audio sources and input levels
of amplifiers connected to this unit.
Turning the power on
1. Use the POWER switch on the back of the unit to turn its
power on.
After the unit starts and the startup screen is shown, the
Home Screen will open.
2. Turn connected input audio source devices on.
3. Finally turn amplifiers on.
Turning the power off
Before turning the power off, minimize the levels of output
faders along with monitor out and headphone volumes on this
unit, and then follow the procedures above in reverse.
Failure to follow the correct order could result in clicking noises,
for example, that might damage equipment.
V
CAUTION
Do not turn the power off or disconnect the power cord
when the unit is operating (including recording, playing
back, writing data to an SD card or USB flash drive, or saving
settings to the internal memory). Doing so could cause
proper recording to fail, recorded data to be lost, and sudden
loud noises from monitoring equipment, which might
damage the equipment, harm hearing or cause other trouble.
NOTE
We recommend executing the Save Current Settings
command on the Menu Screen before turning the unit off.
(See “Saving the current settings” on page 63.)
26
TASCAM Sonicview 16/Sonicview 24


