4 – Mixer configuration and settings
7
Settings list
o
This shows channel sets and custom layers that can be set
for LAYER KEY 1–7.
o
To change a setting, swipe the list up and down. The
setting can also be changed by turning LCD knob 8 (lit
blue).
o
Settings that can be selected are as follows.
Model
Option
Sonicview 16
CH 1-16
CH 17-32
CH 33-40 / ST IN / FX RTN
MIX 1-16
MIX 17-22 / MAIN L/R
DCA
CUSTOM 1
CUSTOM 2
CUSTOM 3
CUSTOM 4
CUSTOM 5
CUSTOM 6
CUSTOM 7
Sonicview 24
CH 1-24
CH 25-40 / ST IN / FX RTN
MIX 1-22 / MAIN L/R
DCA
CUSTOM 1
CUSTOM 2
CUSTOM 3
CUSTOM 4
CUSTOM 5
CUSTOM 6
CUSTOM 7
8
CANCEL button
Tap this button to cancel setting changes and close to the
layer settings screen.
9
APPLY button
Tap this button to confirm setting changes and close to the
layer settings screen.
0
Scroll knob icon
This icon shows that LCD knob 8 (lit light blue) can be used
to scroll.
Default settings for LAYER KEY 1–7
The factory default settings are as follows.
Sonicview 16
Key
Lit color Assigned function
LAYER 1
Blue
CH 1-16
LAYER 2
Blue
CH 17-32
LAYER 3
Blue
CH 33-40 / ST IN / FX RTN
LAYER 4
Orange MIX 1-16
LAYER 5
Orange MIX 17-22 / MAIN L/R
LAYER 6
Yellow
DCA
LAYER 7
Pink
CUSTOM 2
Sonicview 24
Key
Lit color Assigned function
LAYER 1
Blue
CH 1-24
LAYER 2
Blue
CH 25-40 / ST IN / FX RTN
LAYER 3
Orange MIX 1-22 / MAIN L/R
LAYER 4
Yellow
DCA
LAYER 5
Pink
CUSTOM 1
LAYER 6
Pink
CUSTOM 2
LAYER 7
Pink
CUSTOM 3
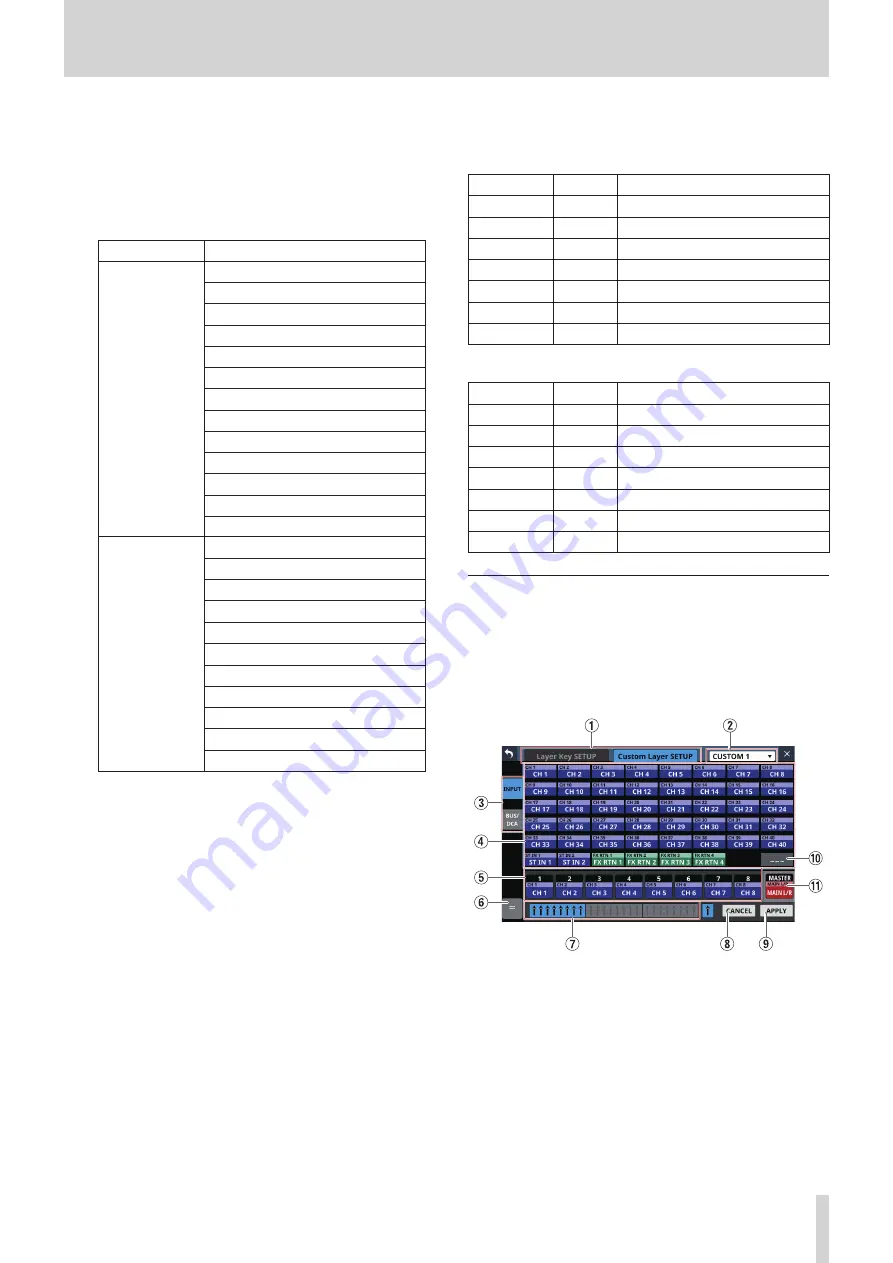
Custom Layer SETUP page
The modules assigned to custom layers and the modules
assigned to the master fader can be set in the settings list on
this screen.
Tap Menu Screen > Front Panel Setup > Layer/Master Fader
Setup to open the Layer Key Setup page. Then, tap the Custom
Layer Setup button to open this page.
1
Page selection buttons
Tap these buttons to switch the page shown.
TASCAM Sonicview 16/Sonicview 24
47


