137
6-2-3 Connection
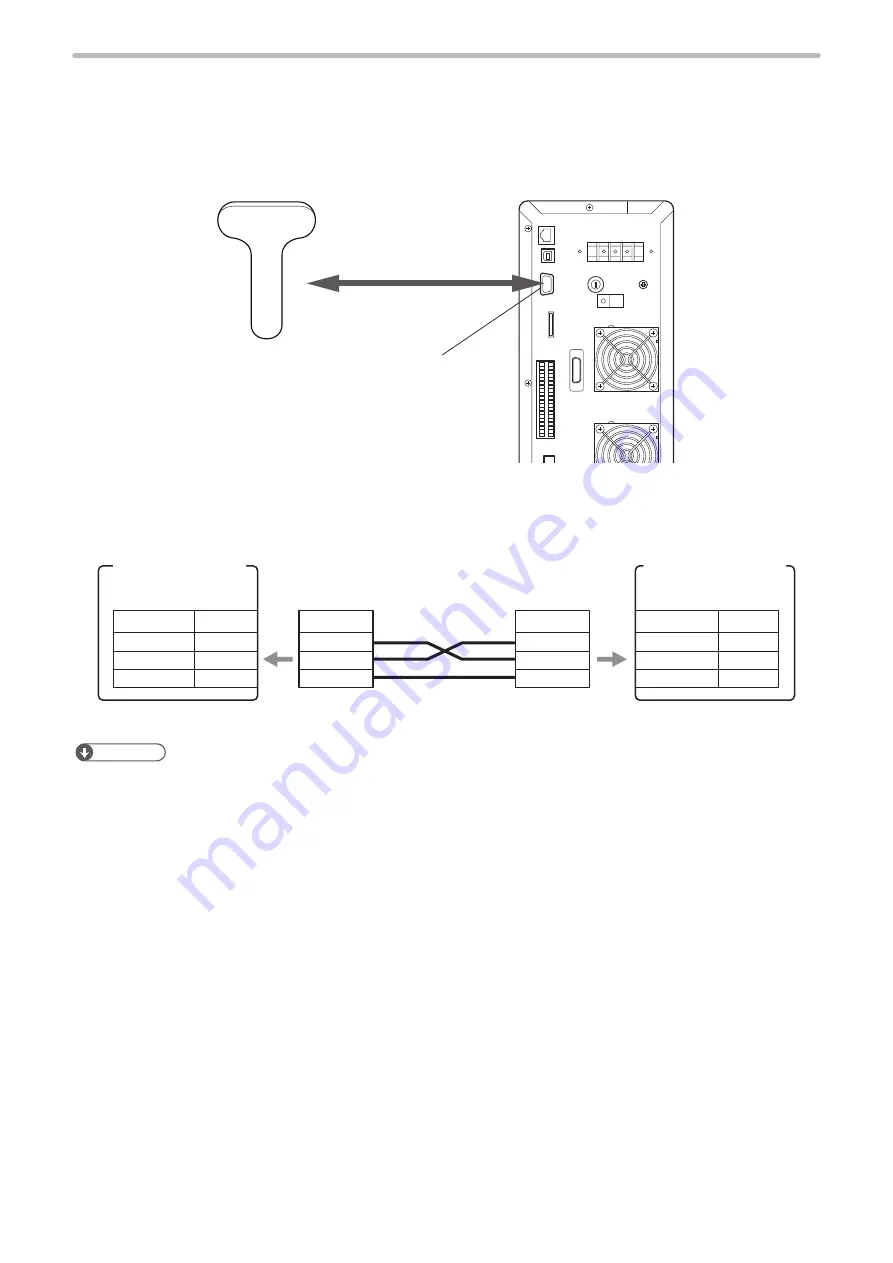
Connection method
Connect the code reader to the RS-232C port on the controller.
RS-232C port
Laser marker side
connector specifications:
D-sub 9-pin female
Code reader
Rear of controller
• Do not connect to other than three lines RxD (RD), TxD (SD) and GND to the laser marker.
• Use the RS-232C cross cable to connect the code reader and laser marker, referring to the example below.
Connection example
TxD
RxD
GND
2
3
5
TxD
RxD
GND
2
3
5
2
3
5
2
3
5
D-sub 9-pin female
Laser marker
RS-232C port
Example of connection cables
Cross cable
Terminal No.
Terminal No.
Terminal No.
Terminal No.
Signal
Signal
Code reader side
Example of RS-232C port
D-sub 9-pin female
D-sub 9-pin male
D-sub 9-pin male
ンㄆㄇㄆㄓㄆㄏㄆ
• For RS-232C port specifications, refer to “5-2 RS-232C” (P.109).
ME-LPGS-SM-8
Содержание LP-GS Series
Страница 17: ...1 Product Overview ME LPGS SM 8 ...
Страница 32: ...2 Laser Marker Installation ME LPGS SM 8 ...
Страница 48: ...3 Operation Method ME LPGS SM 8 ...
Страница 68: ...4 External Control Using I O ME LPGS SM 8 ...
Страница 107: ...5 External Control by Communication Commands ME LPGS SM 8 ...
Страница 116: ...6 Link Control with External Devices ME LPGS SM 8 ...
Страница 141: ...7 Maintenance ME LPGS SM 8 ...
Страница 161: ...161 MEMO ME LPGS SM 8 ...
Страница 162: ...Troubleshooting ME LPGS SM 8 ...
Страница 186: ...Index ME LPGS SM 8 ...
Страница 188: ...188 Unit power cable 26 USB 30 45 V Vibration resistance 33 W Warning 177 Z Z axis adjustment module 154 ME LPGS SM 8 ...
Страница 189: ......
Страница 190: ... Panasonic Industrial Devices SUNX Co Ltd 2014 2019 April 2019 ...


