140
5.
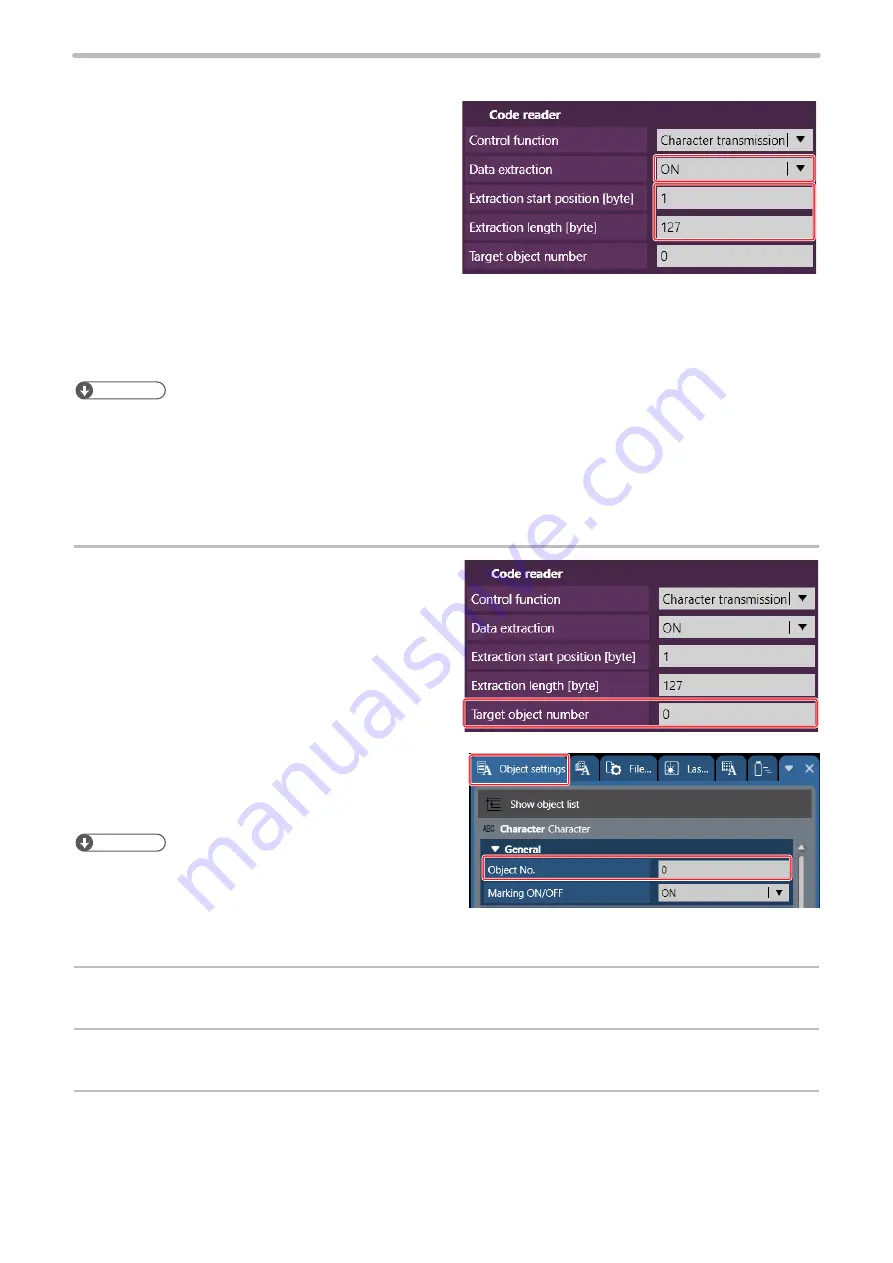
To transfer a part of the code string read, set the data extraction.
If “OFF” is selected, the read string is transmitted as is.
To set the data extraction, specify the start position
and data length of the code data in bytes.
Setting range:
• Extraction start position: 1 to 299 byte
• Extraction length
• Character transmission: 1 to 299 byte
• File switching by name: 1 to 299 byte
• File switching by number: 4 byte (fixed)
Extraction example: To read code characters “ABCDE” and transfer “BCD” to the laser marker, set as follows:
• Extraction start position [byte]: 2
• Extraction length [byte]: 3
ンㄆㄇㄆㄓㄆㄏㄆ
• Count one single byte character as one byte.
• The data extraction position setting applies to all data read by this function.
• If the read data length is shorter than the string to extract, the code is not read.
• Set the checksum setting of the code reader RS-232C communication settings to “OFF”. If the checksum is set to “ON”,
the communication checksum is transferred to the laser marker as marking data.
• The end code (CR) is not subject to the data extraction.
6.
If the control contents are set to character
data transmission, specify the object number
of destination.
The read character data are transmitted to the object
number specified here.
Check the file to use this function and specify an
appropriate object number.
Object numbers available as object numbers of
destination are as follows.
• Object numbers for which character object is set
• Object numbers for which a bar code or 2D code
object is set
ンㄆㄇㄆㄓㄆㄏㄆ
• If there is not object number set as a object number of
destination other than a character in the file to use this
function or code is set for the number, character data
cannot be transmitted.
7.
Click “Set” in the lower right corner of the system settings screen.
8.
Disconnect the online connection with the laser marker.
9.
Turn off the laser marker power and wait for five seconds or more, then restart.
The configured items will be reflected to the laser marker.
ME-LPGS-SM-8
Содержание LP-GS Series
Страница 17: ...1 Product Overview ME LPGS SM 8 ...
Страница 32: ...2 Laser Marker Installation ME LPGS SM 8 ...
Страница 48: ...3 Operation Method ME LPGS SM 8 ...
Страница 68: ...4 External Control Using I O ME LPGS SM 8 ...
Страница 107: ...5 External Control by Communication Commands ME LPGS SM 8 ...
Страница 116: ...6 Link Control with External Devices ME LPGS SM 8 ...
Страница 141: ...7 Maintenance ME LPGS SM 8 ...
Страница 161: ...161 MEMO ME LPGS SM 8 ...
Страница 162: ...Troubleshooting ME LPGS SM 8 ...
Страница 186: ...Index ME LPGS SM 8 ...
Страница 188: ...188 Unit power cable 26 USB 30 45 V Vibration resistance 33 W Warning 177 Z Z axis adjustment module 154 ME LPGS SM 8 ...
Страница 189: ......
Страница 190: ... Panasonic Industrial Devices SUNX Co Ltd 2014 2019 April 2019 ...


