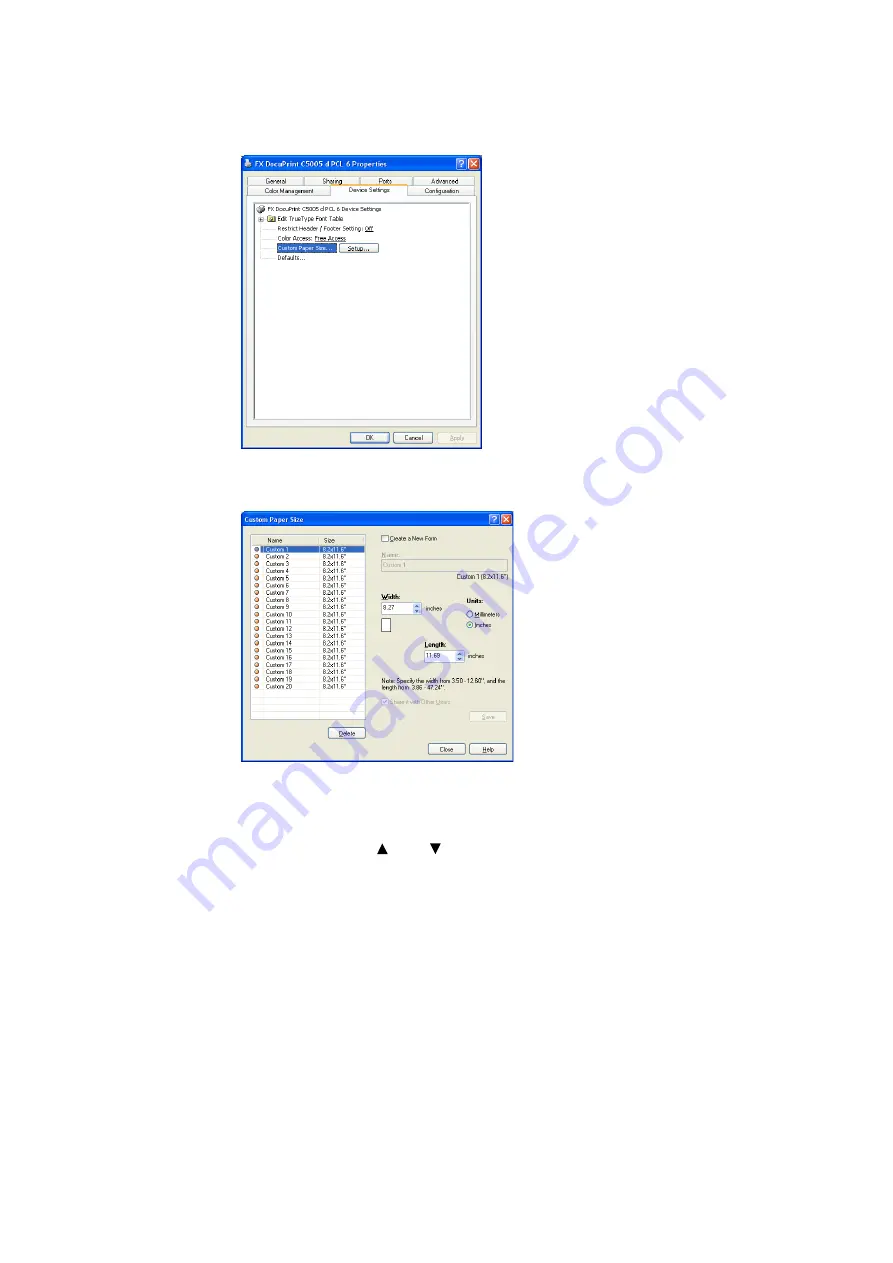
3.3 Printing on Custom Size or Long-size Paper
79
4.
Click [Setup].
5.
Select custom items to be set from the list box for paper name and size.
Note
• If changing paper name, select the [Create a New Form] check box and then enter a name in [Name].
6.
Specify the length for [Width] and [Length].
Use key input or the [ ] and [ ] keys to specify the lengths.
Even if the [Width] setting is within the allowable range, you cannot specify a value
that is greater than the [Length] setting. Conversely, even if the [Length] setting is
within the allowable range, you cannot specify a value that is less than the [Width]
setting.
7.
To define other custom paper sizes, repeat Steps 5 and 6 of this procedure.
8.
Click [Save].
Note
• Proceed to step 10 when registering with a new paper name.
9.
Click [Yes].
10. Click [Close].
11. Click [OK].
Содержание DocuPrint C5005 d
Страница 1: ...User Guide DocuPrint C5005 d...
Страница 78: ...78 3 Printing 2 Click the Device Settings tab 3 Click Custom Paper Size...
Страница 219: ...6 1 Clearing Paper Jams 219 4 Push the tray in gently until it stops...
Страница 227: ...6 1 Clearing Paper Jams 227 5 Gently close the top left cover D 6 Return the upper left cover A to the original position...
Страница 384: ...384 7 Maintenance 23 When the setting is over press the Settings button to return to the print screen...
Страница 462: ...DocuPrint C5005 d User Guide Fuji Xerox Co Ltd ME4989E2 1 Edition1 November 2010 Copyright 2010 by Fuji Xerox Co Ltd...


