34
1 Printer Environment Settings
2.
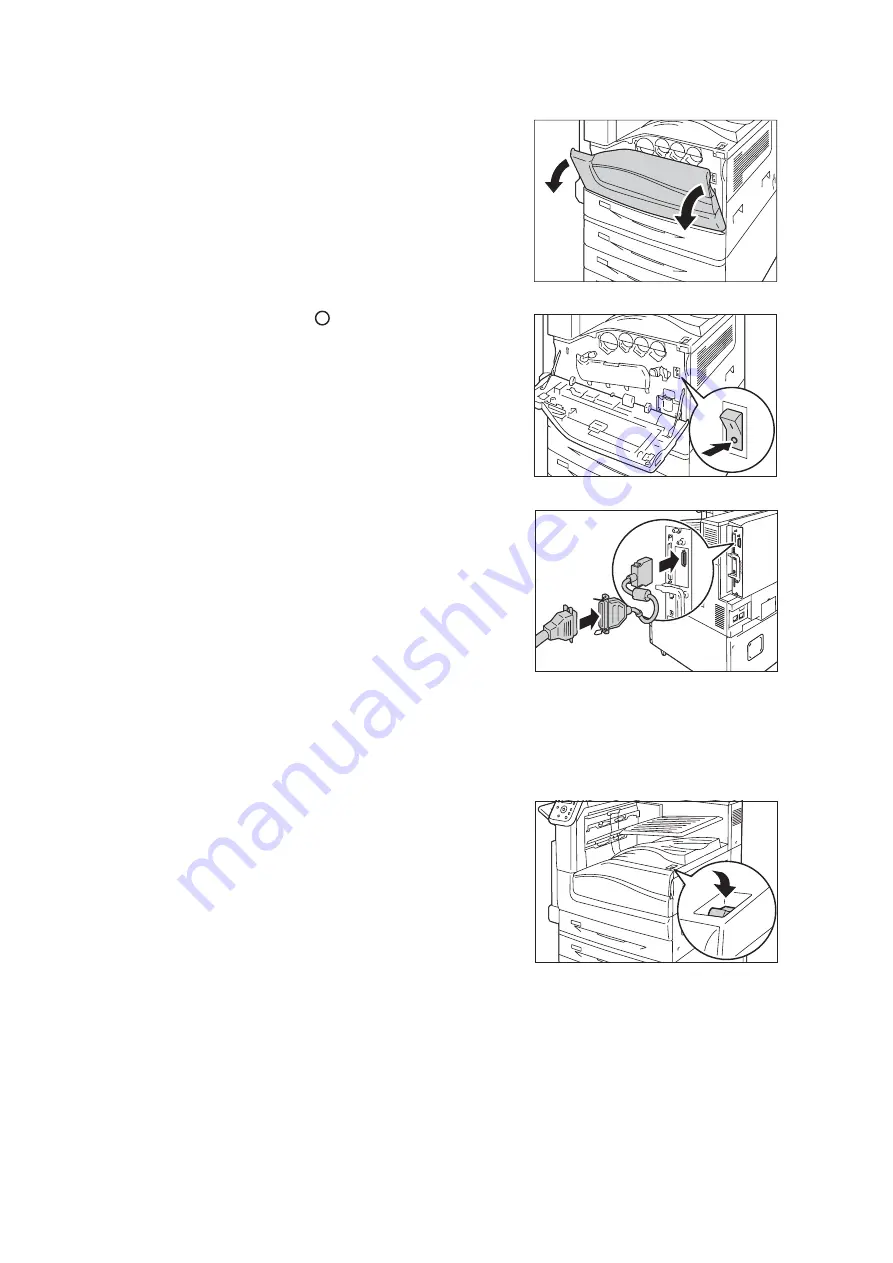
Open the front cover.
3.
Press the <
> side of the printer’s main
power switch to turn off the main power.
Note
• The <Main Power> lamp goes out on the control
panel.
4.
Insert the connector conversion cable
included with the optional Parallel Port Kit
into the interface connector on the printer.
5.
Connect the other end of the connector
conversion cable to the connector on the
parallel cable. Then secure it using the
metal pieces on both sides of the
connector.
6.
Plug the other end of the parallel cable into
your computer.
7.
Press the < | > side of the printer’s main
power switch to turn on the main power and
then close the front cover.
8.
Press the < | > side of the printer’s power
switch to turn on the power.
Note
• Message [Ready to print IP Address failed] may be
displayed on the control panel. To erase this message,
set to [STATIC] in [Network/Port] > [TCP/IP Settings] >
[IPv4 Settings] > [Get IP Address] to specify IP
address (Example: 192.168.1.100) or [Disabled] for
each port other than the Parallel port in [Network/Port].
Refer to
• For setting method of IP address, refer to “1.4 Setting
the Network Environment” (P. 36).
• For setting each port, refer to “1.5 Enabling Ports”
Содержание DocuPrint C5005 d
Страница 1: ...User Guide DocuPrint C5005 d...
Страница 78: ...78 3 Printing 2 Click the Device Settings tab 3 Click Custom Paper Size...
Страница 219: ...6 1 Clearing Paper Jams 219 4 Push the tray in gently until it stops...
Страница 227: ...6 1 Clearing Paper Jams 227 5 Gently close the top left cover D 6 Return the upper left cover A to the original position...
Страница 384: ...384 7 Maintenance 23 When the setting is over press the Settings button to return to the print screen...
Страница 462: ...DocuPrint C5005 d User Guide Fuji Xerox Co Ltd ME4989E2 1 Edition1 November 2010 Copyright 2010 by Fuji Xerox Co Ltd...


