216
6 Troubleshooting
CAUTION
• If you need to pull out a tray to remove paper jam, contact your local Fuji Xerox
representative. Do not pull out a tray, otherwise it may cause injuries.
Important
• Pulling out a paper tray without confirming the location of the paper jam may tear paper and cause
pieces of paper to be left in the machine. This can cause a malfunction. Be sure to confirm the location of
the paper jam before attempting to clear it.
• The paper jam indicator remains lit on the control panel if there are pieces of paper remaining inside the
printer.
• Make sure that the power is on when clearing a paper jam. Switching the power off erases the print data
remaining in the printer and the information stored in the printer's memory.
• Do not touch interior components of the printer. Doing so can cause defective printing.
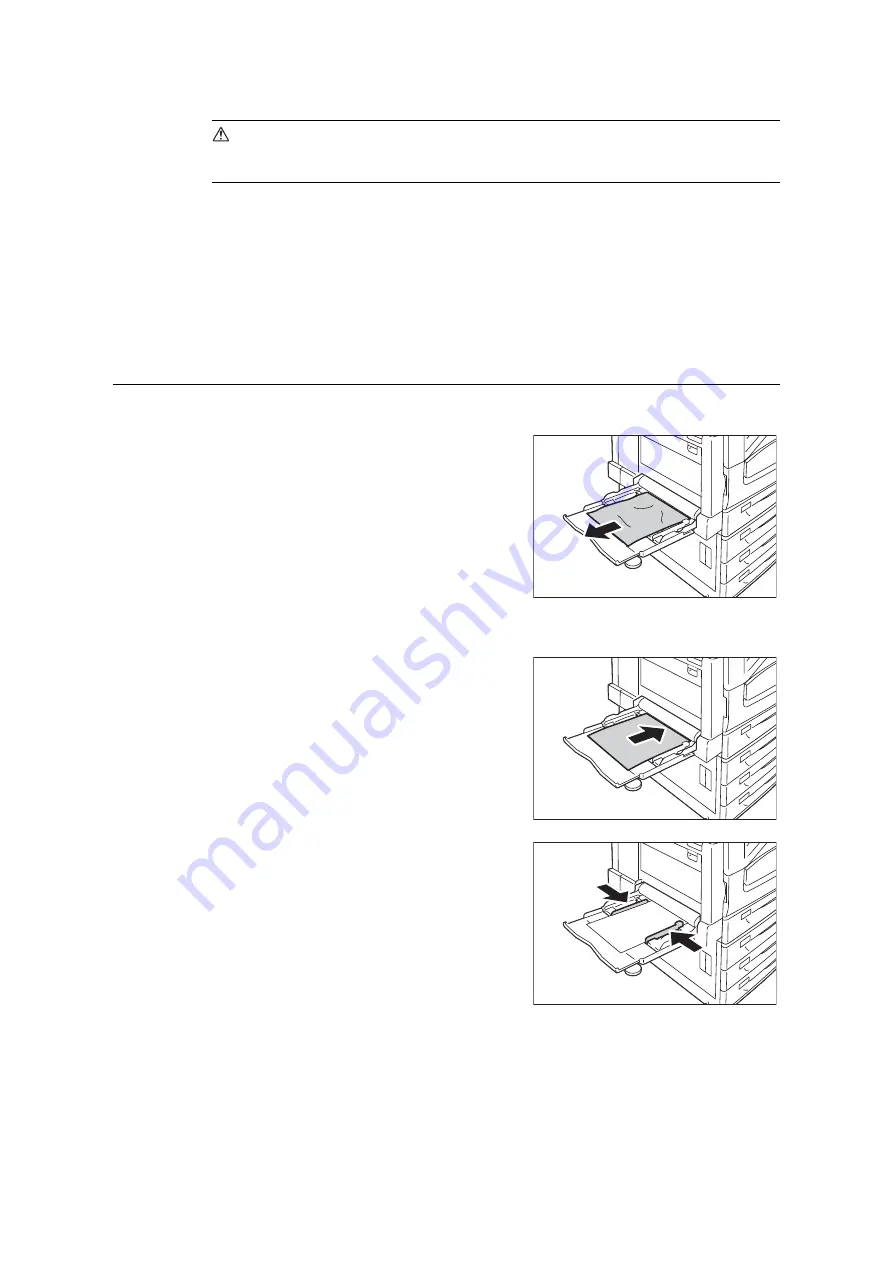
Paper Jam in Tray 5
The following describes how to clear paper jams occurring in Tray 5.
1.
Inspect the area of the paper tray where the
paper enters the printer and remove the
jammed paper.
If the paper is torn, check to make sure that
there are no pieces of paper left inside.
Important
• If there are multiple sheets of paper loaded in the Tray
5, remove all of the paper.
Note
• When the jammed paper is torn, make sure if the
pieces may remain inside the machine.
2.
Load the paper with the print side facing
down.
Important
• Do not load the different types or sizes of paper
together. It may cause a paper jam.
3.
Adjust the paper guides to the size of the
paper.
Important
• Make sure that the guides are positioned lightly
against the paper. Paper guides that are positioned
too tight or two narrow can cause paper jams.
• Do not load paper above the maximum fill-line. Doing
so can cause paper jams.
Содержание DocuPrint C5005 d
Страница 1: ...User Guide DocuPrint C5005 d...
Страница 78: ...78 3 Printing 2 Click the Device Settings tab 3 Click Custom Paper Size...
Страница 219: ...6 1 Clearing Paper Jams 219 4 Push the tray in gently until it stops...
Страница 227: ...6 1 Clearing Paper Jams 227 5 Gently close the top left cover D 6 Return the upper left cover A to the original position...
Страница 384: ...384 7 Maintenance 23 When the setting is over press the Settings button to return to the print screen...
Страница 462: ...DocuPrint C5005 d User Guide Fuji Xerox Co Ltd ME4989E2 1 Edition1 November 2010 Copyright 2010 by Fuji Xerox Co Ltd...


