


Section 4. Program Operation
4-2
025-9229C.1
WRITING A SYSTEM CONFIGURATION FILE
The Write function updates the configuration file stored on the disk by writing the current
edit buffer to disk. The Write function can be activated in three ways. First, by pressing
W
from the MAIN menu. Second, by using the New function after modifications have been
made to the current configuration. Third, by quitting CPS after modifications have been
made. The New and Quit functions notify you that modifications have been made and ask if
the configuration should be saved before performing their respective functions.
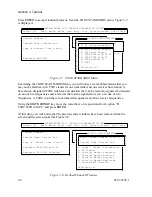
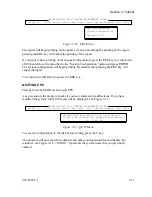
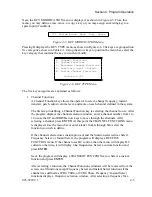
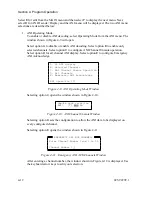
Selecting a File to Write
Pressing
W
from the MAIN menu displays the Write File Select window. The first file name
in the window is the default or current system name. The remaining file names are listed
from the current drive and directory. The current drive and directory can be changed using
the Drive function. Normally you will just press
ENTER
to select the default file name.
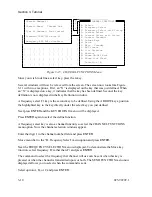
Positioning the cursor with
UP
and
DOWN ARROW
keys, you can select a different file
name other than the default. If you wish to create a new file name, type over one of the
existing file names and press
ENTER
.
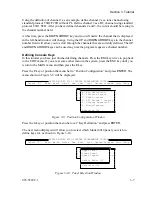
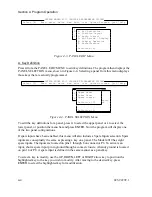
Overwriting or Creating a New File
After you have selected a file name, the program will check if the file exists on the current
drive and directory. If the file exists, the program will display a menu asking if you want the
file overwritten. Answering
Y
overwrites the file. Pressing
N
or
ESC
returns you to the Write
File Select window. If the file does not exist, the program displays a menu asking if it should
create a new configuration file. Answering
Y
will create a new configuration file. Pressing
N
or
ESC
returns you to the Write File Select window.
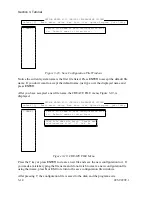
SELECTING A DRIVE AND DIRECTORY
The Drive function allows the user to select the disk drive and directory used for reading and
writing configuration files. The first time CPS is executed, the default drive and directory is
set to the current drive and directory from which CPS is being run.
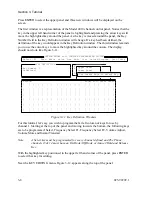
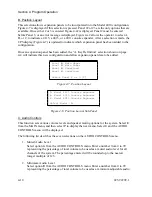
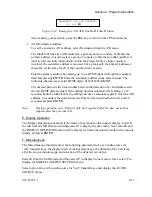
Setting Current Drive and Directory
Pressing
I
from the MAIN menu displays the Set Drive window. The current drive and
directory is displayed for editing. To change drives, enter a drive letter followed by “:”
(colon). If no drive is specified, the current (default) drive is used. If the directory needs to be
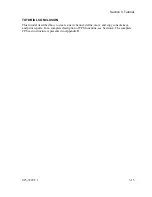
a directory other than the root or top directory for a drive, enter a “\” (backslash) followed by
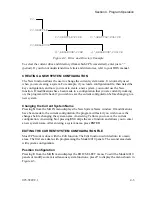
the directory name. For example, if your disk on drive C were set up as shown in Figure 4-2
and you wanted to read configuration files for Seattle Police Department, the drive and
directory would be C:\SEATTLE\POLICE. Likewise, the drive and directory for Bellevue
Fire Department would be C:\BELLEVUE\FIRE.
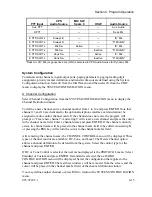
Summary of Contents for 4010
Page 2: ......
Page 4: ......
Page 7: ...1 INTRODUCTION HARDWARE REQUIREMENTS 1 1 DEFINITIONS 1 1 MANUALS 1 2...
Page 8: ......
Page 12: ......
Page 16: ...Section 2 Installation 2 4 025 9229C 1...
Page 18: ......
Page 34: ...Section 3 Tutorial 3 16 025 9229C 1...
Page 36: ......
Page 58: ......
Page 60: ......
Page 62: ......
Page 64: ......
Page 108: ...Appendix D CPS Menu Structure D 44 025 9229C 1...
Page 110: ......


