Section 3. Tutorial
3-8
025-9229C.1
Press
ENTER
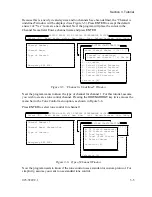
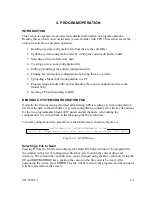
to select the upper panel and three new windows will be displayed on the
screen.
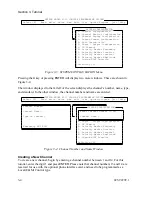
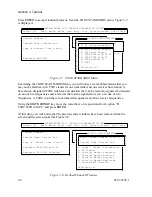
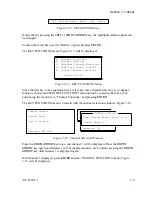
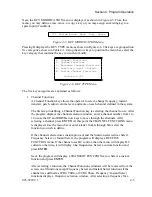
The first window is a representation of the Model 4010 channel control panel. Notice that the
key in the upper left hand corner of the panel is highlighted and pressing the arrow keys will
move the highlighted key around the panel. As the key is moved around the panel, the Key
Number field in the Key Definition window will change. If a key had been defined, the
definition of the key would appear in the Key Definition window. The third window reminds
you to use the cursor keys to move the highlighted key around the console. The display
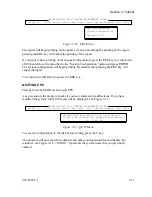
should now look like
X
Figure 3-11
X
.
Select [E] Read Write drIve New Edit List Upload Program Quit ?Help
ZETRON MODEL 4010 CONSOLE PROGRAMMING SYSTEM
Position configuration
System configuration
Selection [P]
A. Key Definition
B. Audio Control
C. ANI Decode / Display
D. Display Operation
E. Miscellaneous
Selection [A]
Upper Panel
Lower Panel
Spare Inputs
Selection [U]
Key Number 0
Undefined
ZETRON
MODEL 4010 UPPER PANEL
[ ] [ ] [ ] [ ] [ ] [ ] [ ] [ ] [ ] [ ]
[ ] [ ] [ ] [ ] [ ] [ ] [ ] [ ] [ ] [ ]
[ ] [ ] [ ] [ ] [ ] [ ] [ ] [ ] [ ] [ ]
[ ] [ ] [ ] [ ] [ ] [ ] [ ] [ ] [ ] [ ]
[ ] [ ] [ ] [ ] [ ] [ ] [ ] [ ] [ ] [ ]
[ ] [ ] [ ] [ ] [ ] [ ] [ ] [ ] [ ] [ ]
Use cursor keys to select key
KEY DEFINITION
Figure 3-11. Key Definition Windows
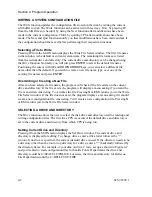
For this tutorial, let’s say you wish to program the far left column of keys for use by
channel 1. Starting at the top of the panel and moving towards the bottom, the following keys
are to be programmed: Select, Frequency Select F1, Frequency Select F2, Volume Adjust,
Volume Mute and Instant Transmit.
Note:
A Select key must be programmed for every channel defined and The Phone
channels 13 & 14 must have an On-Hook/Off-Hook or Answer/Hold and Release
Key.
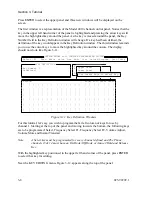
With the highlighted key positioned in the upper left hand corner of the panel, press
ENTER
to select that key for editing.
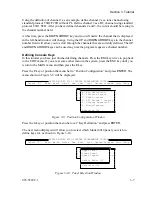
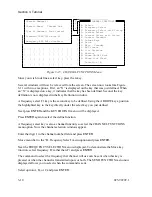
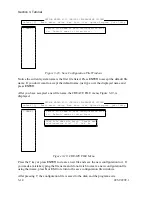
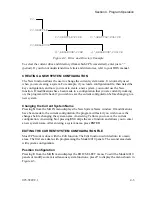
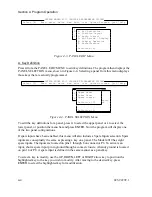
Next the KEY EDITING menu,
X
Figure 3-12
X
, appears along the top of the panel.
Summary of Contents for 4010
Page 2: ......
Page 4: ......
Page 7: ...1 INTRODUCTION HARDWARE REQUIREMENTS 1 1 DEFINITIONS 1 1 MANUALS 1 2...
Page 8: ......
Page 12: ......
Page 16: ...Section 2 Installation 2 4 025 9229C 1...
Page 18: ......
Page 34: ...Section 3 Tutorial 3 16 025 9229C 1...
Page 36: ......
Page 58: ......
Page 60: ......
Page 62: ......
Page 64: ......
Page 108: ...Appendix D CPS Menu Structure D 44 025 9229C 1...
Page 110: ......


