


Appendix D. CPS Menu Structure
025-9229C.1
D-41
Enter
Y
and press
ENTER
to set the mode to “Aux”. This enables the selection of auxiliary
ports 1-8 in all CPS menus that request an auxiliary port number, and it disables all menu
“Spare Input/Output” selection choices.
Enter
N
and press
ENTER
(this is the default) to disable auxiliary ports 1-8 and enable “Spare
Input/Output” selections.
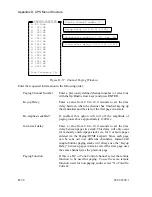
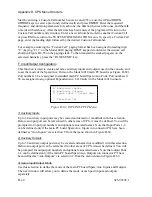
G. TX Timeout
The maximum transmitter on time is entered here. A time between one and 10 minutes may
be entered. If no timeout is desired, enter zero (0).
H. Priority Marker Frequency
Enter the priority marker tone frequency in Hertz. It should be between 600 and 2000 Hz.
I. Priority Marker Duration
Enter the duration of the priority marker tone transmission. It should be between 50 and 1000
milliseconds.
J. Priority Marker Interval
Enter the time interval between priority marker tone transmissions. It should be between one
and 300 seconds.
K. Priority Marker Amplitude
Enter the desired amplitude of the marker tone. It should be between one and 100 percent.
L. Custom HLGT Duration
Enter the desired High Level Guard Tone duration to be used by enabled tone channels in the
system. The default duration is 120 mS. You may enter any other value from 10 mS to 630
mS in 10 mS increments. This custom duration can be enabled on a per-tone-channel basis by
the option bit switch on the back of the card, as described in
Model 4010 Radio Dispatch
Console Installation Manual
(Part No. 025-9227).
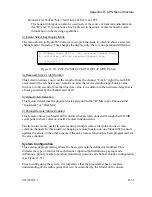
OTHER MENUS
The top-level menus, except for the edit menu, are described in this section.
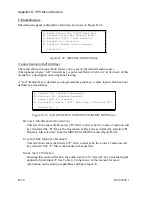
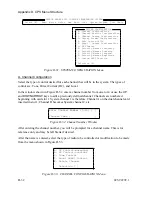
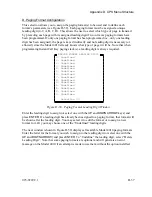
READ
In order to edit or change an existing configuration file, it must first be read into
memory using the Read function. A list of existing files on the currently selected
drive and path will be displayed. Use the Up and Down arrows to select the desired
file. If no files are displayed, check the current disk drive and directory using the
drIve menu.
Summary of Contents for 4010
Page 2: ......
Page 4: ......
Page 7: ...1 INTRODUCTION HARDWARE REQUIREMENTS 1 1 DEFINITIONS 1 1 MANUALS 1 2...
Page 8: ......
Page 12: ......
Page 16: ...Section 2 Installation 2 4 025 9229C 1...
Page 18: ......
Page 34: ...Section 3 Tutorial 3 16 025 9229C 1...
Page 36: ......
Page 58: ......
Page 60: ......
Page 62: ......
Page 64: ......
Page 108: ...Appendix D CPS Menu Structure D 44 025 9229C 1...
Page 110: ......


