


Section 3. Tutorial
025-9229C.1
3-7
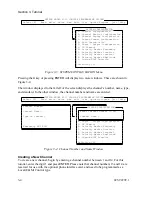
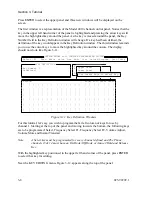
Using the definition of channel 1 as an example, define channel 2 as a tone channel using
standard protocol T2R2/T22R without PL. Define channel 3 as a DC channel using standard
protocol T1R1 STD. After you have defined channels 2 and 3, the cursor should be resting in
the channel number field.
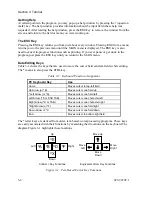
At this time, press the
DOWN ARROW
key and you will notice the channel that is displayed
in the left-hand window will change. Using the
UP
and
DOWN ARROW
keys in the channel
number field will allow you to scroll through the channels that are currently defined. The
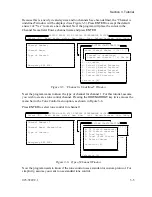
UP
and
DOWN ARROW
keys can be used any time the program requests a channel number.
Defining Console Keys
In this tutorial you have just finished defining channels. Press the
ESC
key twice to pop back
to the EDIT menu. If you are at some other menu in the system, press the
ESC
key until you
return to the MAIN menu and then press the
E
key.
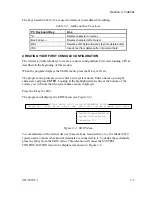
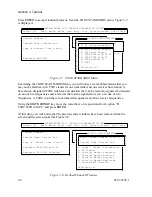
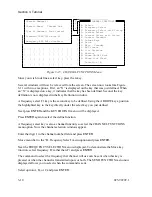
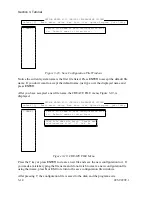
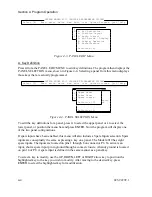
Press the
P
key or position the menu bar to “Position Configuration” and press
ENTER
. The
menu shown in
X
Figure 3-9
X
will be displayed.
Select [E] Read Write drIve New Edit List Upload Program Quit ?Help
ZETRON MODEL 4010 CONSOLE PROGRAMMING SYSTEM
Position configuration
System configuration
Selection [P]
A. Key Definition
B. Position Layout
C. Audio Control
D. ANI Decode / Display
E. Display Operation
F. Miscellaneous
Selection [A]
Figure 3-9. Position Configuration Window
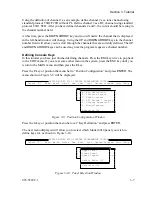
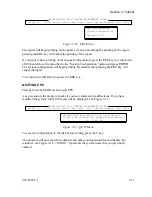
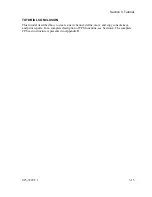
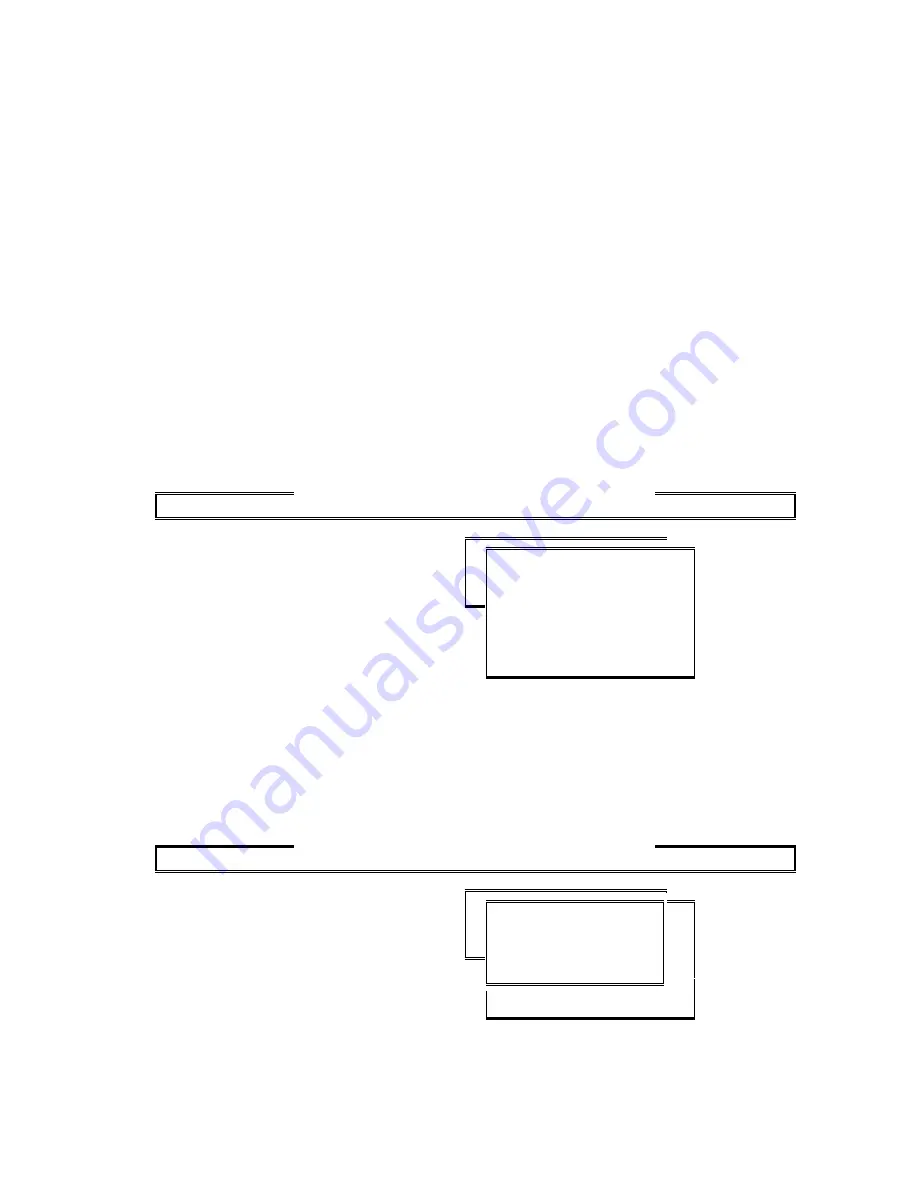
Press the
A
key or position the menu bar over “Key Definition” and press
ENTER
.
The next menu displayed will allow you to select which Model 4010 panel you wish to
define keys for, as shown in
X
Figure 3-10
X
.
Select [E] Read Write drIve New Edit List Upload Program Quit ?Help
ZETRON MODEL 4010 CONSOLE PROGRAMMING SYSTEM
Position configuration
System configuration
Selection [P]
A. Key Definition
B. Audio Control
C. ANI Decode / Display
D. Display Operation
E. Miscellaneous
Selection [A]
Upper Panel
Lower Panel
Spare Inputs
Select Panel [U]
Figure 3-10. Panel Selection Window
Summary of Contents for 4010
Page 2: ......
Page 4: ......
Page 7: ...1 INTRODUCTION HARDWARE REQUIREMENTS 1 1 DEFINITIONS 1 1 MANUALS 1 2...
Page 8: ......
Page 12: ......
Page 16: ...Section 2 Installation 2 4 025 9229C 1...
Page 18: ......
Page 34: ...Section 3 Tutorial 3 16 025 9229C 1...
Page 36: ......
Page 58: ......
Page 60: ......
Page 62: ......
Page 64: ......
Page 108: ...Appendix D CPS Menu Structure D 44 025 9229C 1...
Page 110: ......


