025-9229C.1
2-1
1.
2.
3.
4.
5.
6.
7.
8.
9.
2. INSTALLATION
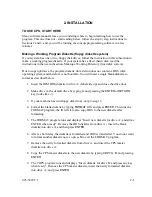
TO USE CPS, START HERE
Many software manuals leave you wondering where to begin learning how to use the
program. This one does not - start reading below, follow the step by step instructions in
Sections 2 and 3, and you will be running the console programming software in a few
minutes.
Making a Working Program Diskette (floppy diskette system)
If your system has one or two floppy disk drives, follow the instruction in this subsection to
make a working program diskette. If your system has a fixed (hard) disk, read the
instructions in the next subsection, Making a Working Directory (fixed disk system).
Due to copyright laws, the program diskette from Zetron does not contain a DOS (disk
operating system) and therefore is not bootable. You will need a single blank diskette to
format as described below.
Insert the IBM DOS diskette in drive A: (label side up) and close the drive door.
Make drive A: the default drive by typing
A:
and pressing the
ENTER
or
RETURN
key (looks like
↵
).
If your machine has two floppy disk drives, skip to step 12.
Format the blank diskette by typing
FORMAT A:/S
and press
ENTER
. This runs the
FORMAT program; the
/S
tells it to also copy DOS to the new diskette after
formatting.
The FORMAT program runs and displays “Insert new diskette for drive A:, and strike
ENTER when ready”. Remove the DOS diskette from drive A:, insert the blank
diskette into drive A: and then press
ENTER
.
After a short delay, the diskette is formatted and DOS is transferred. You do not want
to format another diskette now, so press
N
to exit the FORMAT program.
Remove the newly formatted diskette from drive A: and insert the CPS master
diskette into drive A:
Copy the CPS master diskette to the new diskette by typing
COPY A: B:
and pressing
ENTER
.
The COPY program runs and displays “Insert diskette for drive B: and press any key
when ready”. Remove the CPS master diskette, insert the newly formatted diskette
into drive A:, and press
ENTER
.
Summary of Contents for 4010
Page 2: ......
Page 4: ......
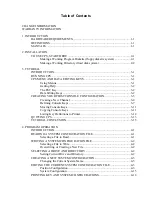
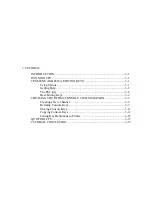
Page 7: ...1 INTRODUCTION HARDWARE REQUIREMENTS 1 1 DEFINITIONS 1 1 MANUALS 1 2...
Page 8: ......
Page 12: ......
Page 16: ...Section 2 Installation 2 4 025 9229C 1...
Page 18: ......
Page 34: ...Section 3 Tutorial 3 16 025 9229C 1...
Page 36: ......
Page 58: ......
Page 60: ......
Page 62: ......
Page 64: ......
Page 108: ...Appendix D CPS Menu Structure D 44 025 9229C 1...
Page 110: ......

