


Section 4. Program Operation
Select Communications Port from the next menu and finally select COM2 from the
COMMUNICATIONS PORT menu. Press
ESC
to return to the PROGRAM menu.
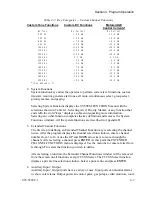
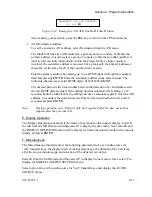
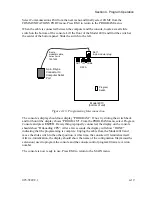
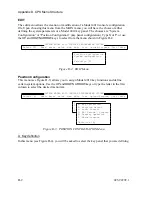
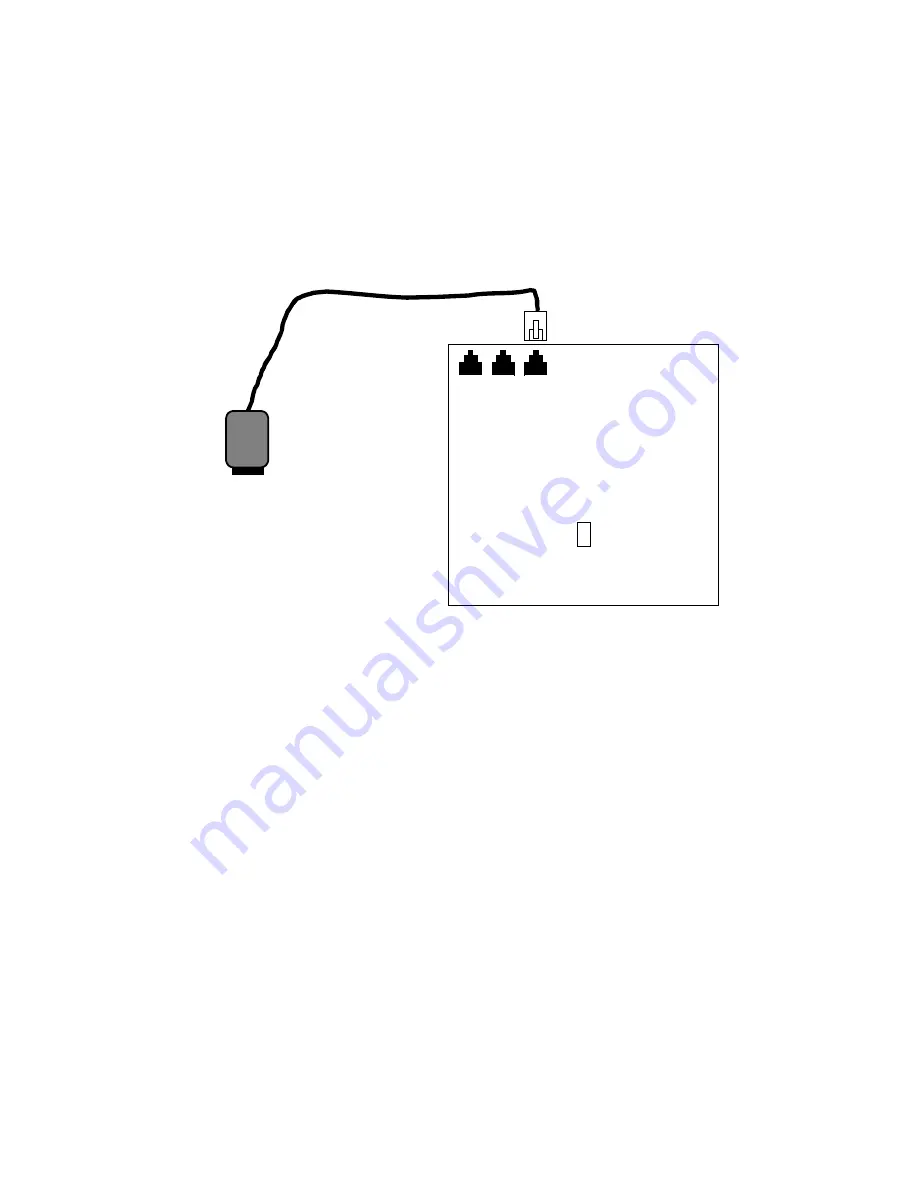
When the cable is connected between the computer and the console, locate a small slide
switch on the bottom of the console. Lift the front of the Model 4010 and find the switch at
the center of the bottom panel. Slide the switch to the left.
Model 4010
(bottom of unit)
Program
Switch
DATA
OUT
IN
COMB
RJ-11
6-pin modular plug
6-wire
modular cable
Zetron Part #
709-7400
9-pin, D-type
Connector to
Computer Serial
Port
Figure 4-13. Programming Interconnection
The console’s display should now display “PROGRAM”. If not, try sliding the switch back
and forth until the display shows “PROGRAM”. From the PROGRAM menu, select Program
Console and press
ENTER
. If everything is properly connected, the display on the console
should show “DnLoading CPS”. After a few seconds, the display will show “DONE”
indicating that the programming is complete. Unplug the cable from the Model 4010 and
move the slide switch to the other position. At this time, the console will reinitialize itself.
After re-initialization, the display should show the name of the configuration file (minus the
extension) used to program the console and the console control program firmware version
number.
The console is now ready to use. Press
ESC
to return to the MAIN menu.
025-9229C.1
4-19
Summary of Contents for 4010
Page 2: ......
Page 4: ......
Page 7: ...1 INTRODUCTION HARDWARE REQUIREMENTS 1 1 DEFINITIONS 1 1 MANUALS 1 2...
Page 8: ......
Page 12: ......
Page 16: ...Section 2 Installation 2 4 025 9229C 1...
Page 18: ......
Page 34: ...Section 3 Tutorial 3 16 025 9229C 1...
Page 36: ......
Page 58: ......
Page 60: ......
Page 62: ......
Page 64: ......
Page 108: ...Appendix D CPS Menu Structure D 44 025 9229C 1...
Page 110: ......


