DP120F/DP125F Removal/Replacement
8-44
March 2000 © TOSHIBA TEC
08-02-58
(3)
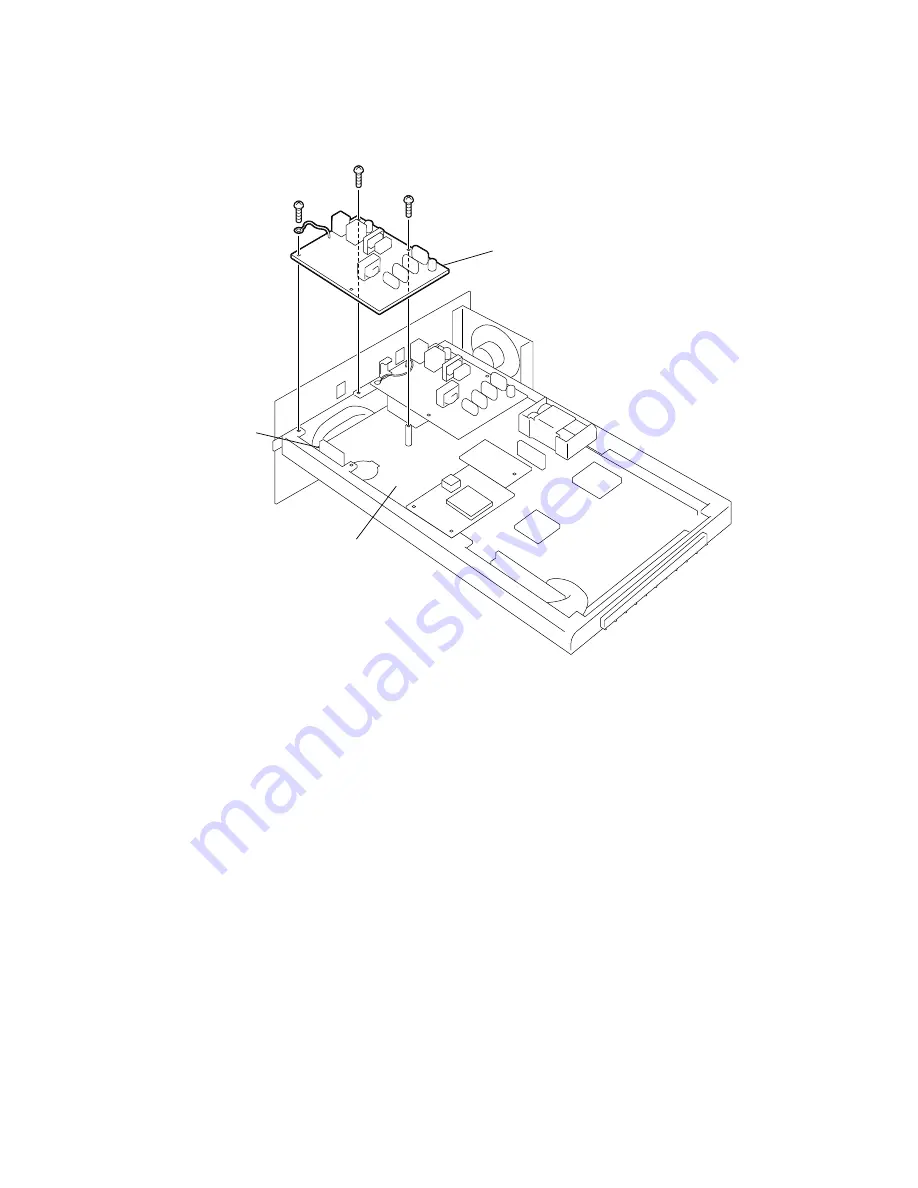
Remove the three screws from the NCU PBA (Line 2). Disconnect the connector on the
NCU PBA (Line 2) from CN4 on the main PBA to remove the NCU PBA (Line 2).
Fig. 8-2-58
(4)
Reassemble the components in the reverse order of disassembly.
NOTE: Carefully handle the boards that are directly connected together to avoid
damaging the connectors and boards.
NCU PBA (Line 2)
Main PBA
CN4
Summary of Contents for DP120F
Page 1: ...PLAINPAPERFACSIMILE File No 31200001 R0112216901 TTEC ...
Page 401: ...DP120F DP125F Circuit Description 7 92 March 2000 TOSHIBA TEC 07 05 00 Fig 7 5 1 ...
Page 656: ...DP120F DP125F Troubleshooting 11 44 March 2000 TOSHIBA TEC ...
Page 700: ...DP120F DP125F Appendix 12 2 March 2000 TOSHIBA TEC 1 2 Error Count List ...
Page 701: ...March 2000 TOSHIBA TEC 12 3 DP120F DP125F Appendix 1 3 Function List for Maintenance ...
Page 702: ...DP120F DP125F Appendix 12 4 March 2000 TOSHIBA TEC 1 4 Drum Unit ...
Page 703: ...March 2000 TOSHIBA TEC 12 5 DP120F DP125F Appendix 1 5 Memory Dump List ...
Page 706: ...SHUWA SHIBA PARK BLDG A 2 4 1 SHIBA KOEN MINATO KU TOKYO 105 8524 JAPAN ...


